
Bambu Studio Settings Explained
This guide covers every setting in Bambu Studio's Process panel with the Advanced switch on. For each one, you'll see what it does, what it changes in your print and when to change it. Preset values are from the Bambu Lab A1's 0.20mm Standard preset with a 0.4 mm nozzle, in Bambu Studio 2.9.1.
Published 30 October 2026127 min read

On this page
- What do the Quality settings in Bambu Studio do?
- What do the Strength settings in Bambu Studio do?
- What do the Speed settings in Bambu Studio do?
- What do the Support settings in Bambu Studio do?
- What do the Others settings in Bambu Studio do?
- How do you check a print before you send it?
- Which Bambu Studio settings matter most?
- How do you fix common print problems in Bambu Studio?
- How do you print a lamp with these settings?
- Frequently asked questions about Bambu Studio settings
What do the Quality settings in Bambu Studio do?
The Quality tab decides how smooth your print looks and how closely it matches the shape and size of the model. Its settings sit in seven groups, from top to bottom: Layer height, Line width, Seam, Precision, Ironing, Wall generator and Advanced. Each "In this preset" line gives the value in the A1's 0.20mm Standard preset with the 0.4 mm nozzle.
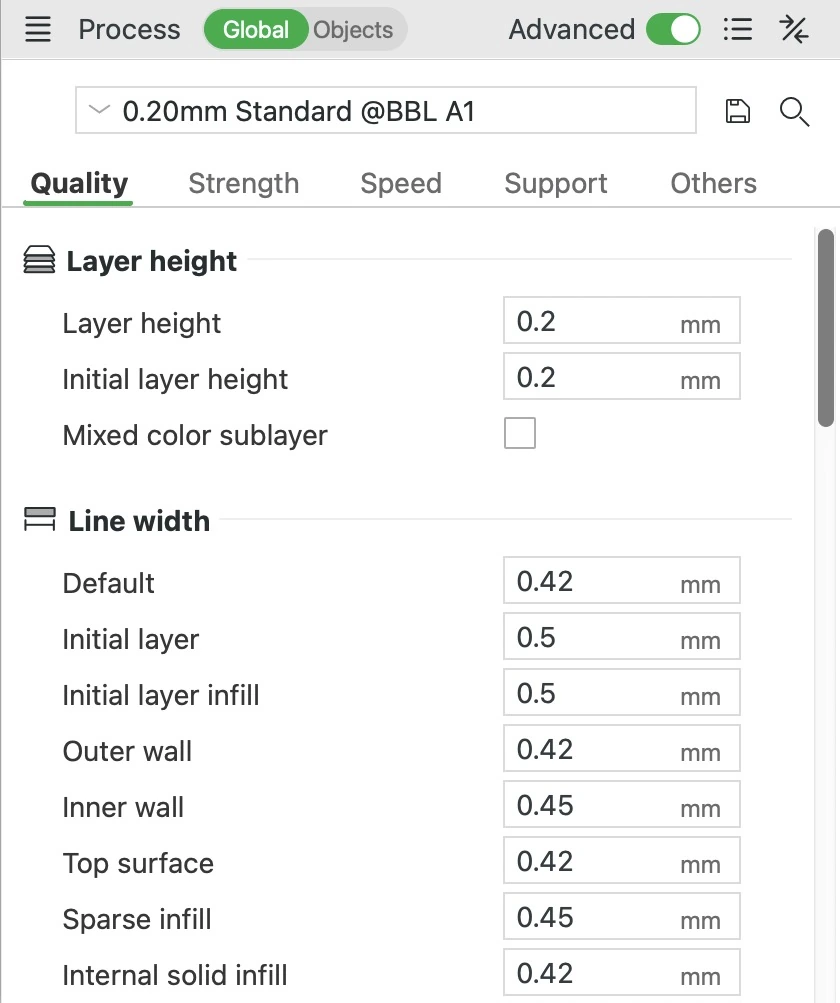
Layer height


Layer height
This is how thick each layer of your print is. The first layer has its own setting, below. Your printer builds curves and slopes out of flat layers, so they end up looking like tiny stairs. Thinner layers make those steps smaller and the surface smoother. But you need more of them to reach the same height, so the print takes longer. Use thin layers for pieces people will look at up close, and thick ones for test prints and parts where speed matters more than looks.
On the 0.4 mm nozzle, stay between 0.08 and 0.28 mm (20% to 70% of the nozzle width). Layers much thinner or thicker than that can print poorly. The easiest way to change it is to pick the process preset named after the height you want, such as 0.12mm Fine or 0.28mm Extra Draft. Each one also adjusts the speeds and a few other settings to suit its layers.
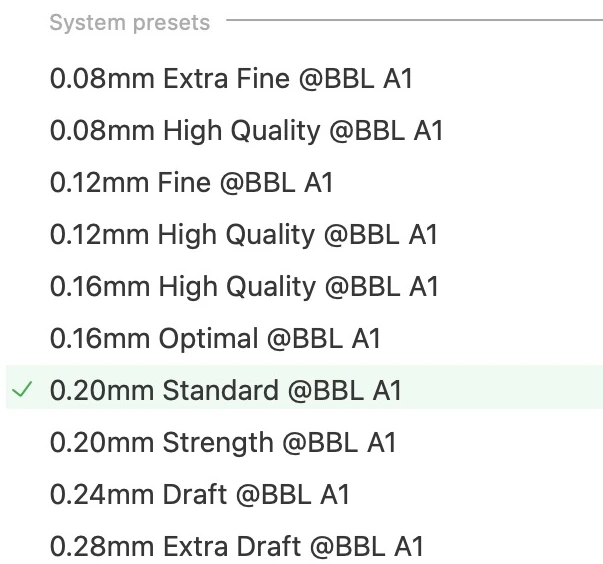
A thicker layer pushes out more plastic every second at the same speed. The hot end, the heated part that melts the plastic, can only melt so much per second. That's why 0.28mm Extra Draft slows the inner walls, the hidden outlines inside the outer one, from 300 to 200 mm/s. It slows the infill, the pattern inside the part, from 270 to 200 mm/s.
In our test, the same 50 mm dome took about 45 minutes to print with 0.08 mm layers, about 20 minutes with 0.2 mm layers and about 18 minutes with 0.28 mm layers. So the thinnest layers more than doubled the time, and the thickest saved less than 3 minutes.
In this preset: 0.2 mm for every layer after the first.
Layer height
Initial layer height


The whole block, 50 x 50 x 25 mm
- First layer
Initial layer height
This is how thick the first layer is. It's also the gap between the nozzle and the build plate while that layer prints. A slightly thicker first layer can help the print stick to the plate. But it lifts everything above it, so the part can come out a little taller than the model. The extra height doesn't remove a layer higher up. With a 0.28 mm first layer, a 25 mm block still gets 125 layers, so its top ends at 25.08 mm. Precise Z height, in the Precision group, can fix this by fine-tuning the last five layers.
In this preset: 0.2 mm.
Mixed color sublayer
Bambu Studio can blend two or three filaments of the same type into a new colour, which it calls a mixed filament. You make one with Add Mixed Filament under the filament list. It prints the filaments in thin stripes that your eye blends into one colour from a normal viewing distance.
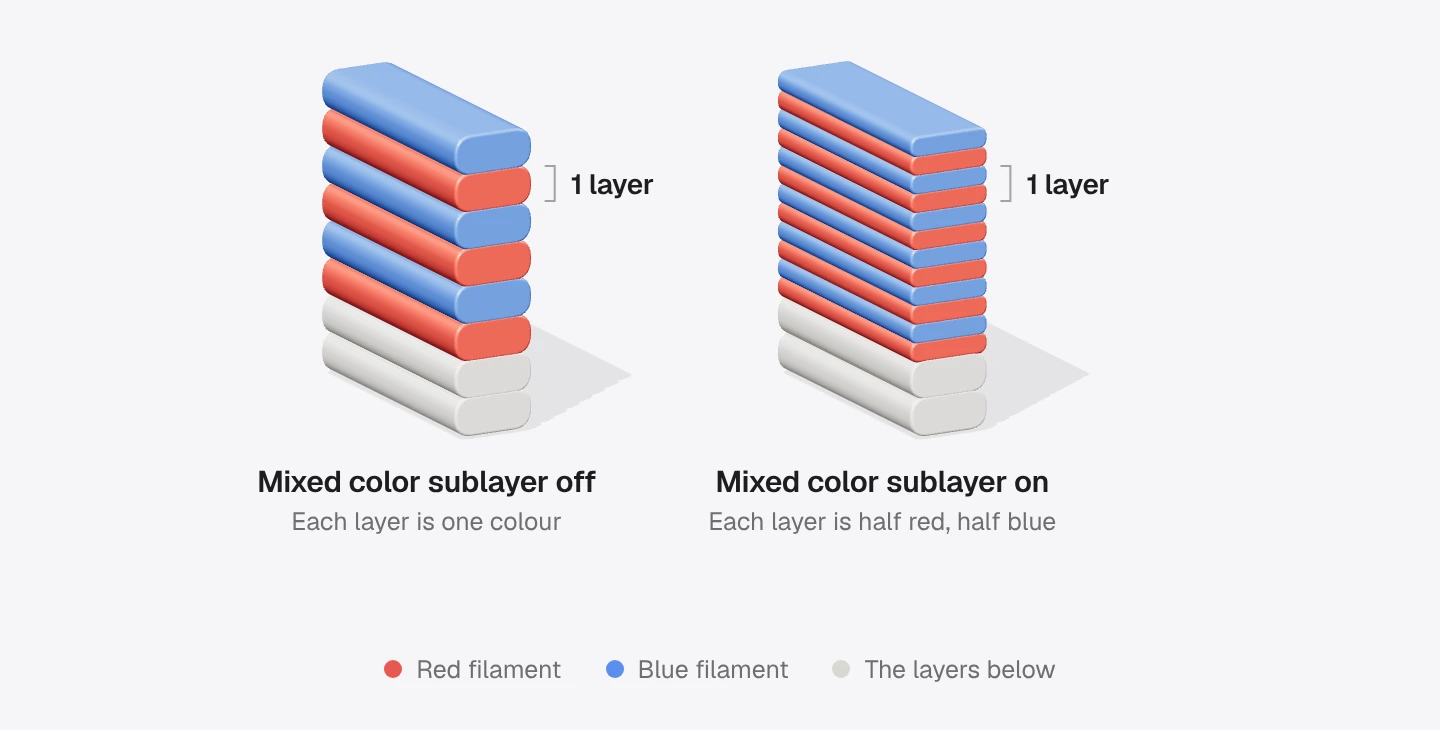
With this setting off, each layer is printed in one of the filaments, so the colours take turns layer by layer. Turn it on and every layer is split into thinner sublayers, one for each filament, so each layer holds all the colours and the stripes get finer.
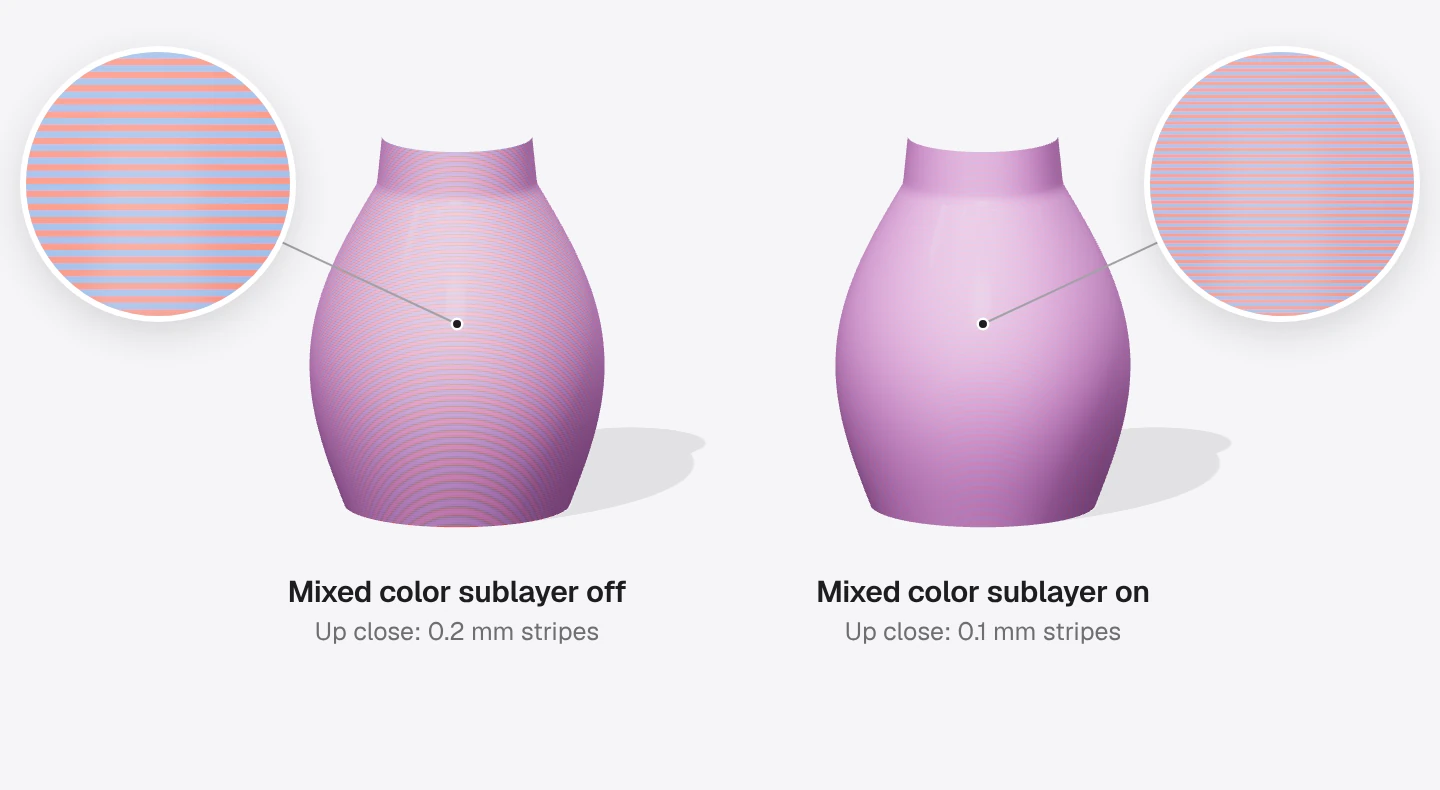
That matters most on prints people look at up close, where the finer stripes make the colour look more even. From further away, the difference is hard to see.
Without a mixed filament in your project, this setting does nothing. Bambu Studio warns that using it together with Variable layer height may affect print quality. Bambu doesn't recommend colour mixing on single-nozzle printers like the A1, because of all the filament changes it causes.
In this preset: Off.
Line width
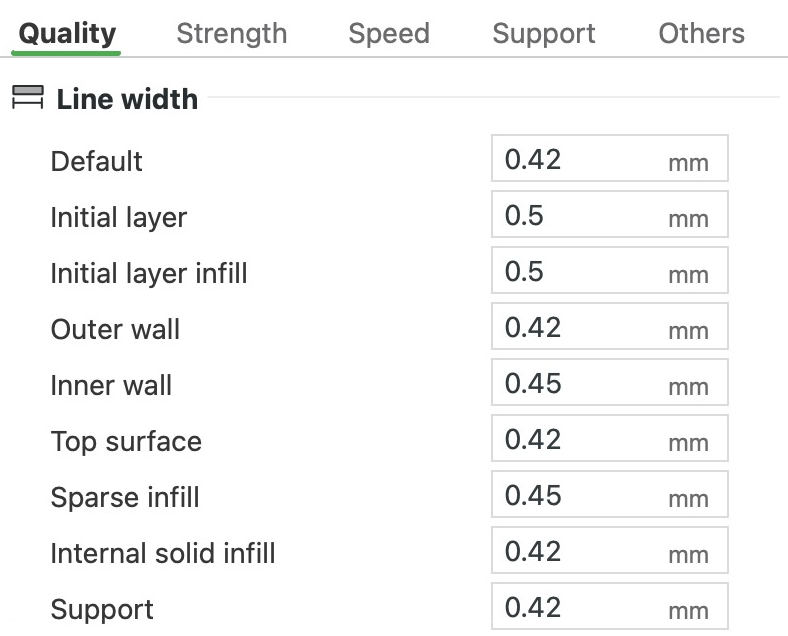


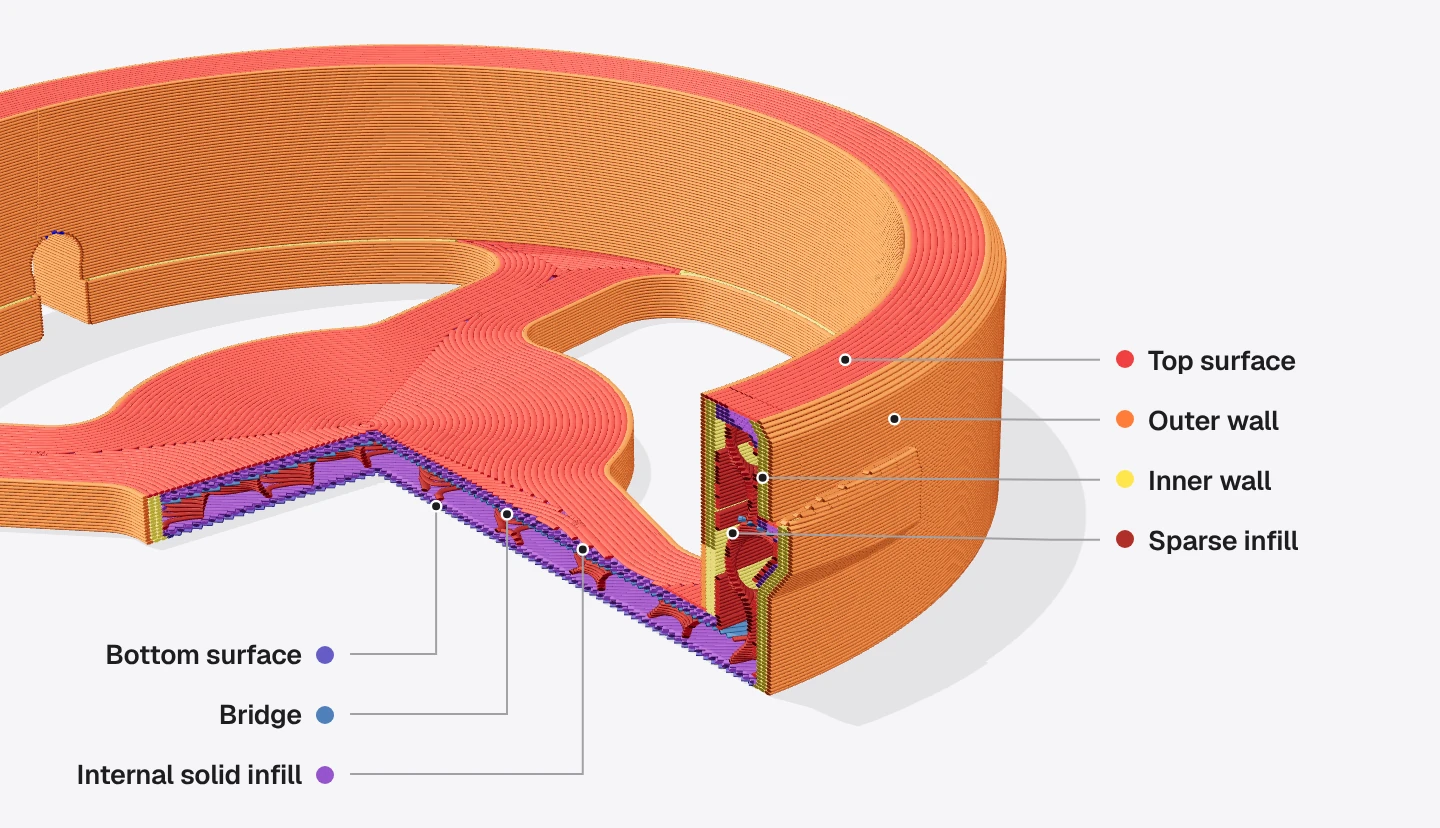
The whole block, 50 x 50 x 25 mm, cut at this layer
- Outer wall 0.42 mm, inner wall 0.45 mm
- Sparse infill 0.45 mm
Line width
This decides how wide each printed line is. There are separate boxes for the walls (the outlines of each layer), the infill, top surfaces, supports and the first layer. For a line wider than the 0.4 mm nozzle hole, the printer pushes out more plastic and the nozzle's flat tip squashes it sideways. A wider line covers an area in fewer passes, but each pass carries more plastic. The preset widths suit most prints. If you change one, stay between 0.3 and 0.6 mm on the standard 0.4 mm nozzle, which is 0.75 to 1.5 times the nozzle size. Lines much wider or narrower than the nozzle don't print well.
The hot end, the heated part that melts the plastic, can only melt so much per second. Bambu Studio slows down any line that would need more. In our test, a 0.6 mm outer wall on a 50 x 50 x 25 mm block ran at 188 mm/s instead of the set 200 mm/s. Widening the infill lines to 0.6 mm saved 48 seconds but used 0.55 g more plastic.
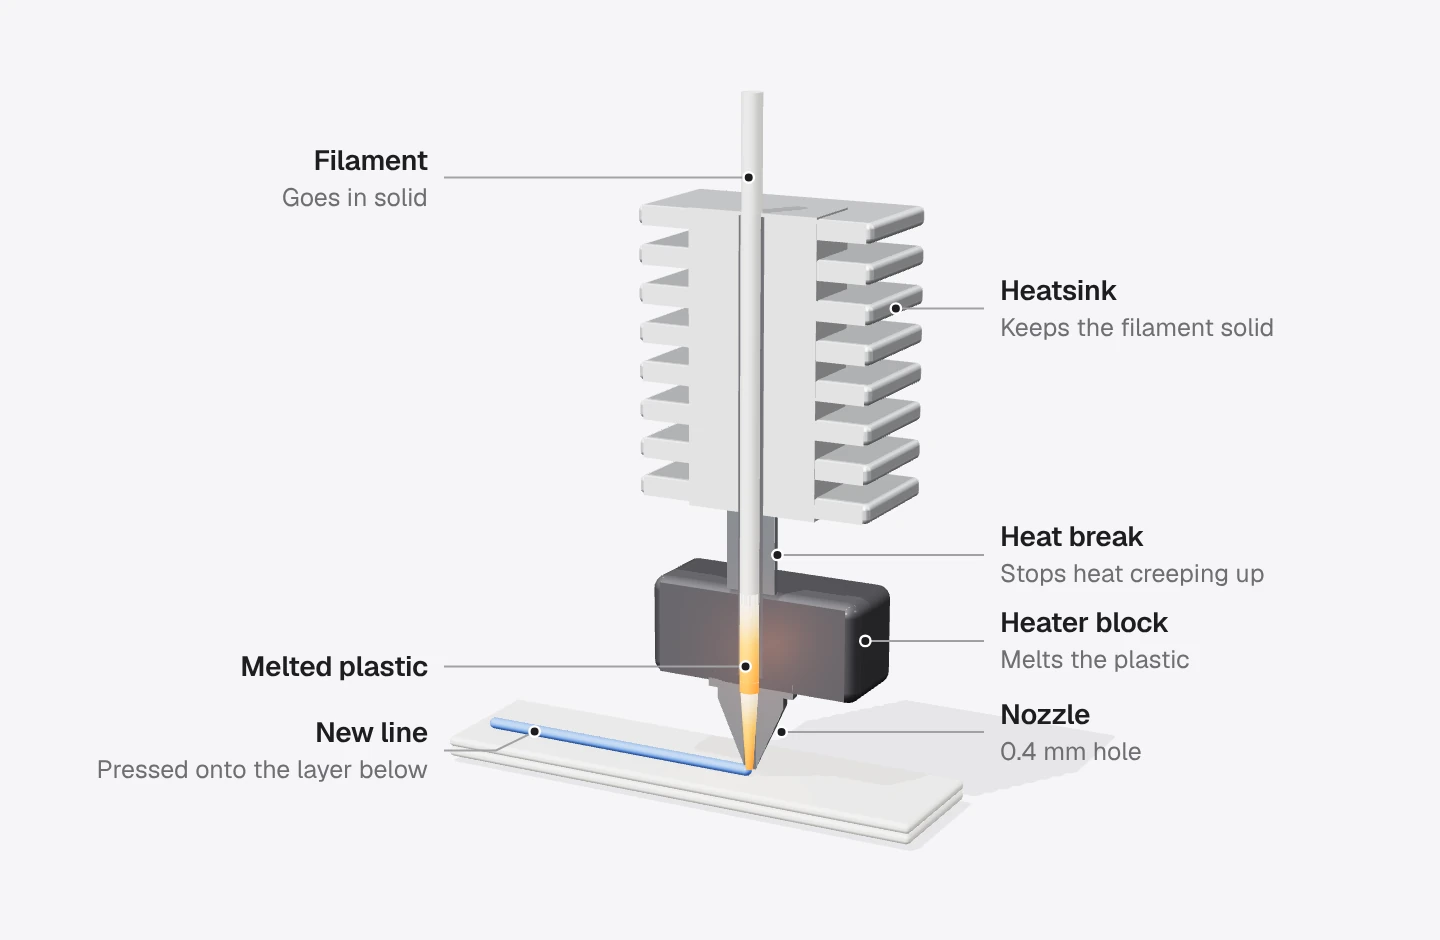
With the Classic wall generator, which this preset uses, details thinner than a wall line may not print well. A narrower wall line helps small text and other fine details come out. Bridges and overhangs have no width box, because a line printed in mid air has nothing under it to squash it flat.

In this preset: Most lines are 0.42 mm wide. Inner walls and sparse infill are 0.45 mm, and the first layer is 0.5 mm.
Initial layer line width
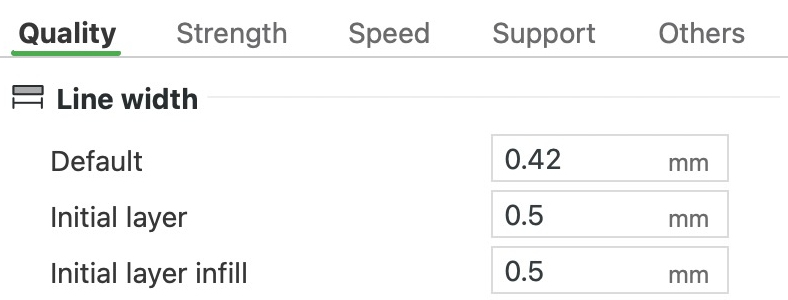
Initial layer
This is the line width for the first layer. In Bambu Studio it's the box called Initial layer in the Line width group. Wider first-layer lines press more plastic onto the plate, which can help the print stick. The first layer's infill has its own box, Initial layer infill, and this one covers everything else, such as the walls. To widen every first-layer line, change both.
In this preset: 0.5 mm, a little wider than the 0.42 to 0.45 mm lines above it. Initial layer infill is also 0.5 mm.
More line width settings
- Default: The width Bambu Studio uses for any kind of line whose own box is set to 0. 0.42 mm in this preset.
- Initial layer infill: The width of the infill lines that fill the first layer between its walls. Everything else on the first layer uses Initial layer, and 0 here means it copies Initial layer. 0.5 mm in this preset.
- Outer wall: The width of the outer wall, the line you see on the outside of the part. 0.42 mm in this preset.
- Inner wall: The width of the walls hidden inside the outer one, which make the sides thicker and stronger. 0.45 mm in this preset.
- Top surface: The width of the lines on top surfaces, the ones you see from above. 0.42 mm in this preset.
- Sparse infill: The width of the open pattern that fills the inside of the part. 0.45 mm in this preset.
- Internal solid infill: The width of the solid layers inside the part, under the top and over the bottom. It also fills spots too small for the open pattern. 0.42 mm in this preset.
- Support: The width of support lines, including the support interface, the dense layers that touch the part. 0.42 mm in this preset.
Seam position
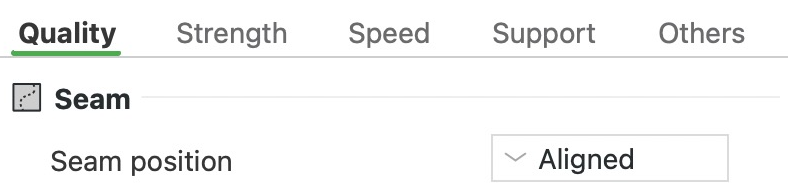


- Seam: where each layer's outer wall starts
Seam position
Each layer's outline starts and ends at the same spot, and the join leaves a tiny mark. Layer after layer, those marks stack up into a visible line called the seam. This setting decides where that line goes.
Aligned and Nearest both try to tuck the seam into a corner, where it's hard to see. Aligned keeps it in one straight line up the part. Nearest uses whichever corner is closest to where the nozzle already is. That means shorter moves between lines and less stringing, the thin hairs of plastic those moves can leave. Round parts have no corners, so the seam always shows somewhere. Choose Back to put it on the side facing the back of the plate, then turn the model so its best side faces the front. Random spreads the seam all over the surface as small bumps. Bambu's wiki names it as the most common cause of dots all over a print. To pick the exact spot yourself, paint the seam onto the model with the seam painting tool.
In this preset: Aligned.
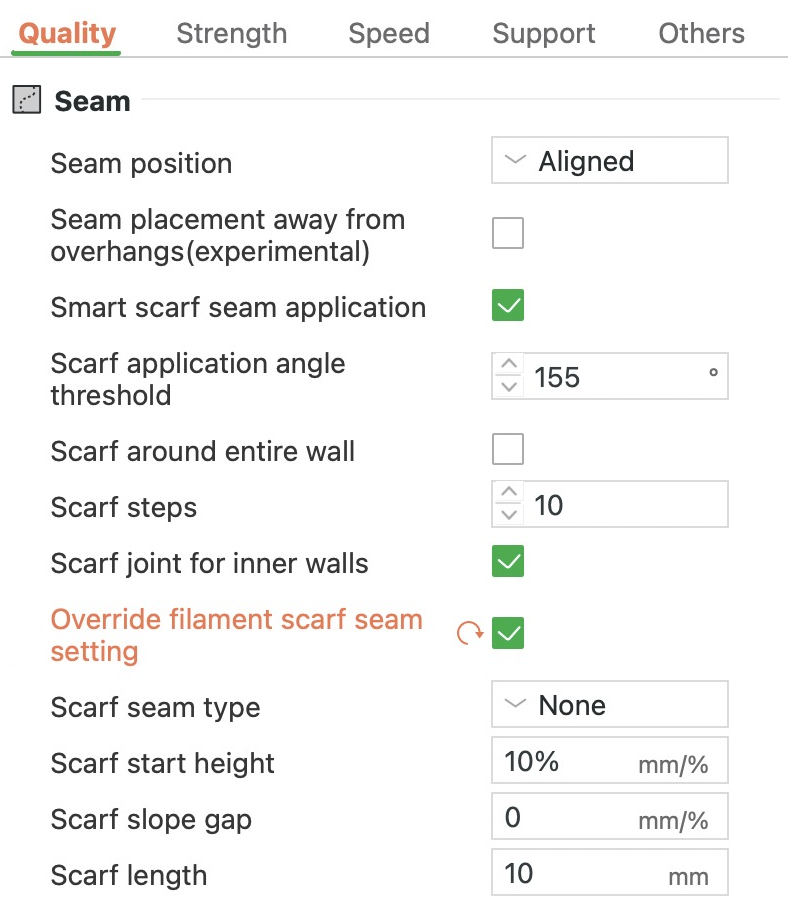
Smart scarf seam application
A scarf seam hides the seam by overlapping the two ends of each outline on a shallow ramp. This setting decides which outlines get one. With it on, an outline gets a scarf only when its seam lands on a smooth stretch. If the seam sits in a sharp corner, the corner already hides it, so it stays an ordinary seam. It also skips the scarf where the wall near the seam overhangs, because scarfs tend to fail there. Turn it off to scarf every outline the scarf type covers, corners included.
In this preset: On. It does nothing until a scarf is turned on, and PLA Basic has it off.
Scarf application angle threshold
This is the angle Smart scarf seam application uses to tell a sharp corner from a smooth curve. A straight wall is 180° and a square corner is 90°. If the angle at the seam is wider than this, the spot counts as smooth and gets a scarf. Lower the number to scarf sharper corners too, or raise it to keep scarfs for rounder shapes.
In this preset: 155°, so only gentle bends and straight stretches count as smooth.
Override filament scarf seam setting
Normally the scarf seam comes from the filament's own settings. Turn this on to set it here instead. It also lets a modifier, a shape that changes settings where it overlaps the model, set the scarf for only that area. The A1's PLA Basic has the scarf off. To get a scarf with it, turn this on, or turn the scarf on in the filament's Filament scarf seam settings. Turning this on brings up Scarf seam type, Scarf start height, Scarf slope gap and Scarf length.
In this preset: Off, so the filament decides, and PLA Basic prints ordinary seams.
Scarf seam type
- First pass
- Last pass
- The layers below
Scarf seam type
A scarf seam makes the two ends of each outline overlap on a long, shallow ramp instead of meeting at one spot. The outline starts low and thin, a little above the layer below, and climbs to full height over the scarf length. When the nozzle comes round to the start again, it runs over the ramp while letting out less and less plastic. Spreading the join out like this makes the seam less visible in most cases. Use it on round parts and other shapes with no corner to hide the seam in. Contour scarfs the outside of each part, and Contour and hole does the holes as well.
The overlap means the nozzle goes over the start of each wall twice. In our test on an 80 mm bar, a 10 mm scarf made each layer's outer wall about 10 mm longer. It added 4 seconds to the print.
In this preset: None. You'll only see this setting after you turn on Override filament scarf seam setting.
Role-based wipe speed
The wipe is a short move along the line the nozzle has finished, pulling the plastic back up into the nozzle as it goes. It cleans plastic off the tip, so you get fewer blobs where printing starts again. With this on, each wipe runs at the speed of the line it follows. With it off, wipes run at 80% of the travel speed, 560 mm/s here, which can be too fast over fresh plastic. Leave it on. After an outer wall, the wipe usually runs 2 mm forward over the start of that wall. To see the wipes, turn on Wipe in the Preview's Options list.
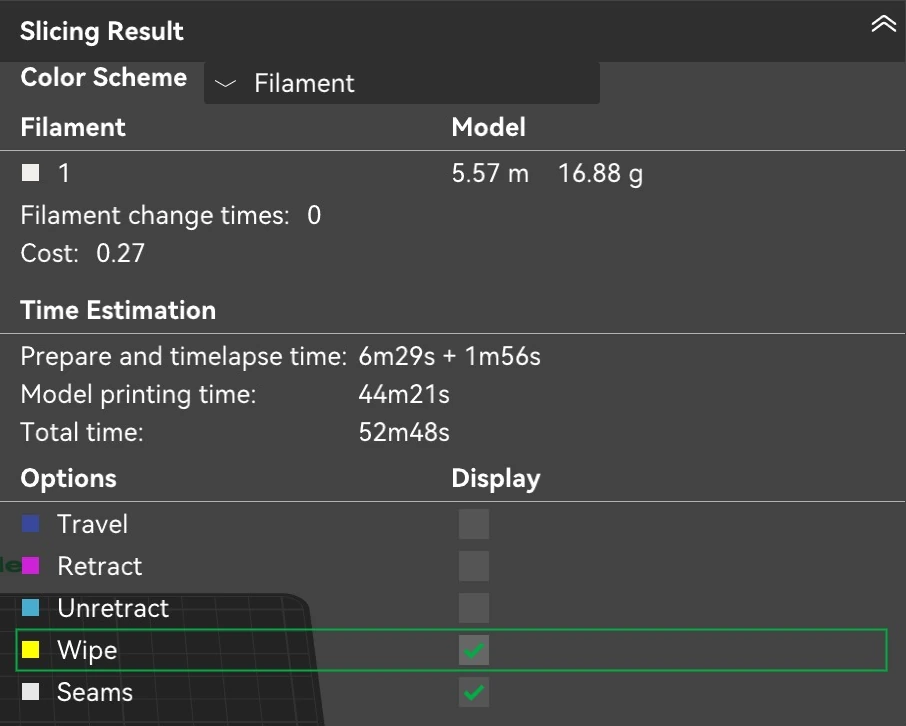
In this preset: On. A wipe after an outer wall runs at 200 mm/s, the outer wall speed, or 50 mm/s on the first layer.
More seam settings
- Seam placement away from overhangs(experimental): Keeps the seam off parts of the outer wall that stick out over the layer below. It only shows with Seam position set to Aligned or Back. Off in this preset.
- Scarf around entire wall: Stretches the scarf's ramp all the way round the wall and ignores Scarf length. Off in this preset.
- Scarf steps: The scarf's ramp climbs in small steps. This is the minimum number of steps, and Bambu Studio may use more. 10 in this preset.
- Scarf joint for inner walls: Gives the inner walls, the hidden outlines inside the outer one, a scarf too. On in this preset.
- Scarf start height: How far above the layer below the scarf's ramp starts, in mm or as a percentage of the layer height. A value at or above the layer height resets to 10%. Only shows with Override filament scarf seam setting on. 10% in this preset.
- Scarf slope gap: Shortens the inner and outer walls at the scarf by this amount to make the seam less visible. Set it in mm or as a percentage of the nozzle width. Only shows with Override filament scarf seam setting on. 0 in this preset.
- Scarf length: How far along the wall the scarf's ramp runs. 0 turns the scarf off. Only shows with Override filament scarf seam setting on. 10 mm in this preset.
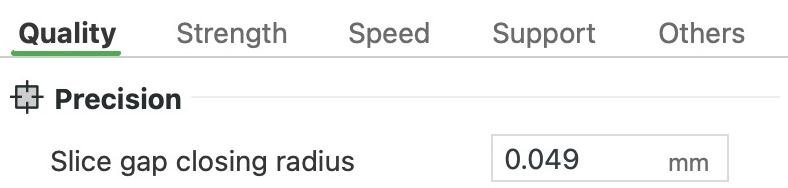
Slice gap closing radius


- Outer wall
- Inner wall
Slice gap closing radius
When Bambu Studio cuts the model into layers, it closes any crack narrower than twice this value. Raise it if a model has hairline cracks between pieces that should print as one part. Otherwise keep it low, because a bigger value also closes narrow gaps and fine details you want to keep. In our test, at 0.1 mm two blocks 0.15 mm apart printed as one.
In this preset: 0.049 mm, so cracks narrower than 0.098 mm (about 0.1 mm) get closed.
Resolution


The whole gear, 50 mm across
- Outer wall, as printed
- The teeth as drawn
Resolution
Before Bambu Studio writes the G-code (the list of moves the printer follows), it simplifies each outline by dropping points it doesn't need. This value is how far the simplified outline may stray from the model. Smaller values keep more detail but take longer to slice. Leave it at the preset value.
In our test on a 50 mm gear, coarser values made the G-code file smaller, but the print got less accurate and no faster. At 0.3 mm the file shrank from 1.31 MB to 0.78 MB, but the outer wall strayed up to about 0.3 mm from the teeth. The print also took about 15 minutes instead of 14.
In this preset: 0.012 mm.
Arc fitting
Arc fitting
This writes each curve into the G-code (the list of moves the printer follows) as one arc instead of many short straight moves. Each arc stays within the Resolution value of the real curve. The nozzle follows the same path either way, and the file gets much smaller. Leave it on. In our test on a 72 x 18 x 4 mm plate with holes, the G-code shrank from 595 kB to 339 kB. The print also finished about 16 seconds sooner.
In this preset: On.
X-Y hole compensation


The whole plate, 50 x 10 mm
- Printed wall
- The plate as drawn
X-Y hole compensation, X-Y contour compensation, Auto circle contour-hole compensation
This makes every hole in the part bigger or smaller by a set amount and leaves the outside alone. Use it when screws, pins or other parts don't fit the printed holes. A positive value widens holes. The wall moves out by the value all the way round, so the diameter grows by twice that. To pick a value, measure how far off a printed hole is and enter half of that. If a hole comes out 0.5 mm too small, try 0.25 mm.
Rule out other causes first, because they change the size of a print too. Plastic shrinks a little as it cools, damp filament behaves differently, and elephant foot (a first layer that spreads out) narrows holes near the plate. Then print a test piece with holes of known sizes, using your filament and settings, and test again when you change filament. It only works on holes that are closed all the way round in a layer. Where a hole opens to the side, those layers aren't treated as a hole, so the hole can change size there. Anything over 2 mm either way resets to 0, so scale the model for bigger changes.
In this preset: 0 mm.
X-Y contour compensation
This makes the outside of the part bigger or smaller by a set amount and leaves its holes alone. Use it when a part has to fit into something and comes out too tight or too loose. Each edge moves by the value, so in our test -0.4 mm made a 50 x 10 mm plate 0.8 mm smaller both ways. If a part comes out 0.2 mm too big, try -0.1 mm and check the fit again. Anything over 2 mm either way resets to 0.
In this preset: 0 mm.
Auto circle contour-hole compensation
Round holes and pegs rarely come out exactly the size you drew, because plastic shrinks as it cools and the printer's moves always have small errors. This experimental setting finds round holes and round pegs under 50 mm across and corrects their size. The amount depends on the diameter. It only works on complete circles lying flat, not half circles or circles standing on edge. It supports only PLA Basic, PLA CF, PET CF, PETG CF and PETG HF, and damp filament weakens it. The A1 uses Bambu Studio's general values rather than ones tuned for the printer, so the result may be less exact. Try it if round parts don't fit.
In our test, it moved the wall of a 5 mm hole out by about 0.2 mm and left the straight edges alone. It also gives those circles a scarf seam and caps their speed at 200 mm/s. Turning it on sets both X-Y compensations to 0, greys them out and brings up User Customized Offset.
In this preset: Off.
User Customized Offset
This fine-tunes Auto circle contour-hole compensation, the setting that resizes round holes and round pegs so they come out the right size. It only appears when that setting is on. If round parts still fit too tightly or too loosely, change this value 0.02 mm at a time and print a quick test fit after each change.
In this preset: 0 mm, so no extra adjustment.
Elephant foot compensation


The whole block, 50 x 50 x 25 mm
- First layer
Elephant foot compensation
Elephant foot is when the first layer spreads wider than the rest, leaving a small lip around the bottom of the print. It happens because the first layer is squashed onto the hot plate and stays soft while the layers above press down on it. This setting shrinks the first layer to cancel that out. The value is how far each edge moves in, so 0.075 mm makes a 50 mm block's first layer 0.15 mm narrower overall. The preset value is fine for parts that don't need to be exact. For parts that clip or slot together, print a test at 0 and measure how far the bottom sticks out on each side. Enter that number. Measure again if you switch build plates, since the spread can differ. Bambu Studio resets anything above 1 mm to 0, because a lip that big points to another problem, such as a bed that's too hot.
In this preset: 0.075 mm.
Precise Z height
A model's height doesn't always divide evenly into layers. With 0.2 mm layers, a 10.1 mm part would need 50.5 layers, so it prints slightly short or tall. This setting adjusts the height of the last five layers so the top lands at the model's real height. Use it when the exact height matters. It's experimental and does nothing on parts with fewer than six layers. Multicolour prints usually use a prime tower, a block the printer purges into when it changes colour. Bambu Studio warns that this setting can make that tower much bigger.
In this preset: Off.
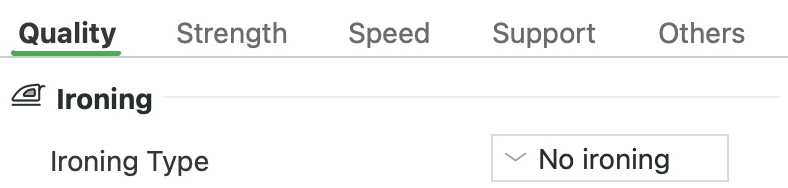
Ironing Type


- Ironed
Ironing Type
Ironing smooths flat tops. After a top layer prints, the hot nozzle goes over it again at the same height, slowly, pushing out only a trickle of plastic. That fills the tiny gaps between the top's lines. This setting turns ironing on and picks which surfaces get it. Top surfaces irons every flat top, and Topmost surface only the highest one. All solid layer also irons the first layer and the fully filled layers inside the part. It adds a lot of time and doesn't reliably print well, so it's rarely used. Ironing can't smooth curved tops; there it only adds time. The other ironing settings appear once you choose a type.
In our test, a 60 x 50 x 15 mm stepped block took about 21 minutes without ironing. It took about 26 minutes with Topmost surface, 31 with Top surfaces and 1 hour 34 minutes with All solid layer. Because so little plastic flows for so long, heat can creep up the hot end and soften the filament early, which can clog it. It's most likely with plastics that soften at low temperatures, such as PLA, PETG and TPU. The rubbing nozzle can also knock a poorly stuck part off the plate.
In this preset: No ironing.
Ironing Pattern
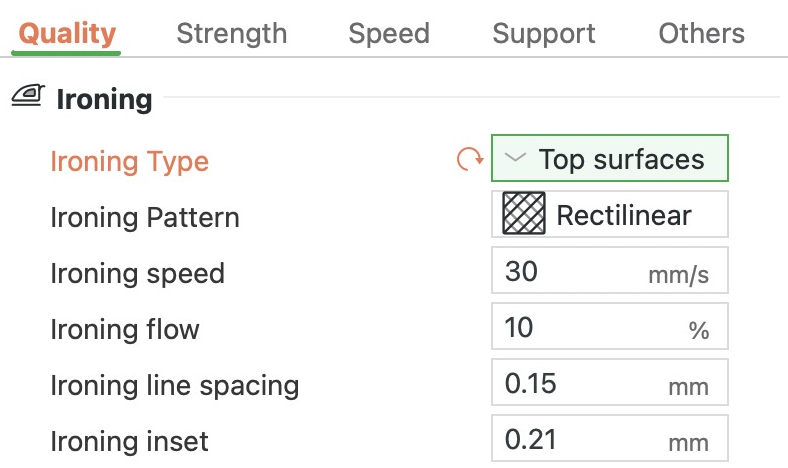
Ironing Pattern, Ironing line spacing, Ironing inset
This is the path the nozzle follows while ironing. Rectilinear goes back and forth in straight lines and suits most tops. Concentric goes round in rings that follow the edge, which suits round, oval or many-sided tops and rounded corners. Archimedean Chords irons in a spiral that winds outwards from the middle.
In this preset: Rectilinear.
Ironing speed
This is how fast the nozzle moves while ironing. Slower usually gives a smoother top, but the ironing takes longer.
In this preset: 30 mm/s.
Ironing flow
This is how much plastic comes out while ironing, as a percentage of a normal layer's amount. That trickle fills the gaps between the top's lines. Too much leaves excess plastic on the surface; too little leaves it less smooth.
In this preset: 10%.
Ironing line spacing
This is the gap between neighbouring ironing passes. Keep it smaller than the nozzle's width (0.4 mm), so the passes overlap and every spot gets ironed more than once. Wider spacing saves time, but each spot gets fewer passes. Bambu Studio resets anything under 0.05 mm to 0.1 mm. In our test, doubling it to 0.3 mm halved the number of passes and cut the stepped block from about 31 to 26 minutes.
In this preset: 0.15 mm.
Ironing inset
This keeps the ironing a little way in from the edges of the top, where plastic can otherwise build up. Raise it if ironed tops still show a ridge along the edges. At 0, Bambu Studio uses half the nozzle's width instead, 0.2 mm on a 0.4 mm nozzle.
In this preset: 0.21 mm.
Wall generator

- Outer wall
- Inner wall
- Gap fill
Wall generator
Walls are the outlines of each layer, printed as a few lines side by side. This setting decides how those lines fill the wall's thickness. Classic prints every line at the same width. Leftover spaces too narrow for a full line get a thinner line, called gap fill. That gives a clean surface with one seam per layer, but details thinner than a line, such as small text, can go missing. Arachne makes each line wider or narrower to fit, so thin details print. Where the number of lines changes, though, it can break the wall into separate pieces, and the breaks can show.
Keep Classic for most parts. Switch to Arachne when thin walls or small details are missing in the Preview after slicing. Go back to Classic if Arachne puts the seam in a bad spot, leaves bits of wall floating or makes the surface uneven. In our test on a wall that tapers to a thin tip, Classic's lines stopped 1.2 mm short of the tip. Arachne's line got to within 0.16 mm of it. Where the wall was 1.1 mm thick, Classic printed two 0.42 mm lines with a 0.31 mm gap-fill line between. Arachne printed two 0.57 mm lines. Choosing Arachne shows six more settings in this group.
In this preset: Classic. All of Bambu's own process presets use Classic.
Wall transitioning threshold angle
- Outer wall
- Inner wall
- Infill
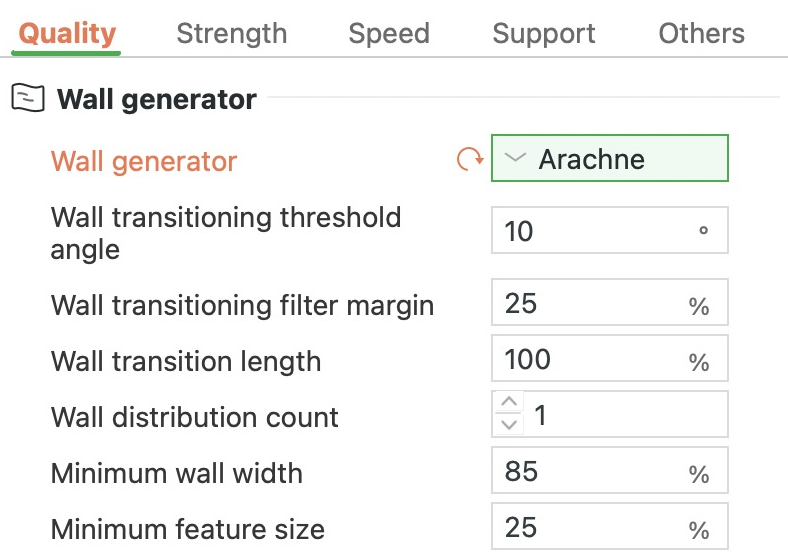
Minimum wall width, Wall transitioning threshold angle
With Arachne, a wall that narrows like a wedge loses lines as it thins. Going between an even and an odd number of lines means adding or removing one down the middle. This is the widest wedge angle that still gets that middle line; wider ones are left empty in the centre. Lowering it gives fewer and shorter middle lines, but can leave gaps or put down too much plastic. In our test at 3°, a wall narrowing at 5.7° got a gap up to about 0.38 mm wide down its middle.
In this preset: 10°.
Minimum wall width
This also only applies with Arachne. It's the narrowest line Arachne prints, as a percentage of the nozzle's width. Thinner details are printed at this width, so they come out a little fatter than designed. A lower value keeps thin details closer to their real size, and a higher one prints them wider. In our test, a tapering wall split from one line into two at about 0.64 mm thick with 85%, and 0.43 mm with 50%.
In this preset: 85%, which is 0.34 mm on a 0.4 mm nozzle.
Minimum feature size
This Arachne setting is the thinnest detail that still gets printed, as a percentage of the nozzle's width. Anything thinner is left out. Details thicker than this but thinner than the Minimum wall width are widened to that width. Lower it to keep finer details, such as tiny text. Raise it and more of the finest details are left out.
In this preset: 25%, so anything thinner than 0.1 mm is left out on a 0.4 mm nozzle.
More wall generator settings
- Wall transitioning filter margin: Stops Arachne flipping back and forth between one more line and one fewer, by letting the line width vary more. A bigger margin means fewer switches, so fewer starts and stops. But widths that vary a lot can put down too little or too much plastic. 25% of the nozzle's width in this preset.
- Wall transition length: The length of wall Arachne uses to split one line into two or merge two into one, as a percentage of the nozzle's width. 100%, or 0.4 mm, in this preset.
- Wall distribution count: How many lines, counted from the middle of the wall, share a change in width. At 1, only the middle line or lines change, so the outer walls keep their width wherever the wall is three or more lines thick. 1 in this preset.
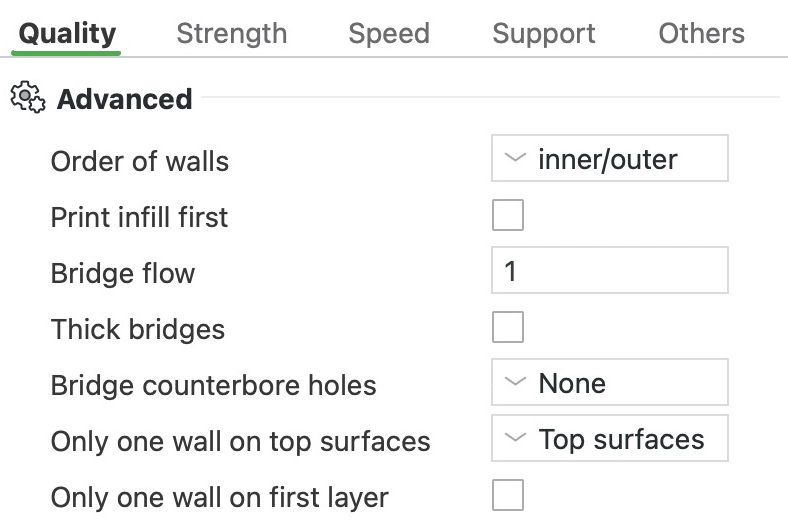
Order of walls
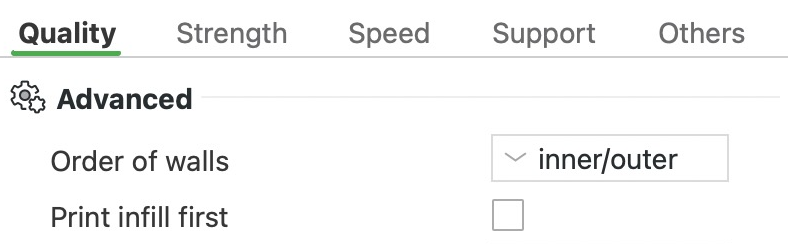
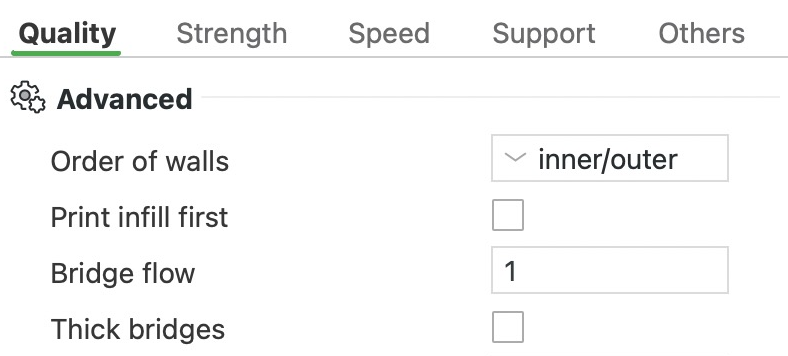
Order of walls, Print infill first
Each layer has an outer wall, the outline you see, with inner walls inside it that make the sides thicker. This decides which order they print in. With inner/outer, the outer wall goes last and can lean on the inner walls already there. That gives better overhangs, so keep it for most parts. With outer/inner, the outer wall prints first and sets before the inner walls press on it, so the surface can show fewer marks. But seams may show more, and over an overhang the outer wall has nothing to lean on.
The third option, inner wall/outer wall/inner wall, prints the inner walls, then the outer wall, and the wall next to it last. That leaves a small gap beside the outer wall while it prints, so the inner walls pushing and shrinking mark the surface less. Like outer/inner, it gives the outer wall nothing to lean on over an overhang. It needs at least three walls; with two, it prints like outer/inner.
In this preset: inner/outer, with two walls.
Print infill first
Normally each layer prints its walls first and then fills in the inside. Turn this on to print the infill first. Infill here covers everything inside the walls, including the pattern inside the part, solid layers, top and bottom surfaces and bridges. Even with this on, the first layer prints its walls first, because that helps it stick to the plate.
In this preset: Off.
Bridge flow


The whole bridge, 54 mm long, cut through the middle of the gap
- Bridge lines, cut across
Bridge flow, Thick bridges
A bridge is a stretch of print that spans a gap with nothing underneath, like the top of a doorway. This setting multiplies how much plastic goes into the bridge lines. If bridges sag, lower it slightly, for example to 0.9, so there's less plastic to sag. If neighbouring bridge lines don't touch and join up, raise it so each line carries more plastic.
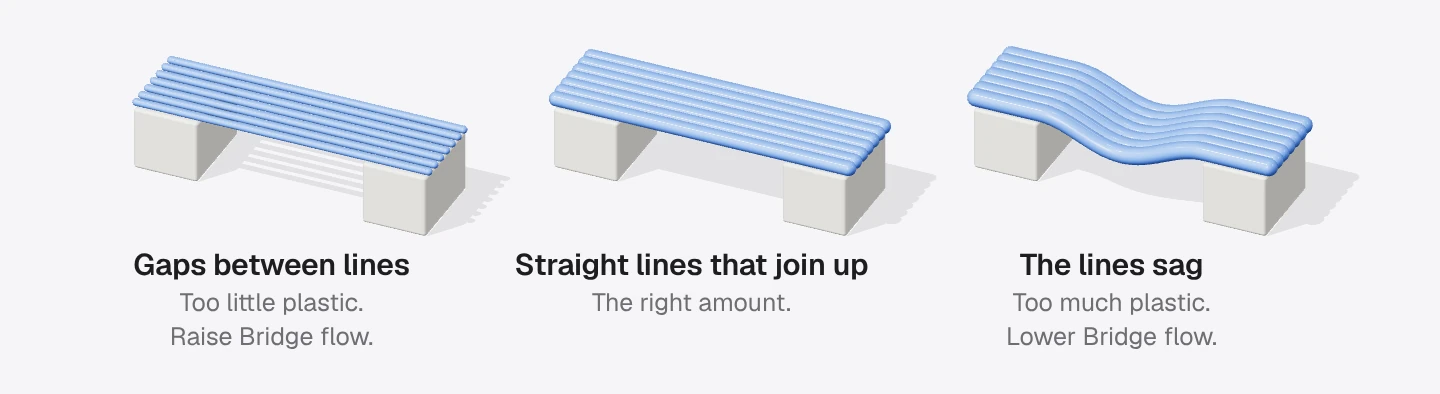
Change it in small steps, and print a test bridge with your own filament each time. The bridge speed (Bridge, on the Speed tab) also affects how bridges turn out. In our test over a 30 mm gap, 1 gave 49 lines 0.38 mm apart. At 0.6 the slicer used 81 thinner lines 0.23 mm apart. At 1.5 it kept the 49 lines but put 50% more plastic in each.
In this preset: 1, which leaves the amount unchanged.
Thick bridges
Normally a bridge line is sized like any other line, as thin as the layer height. With this on, bridges over open air print as thick, round lines as wide as the nozzle. Thick lines hold together better and can span further. Turn it on for long bridges, and when you print thin layers, because thin bridge lines get too little plastic and can pull apart. Thick bridges can look worse, so leave it off when your bridges are short. Bridges inside the part, printed over the infill, are always thick. In our test over a 30 mm gap, it gave 41 lines about 0.4 mm thick and 0.45 mm apart. Without it there were 49 lines 0.38 mm apart.
In this preset: Off.
Bridge counterbore holes
- Printed over the wide hole
- The part, cut across
- The plate
Bridge counterbore holes
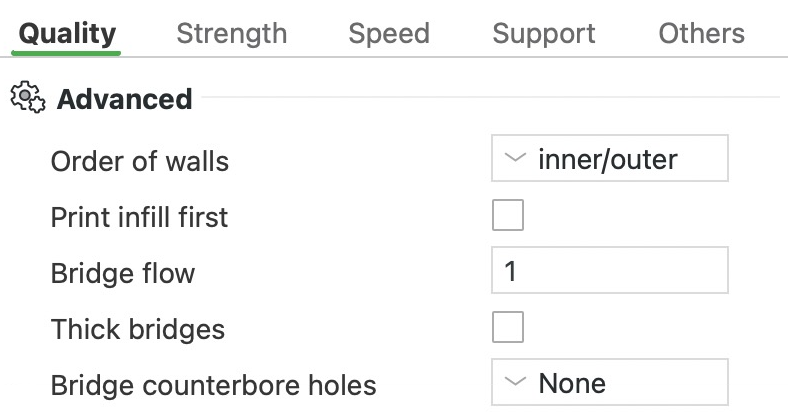
A counterbore is a wide hole that steps down to a narrower one, like the recess that lets a screw head sit flush. When it faces down on the plate, the narrow hole starts above the wide one, with nothing underneath. This setting adds bridges there, lines held at both ends, so the hole prints without support. With None, no bridges are added. The lines over the wide hole are held only at its edge, so they stick out over the air like an overhang, and the narrow hole's first walls print over empty space. Partially bridged keeps the wide hole going for one more layer, then closes the ledge with loops that follow the narrow hole. Sacrificial layer lays a full bridge across the opening and starts the narrow hole on top. You cut that thin layer out afterwards.
In this preset: None.
Only one wall on top surfaces
- Inner wall
- Outer wall
Only one wall on top surfaces
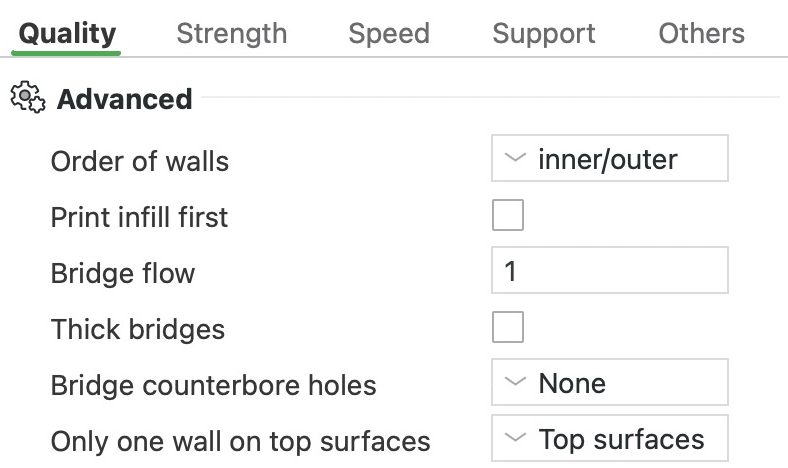
Flat tops normally get the same number of walls (outlines) as the rest of the layer. This setting uses only one wall around flat tops instead. That leaves more room for the top's surface pattern and makes tops look better, especially on flat-topped parts. Top surfaces does this on every flat top, and Topmost surface only on the highest one. Not applied keeps the full number of walls on every top. In our stepped-block test, Top surfaces gave the top pattern about 4% more area than Not applied.
In this preset: Top surfaces.
Only one wall on first layer


The whole ring, 50 mm across
- Walls of the first layer
Only one wall on first layer
This prints the first layer with only one wall (outline), so the bottom surface pattern covers more of it. In our test on a 50 mm ring, the bottom pattern got about 9% more area.
In this preset: Off.
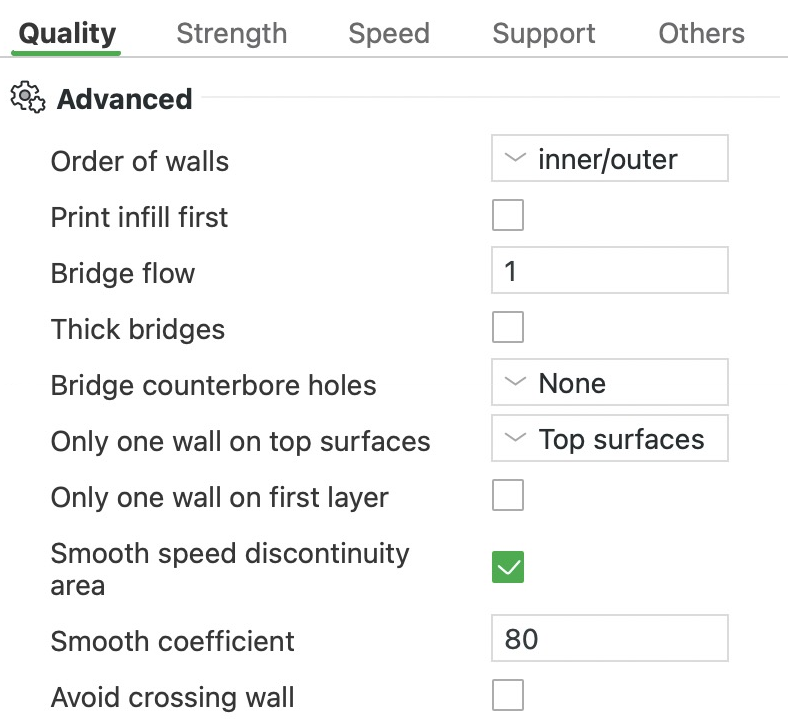
Smooth speed discontinuity area
Where a wall slows for an overhang, this makes the speed change gradually instead of all at once. The wall eases down before the overhang and back up after it. Bambu says this helps cooling, so leave it on.
In this preset: On.
Smooth coefficient
This sets how long the gradual speed change from Smooth speed discontinuity area is. Smaller numbers spread the change over a longer stretch of wall, so it's smoother. Setting it to 0 turns the smoothing off. Bambu recommends values between 1 and 200.
In this preset: 80.
Avoid crossing wall
- Moving across or round the hole
- Other moves without plastic
- Printed lines
Avoid crossing wall
When the nozzle moves without printing (a travel move), it normally goes straight, even across walls. Plastic can leak out on the way and leave strings or blobs where it crosses. With this on, the nozzle goes around walls where it can. It only does this on moves longer than the printer's Travel distance threshold, 1 mm on the A1. If a wall lies between the start and the end, as when the nozzle leaves the part, it still crosses. Turn it on if travel moves leave strings or blobs on the surface. In our test on a 50 mm ring, the detours added about 4 seconds.
In this preset: Off.
Smoothing wall speed along Z(experimental)
Bambu Studio slows small layers down so they have time to cool. The outer wall's speed then jumps between layers, and the jumps can show as brighter or darker bands. This setting evens out those jumps by slowing the outer wall a little on the neighbouring layers too. That adds print time. It helps most on tall, smooth, curved parts such as figurines and on parts that narrow towards the top. Silk, glossy and translucent filaments show the bands most. Small parts and simple boxes gain little. It doesn't work in spiral vase mode, so it's greyed out there.
In this preset: Off.
More advanced settings
- Avoid crossing wall - Max detour length: The longest detour allowed, in millimetres or as a percentage of the straight move. If going around a wall would add more than this, the nozzle goes straight across. It only appears when Avoid crossing wall is on. 0, meaning no limit, in this preset.
- Avoid crossing wall - Includes support: Makes travel moves go around supports as well as walls. It only appears when Avoid crossing wall is on. Off in this preset.
What do the Strength settings in Bambu Studio do?
The Strength tab decides how thick the outside of your print is and what fills the inside. The walls are the lines that trace the outline of each layer, and stacked up they form the sides. The top and bottom shells are solid layers that close the part at the top and bottom. Sparse infill is the open pattern that fills the space in between. The tab has four groups: Walls, Top/bottom shells, Sparse infill and Advanced. The "In this preset" values come from 0.20mm Standard @BBL A1, the preset Bambu Studio picks for an A1 with the 0.4 mm nozzle.
Wall loops


The whole block, 50 x 50 x 25 mm, cut at this layer
- Walls
- Sparse infill
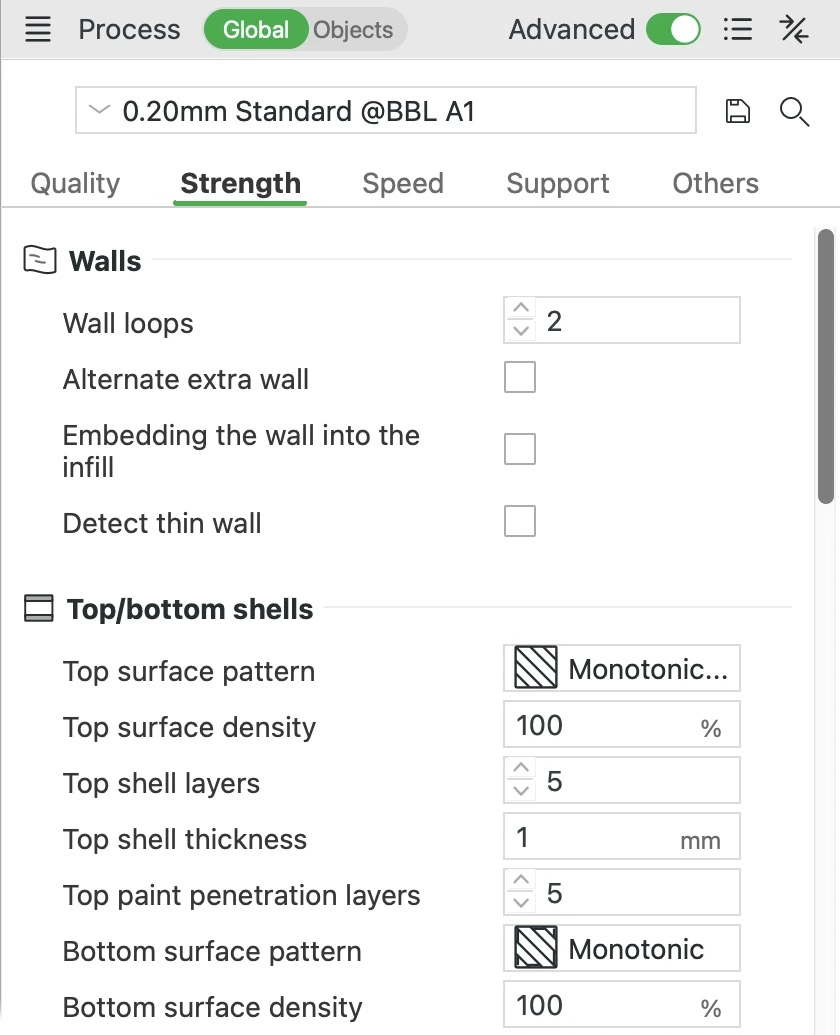
Wall loops
This is how many times the nozzle goes round the outline of each layer. These loops are the walls, and stacked up they form the sides of the part. The outermost one is the surface you see and touch. Each extra loop makes the sides thicker and the part stronger, but adds plastic and time. Two loops suit parts that carry little load. For a strong part, use five with about 25% sparse infill (the pattern inside). If a part cracks between layers, more loops and infill are one fix to try.
Three loops can also make the seam look better. That's the line of small marks where each loop starts and ends.
In this preset: 2 wall loops, which make the sides about 0.8 mm thick. The 0.20mm Strength @BBL A1 preset uses 6 loops with 25% sparse infill.
In our test on a 50 x 50 x 25 mm block, each extra loop added about 0.4 mm to the sides and 1.7 g of plastic. Five loops took 32 minutes and 25.8 g, and two took 28 minutes and 20.6 g.
Alternate extra wall
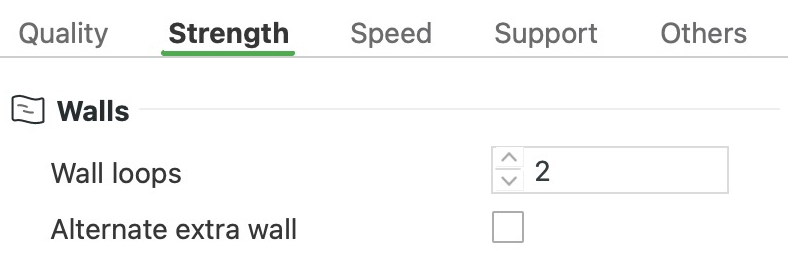
- Walls
- Infill
Alternate extra wall
This adds one more wall loop on every other layer. On those layers the extra loop takes the place of some infill (the pattern inside), so the infill gets wedged between walls from layer to layer. That helps the layers bond and makes the part stronger, for about half the cost of a full extra loop. Use it when two loops aren't enough and a third costs more time and plastic than you want. It can't be used with Spiral vase, which prints the part as one spiralling wall.
When you turn it on, Bambu Studio checks three related settings and offers to change any that get in its way. If you click Yes, it sets Wall loops to 2 and switches Ensure vertical shell thickness from Enabled to Partial. It also raises a Sparse infill density of 0% to 15%.
In this preset: Off.
In our test on a 50 x 50 x 25 mm block, with Ensure vertical shell thickness at Partial, it added 55 seconds and 0.85 g. A full third loop added 1 minute 45 seconds and 1.71 g.
Embedding the wall into the infill
Bambu Studio lets you give one part of a model its own settings. This setting only matters when such a part has Wall loops at 0 and touches a part with walls. With it on, the wall of the other part reaches into the wall-less part's infill on every other layer, so the two lock together. Most prints leave it off.
In this preset: Off.
Detect thin wall
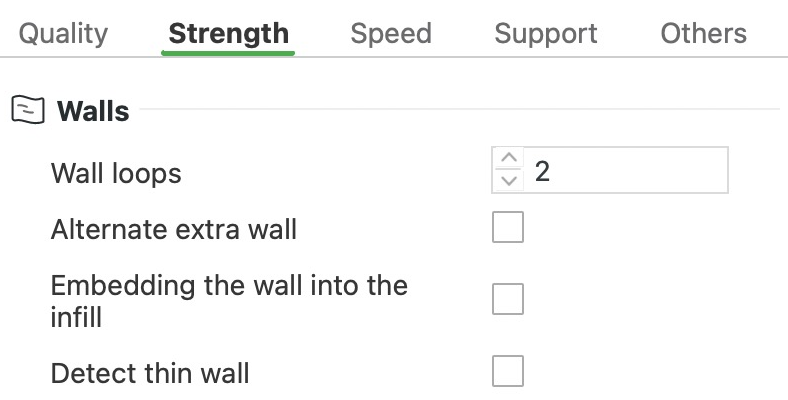


- Printed
- In the model
Detect thin wall
A normal wall is a closed loop, so it needs room for two lines side by side. With the Classic wall generator, a detail thinner than that, such as small text, gets no wall and is left out of the print. Detect thin wall prints those details as a single line instead, so they don't go missing. Setting Wall generator (Quality tab) to Arachne also keeps them, because Arachne varies the line width to fit. Arachne greys this setting out.
A single line isn't a closed loop, so it may not print as cleanly, and a tiny piece printed that way can fail because it's fragile. Walls can also end up closer together than one line width and overlap. The extra plastic can stick to the nozzle and then leave marks on the surface. Turn it on only when thin details go missing.
In this preset: Off. The preset uses the Classic wall generator.
In our test on a comb of walls from 0.3 to 2 mm thick, turning it on brought back the missing 0.3 and 0.4 mm walls. It added 10 seconds and 0.09 g.
Top surface pattern
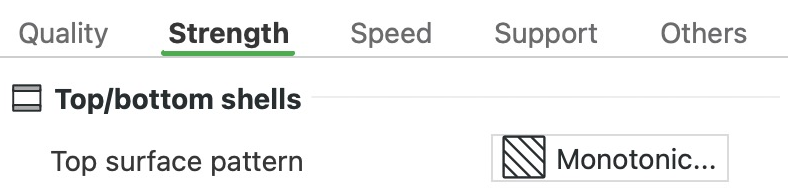
Top surface pattern
This is the pattern of lines on the top surface, the face you see on top of a part. It changes how the top looks and how long it takes, but barely changes the plastic used.
- Monotonic line and Monotonic lay straight lines side by side, always in the same order, for a smooth, even look on large flat tops. Monotonic line ends each line at the wall instead of turning along it, so no extra plastic piles up at the edges, though small seams can show. Global monotonic line works the same way but sweeps the whole top from one side to the other, even where holes split it.
- Concentric lays rings that follow the shape of the top's outline.
- Hilbert Curve draws one long, maze-like path. It's by far the slowest, because the path turns a corner every 0.4 mm or so and the printer slows for each turn.
- Archimedean Chords lays an even-looking spiral, and Octagram Spiral a decorative star. Both print much faster than Hilbert Curve.
- With transparent plastic and Aligned Rectilinear on top, set Sparse infill pattern to Aligned Rectilinear too. The lines inside then run the same way as the top, which looks neater through the clear plastic.
In this preset: Monotonic line.
In our test on a 50 x 50 x 25 mm block, Hilbert Curve took about 33 minutes and Monotonic line 28. All of the difference came from the one top layer, where its path makes over 13,000 right-angle turns. The other patterns finished within a minute.
Top surface density
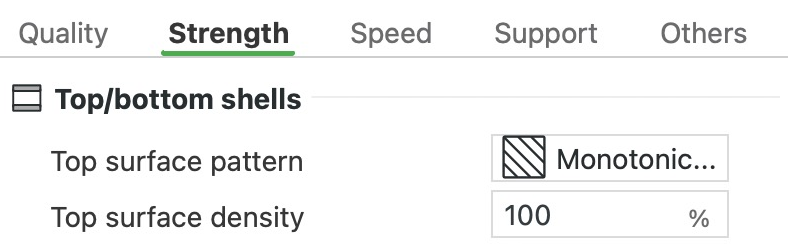


- Top surface lines
- The layer below
Top surface density
This sets how close together the lines on the top surface are. At 100% they join into a solid face. Lower values spread them apart, so the layer underneath shows through the gaps as a texture. At 0% the top layer gets only its walls. Lower it only when you want that texture. It won't fix a top whose lines overlap or leave gaps. That usually means too much or too little plastic is coming out, which the Flow Rate Calibration corrects.
In this preset: 100%, a fully solid top.
In our test on a 50 x 50 x 25 mm block, 40% saved only 24 seconds and 0.36 g.
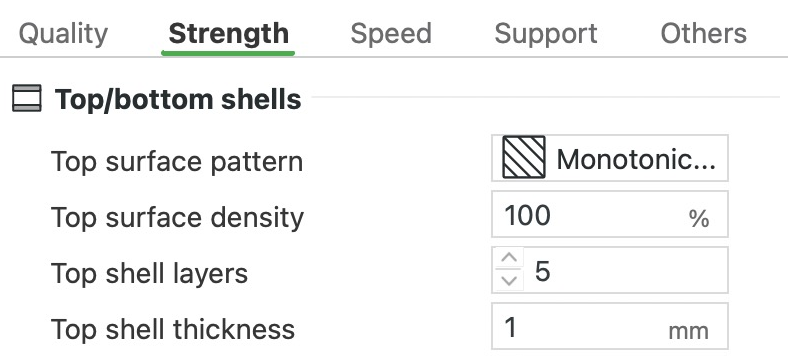
Top shell layers


The whole block, 50 x 50 x 25 mm, cut open
- Top shell layers
- Sparse infill
Top shell layers
This is how many solid layers close off the top of a part, counting the top surface. The infill below is full of gaps. With two or more layers, the lowest one prints as a bridge, with thick lines stretched over the gaps. These lines sag a little, and each layer above smooths that out, so more layers give a smoother top. Add layers when a top comes out rough, most of all at low infill densities, where the gaps under the top are bigger.
In this preset: 5 layers, which make 1.0 mm with 0.20 mm layers. Top shell thickness also asks for 1.0 mm, so setting fewer layers changes nothing unless you lower Top shell thickness too.
In our test on a 50 x 50 x 25 mm block, with Top shell thickness at 0, a second top layer added about 1 minute 40 seconds and 0.73 g. That's because the lower of the two prints as a bridge, at 50 mm/s. Each layer after that added about 30 seconds and 0.5 g.
Top shell thickness
This is the minimum thickness of the solid top, in millimetres. If Top shell layers would make it thinner, Bambu Studio adds layers, so a smaller layer height doesn't leave a thin top. At 0 it's off, and Top shell layers alone decide.
In this preset: 1.0 mm, which 5 layers of 0.20 mm already reach. If you lower Layer height to 0.12 mm, 5 layers make only 0.6 mm, so Bambu Studio adds layers to reach 1.0 mm.
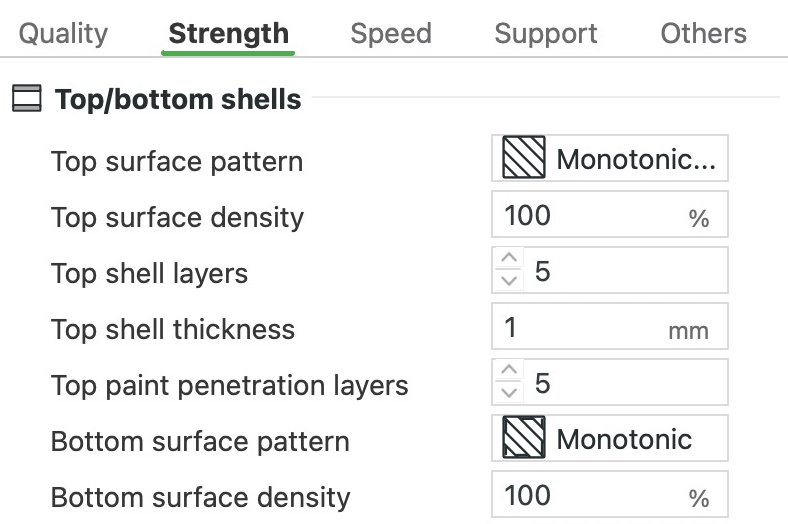
Bottom surface pattern
Bottom surface pattern
This is the line pattern on the underside of a part. For a part sitting on the plate, that's the first layer, the face that touches the plate. You can choose from the same patterns as for the top surface. Leave it at Monotonic unless you want a pattern on the underside. Where the underside hangs over open air, it prints as a bridge, and this setting doesn't apply there.
In this preset: Monotonic.
Bottom surface density
This sets how close together the lines on the underside are, from 10% to 100%. Lower values give the underside a texture, but less plastic touches the plate, so the part may not stick as well. Keep 100% for parts whose corners tend to lift off the plate. Lower it only when you want that texture.
In this preset: 100%.
In our test on a 50 x 50 x 25 mm block, 50% saved 37 seconds and 0.29 g.
Bottom shell layers


The whole block, 50 x 50 x 25 mm, cut open
- Bottom shell layers
- Sparse infill
Bottom shell layers
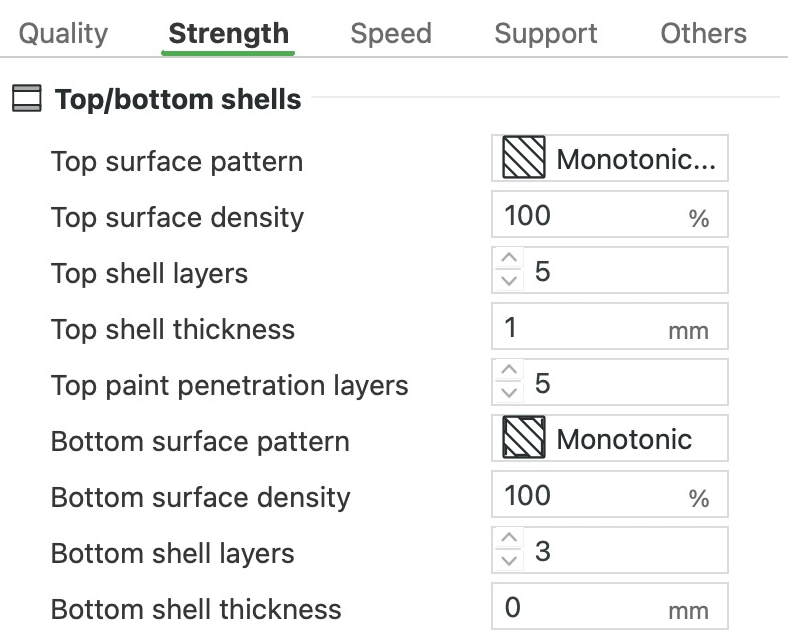
This is how many solid layers make up the floor of a part, counting the bottom surface. The infill starts on top of them. More layers make a thicker, stiffer floor, worth it for a tray or box that carries weight. Fewer save a little time.
In this preset: 3 layers, a floor 0.6 mm thick with 0.20 mm layers. The finer A1 presets add layers to keep a floor of about 0.6 to 0.7 mm. They use 7 at 0.08 mm, 5 at 0.12 mm and 4 at 0.16 mm.
In our test on a 50 x 50 x 25 mm block, every two extra bottom layers added about 1 minute and 1 g.
Bottom shell thickness
This is the minimum thickness of the floor, in millimetres. Bambu Studio adds bottom layers until the floor reaches it. At 0 it's off, and Bottom shell layers alone decide. Set it when you lower the layer height, so the floor doesn't get thinner. With 0.08 mm layers, for example, 3 bottom layers make only about 0.36 mm, because only the first layer stays at 0.2 mm. Setting 0.6 mm brings it back.
In this preset: 0 (off), so Bottom shell layers alone decide.
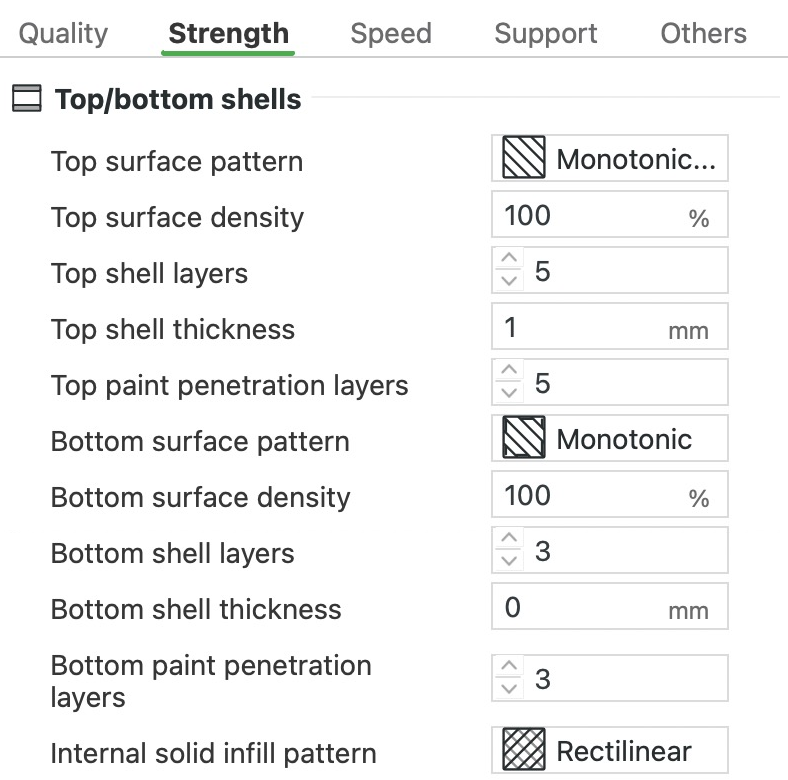
Internal solid infill pattern
Internal solid infill pattern
This is the pattern for the solid layers hidden inside a part, such as the ones right above the bottom surface. Nobody sees them, so the pattern mostly changes the print time, and the preset suits almost every print. The solid layer right under a larger top surface has its own setting, Sub-top surface pattern, in the Advanced group. Narrow areas get Concentric loops anyway while Detect narrow internal solid infill is on.
In this preset: Rectilinear.
In our test on a 50 x 50 x 25 mm block, Concentric took 16 seconds longer.
More Top/bottom shells settings
- Top paint penetration layers: When you paint colours onto a model, how many layers deep the paint goes at the top surfaces. It can't be more than the top's solid layers, or the colour would reach the infill. Same as Top shell layers, 5 in this preset.
- Bottom paint penetration layers: The same for the bottom surfaces, capped by the floor's solid layers. Same as Bottom shell layers, 3 in this preset.
- Using infill instead of top and bottom surfaces: Shows only with the Locked Zag infill pattern. It prints the infill where the solid top and bottom would be, so the pattern shows on the outside there too. Off in this preset.
Sparse infill density
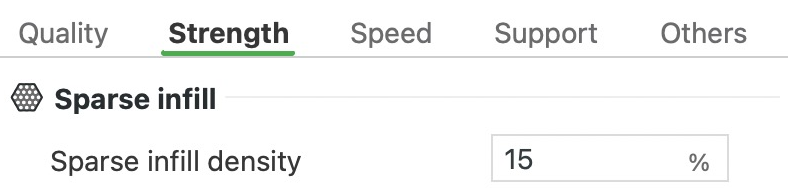


- Sparse infill
Sparse infill density
Sparse infill is the open pattern inside a part. This sets how much of the space it fills, from 0% (hollow) to 100% (solid). More infill makes the part stronger and heavier, and the print longer. 15% suits parts that carry little load. For a strong part, use about 25% with five wall loops. On a large part, stay under 50%. Denser infill shrinks more as it cools, and that can pull the corners up off the plate.
If only one area needs to be strong, add a modifier there (a shape that changes the settings inside it) and raise the density in it alone. At 100%, only Concentric, Rectilinear, Aligned Rectilinear, Hilbert Curve, Archimedean Chords and Octagram Spiral work. With any other pattern, such as Grid, Bambu Studio offers to switch to Rectilinear for you.
In this preset: 15%.
In our test on a 50 x 50 x 25 mm block, going from 15% to 30% added about 10 g and 10 minutes. At 80% the block took about 1 hour 9 minutes and 64 g, more than three times the plastic of the 15% print.
Fill multiline
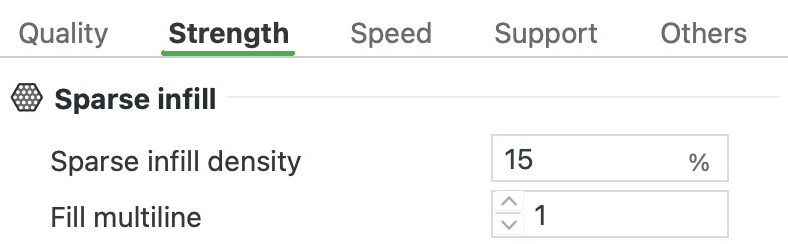


The whole block, 50 x 50 x 25 mm, with its top off
- Infill lines, one layer
Fill multiline
This prints each line of the sparse infill (the open pattern inside the part) as a bundle of 2 to 5 lines side by side. The bundles are spaced further apart, so the weight stays about the same, and you get fewer, thicker ribs with wider gaps. Leave it at 1 unless you want that structure. It only shows with patterns that support it: Grid, Rectilinear, Aligned Rectilinear, Cubic, Adaptive Cubic, Support Cubic, Gyroid, Honeycomb, 3D Honeycomb, Tri-hexagon and Lightning.
In this preset: 1, so each infill line is a single line.
In our test on a 50 x 50 x 25 mm block, single lines, pairs and threes all weighed about the same, between 20.63 and 20.69 g.
Sparse infill pattern
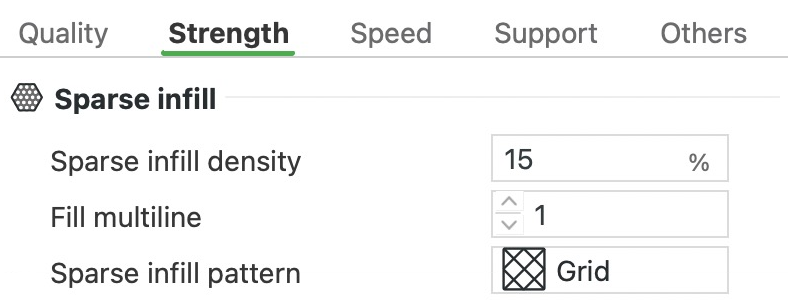
Sparse infill pattern
This is the shape the infill lines make inside the part. At the same density, the shape changes which way the part is strongest, how much it shrinks as it cools and how long it prints. Grid, the preset's pattern, is one of the simplest and fastest.
- For strength in every direction, choose Cubic or Gyroid. Both build a 3D structure that shifts from layer to layer, spreading the strength in all directions.
- For sideways forces, choose Triangles or Tri-hexagon. Their lines run three ways in each layer, so they're strong in any direction across it.
- Honeycomb is strong and its lines don't cross within a layer. But it uses about 25% more plastic than Grid and takes much longer to print.
- To save plastic and time, choose Adaptive Cubic. It's dense near the outside and sparse in the middle, and still holds up the top. Lightning grows only the branches needed to hold up the top surface, so it suits decorative parts that carry no load.
- Rectilinear turns its straight lines 90° on each new layer, so they don't cross within a layer. Aligned Rectilinear keeps one direction all the way up, which saves time, but a top laid the same way can sag into the gaps. Cross Hatch lays straight lines that switch direction every few layers. Bambu says it's much stronger than Line or Concentric and suggests a lower density than usual, such as 12%.
- If a large flat part warps, switch to Gyroid. Patterns with more straight lines, such as Grid and Triangles, shrink more as they cool and pull the part out of shape.
- In transparent plastic, Concentric rings look good through the walls. Locked Zag is for parts whose infill shows on the outside. It keeps the Cross Zag texture near the surface and adds a stronger Zig Zag core. Bambu suggests it for hard-working parts such as shoes.
Grid, Triangles, Tri-hexagon and Cubic cross their own lines within each layer. Where two lines cross, the plastic builds up into a small bump, and the nozzle can scrape it on the way past. This usually does no harm. If the knocks start to loosen the part from the plate, slow down the sparse infill. You can also switch to Line, Rectilinear, Gyroid or Concentric, which have no crossings.
In this preset: Grid.
In our test on a 50 x 50 x 25 mm block at 15%, most patterns finished within a minute of Grid's 28 minutes. Lightning and Adaptive Cubic were 3 to 4 minutes faster, and Lightning was the lightest at 11.8 g, compared with 20.6 g for Grid. Octagram Spiral, Locked Zag, Cross Hatch, Gyroid, 3D Honeycomb and Hilbert Curve took 7 to 15 minutes longer, and Honeycomb took 22 minutes longer.
Length of sparse infill anchor
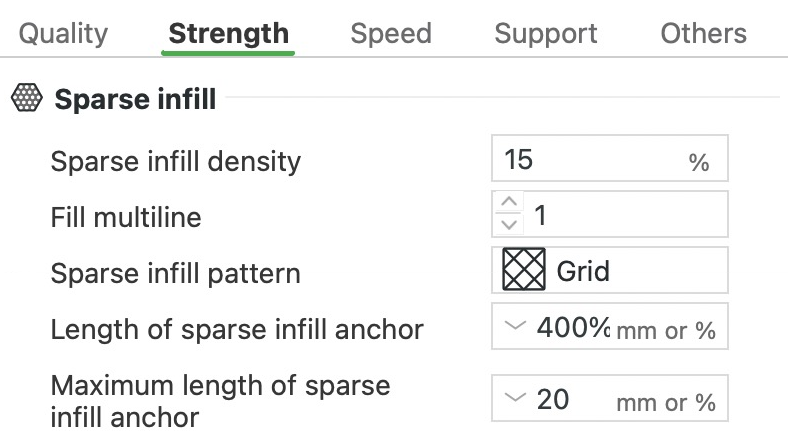
- Infill line
- Anchor
Length of sparse infill anchor
Infill lines don't have to stop dead at the wall. Bambu Studio can turn the end of a line and run it a short way along the inner wall. That short run is called an anchor. It ties the infill to the wall and can link two neighbouring lines into one path, so the nozzle keeps printing instead of stopping. This setting is the length of an anchor that has no neighbouring line to link to. Enter it in mm or as a percentage of the infill line width, and 0 leaves these one-ended anchors out. Anchors cost little time, so leave it at the preset.
In this preset: 400%, which is 1.8 mm with 0.45 mm infill lines. You'll only see this setting while Maximum length of sparse infill anchor is above 0.
In our test on a 50 x 50 x 25 mm block with Rectilinear infill, the anchors added 7 seconds and 0.94 g.
Maximum length of sparse infill anchor
This is the longest run along the inner wall that Bambu Studio will use to link two neighbouring infill lines. It's also the upper limit for the one-ended anchors above. At 0 there are no anchors, and every infill line stops at the wall. At 1000 there's no limit. Leave it at the preset.
In this preset: 20 mm.
More Sparse infill settings
These settings only show up when you pick the infill pattern they belong to, or turn on the setting above them. Conformal infill bends the infill to follow each layer's shape. Locked Zag splits the infill into a skin, a band next to the walls, and a skeleton, everything inside it. Each gets its own pattern, density and line width, so you can tune the surface look and the strength separately.
- Conformal infill: With Rectilinear, Aligned Rectilinear, Zig Zag, Cross Zag or Locked Zag (skin only). The infill follows each layer's outline instead of running in parallel lines. On long or curved shapes, the lines fan out from a centre. Off in this preset.
- Layer stagger: With Conformal infill on, how neighbouring layers line up. Off stacks the same layout on every layer. Alternate links each line to its neighbour on the opposite side, which helps the layers bond. Off in this preset.
- Forward layers: With Conformal infill on, how many layers in a row keep the normal zigzag before the Reverse layers start. The pattern then repeats, and 0 reverses from the first layer. 1 in this preset.
- Reverse layers: With Conformal infill on, how many layers in a row start their zigzag from the opposite edge. 0 turns this off, and 1 with Forward layers at 1 flips every other layer. 0 in this preset.
- Radial center: With Conformal infill on, where the centre of the fanned-out lines comes from. With Each layer, every layer gets its own centre. Axis fits one straight line through those centres, and Smooth curve fits a curve so the centre doesn't jump. Each layer in this preset.
- Radial line count: With Conformal infill on, how many lines fan out from the centre. 0 works it out from Sparse infill density. Other values are rounded up to an even number, at least 4. 0 in this preset.
- Center region radius: With Conformal infill on, a circle around the centre that gets ordinary straight lines, with fanned-out lines outside it. 0 sizes it automatically, and other values are in mm. 0 in this preset.
- Skin infill pattern: With Locked Zag, the pattern for the skin. Cross Zag in this preset.
- Skin infill density: With Locked Zag, how dense the skin is. It resets to Sparse infill density whenever you change that, and you can adjust it afterwards. 15% in this preset.
- Skeleton infill pattern: With Locked Zag, the pattern for the skeleton. Zig Zag in this preset.
- Skeleton infill density: With Locked Zag, how dense the skeleton is. It also resets to Sparse infill density. 15% in this preset.
- Infill lock depth: With Locked Zag, how far the skin and skeleton overlap. Deeper is stronger. It can't be more than Skin infill depth, and a larger value resets to half the skin depth. 1 mm in this preset.
- Skin infill depth: With Locked Zag, how far the skin reaches in from the walls. Deeper gives the sides more of the Cross Zag look. 2 mm in this preset.
- Skin line width: With Locked Zag, the width of the skin's lines. It copies the Sparse infill line width (Quality tab) when you change that. 0.45 mm in this preset.
- Skeleton line width: With Locked Zag, the width of the skeleton's lines, which also copies the Sparse infill line width. 0.45 mm in this preset.
- Symmetric infill y axis: With Zig Zag, Cross Zag and Locked Zag. For two parts that mirror each other across the Y axis, turn it on for one of them, and their infill textures mirror too. Off in this preset.
- Infill shift step: With Cross Zag and Locked Zag, how far the infill lines shift sideways from layer to layer, in mm, to build a criss-cross texture. At 0, Cross Zag looks much like Rectilinear. 0.4 mm in this preset.
- Lattice angle 1: With 2D Lattice, how far the first set of lattice bars leans, from -75° to 75°. At 0° they stand straight up. -45° in this preset.
- Lattice angle 2: The same for the second set of bars, which cross the first. 45° in this preset.
- Infill rotate step: With Zig Zag, how many degrees the infill turns from layer to layer, to build a criss-cross texture. At 0, Zig Zag looks much like Rectilinear. 0° in this preset.
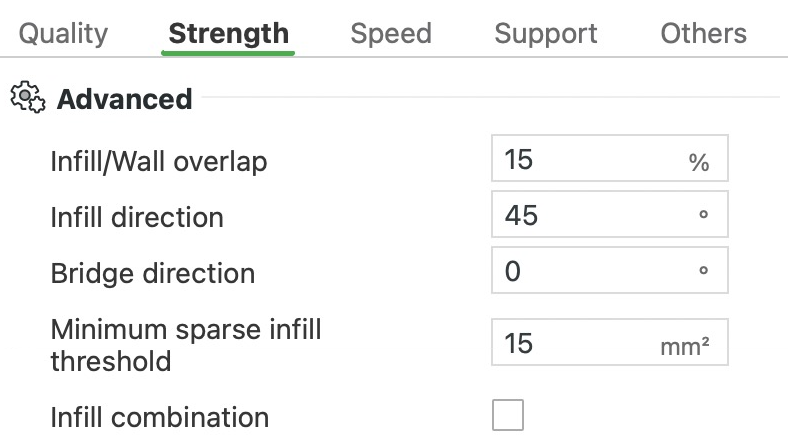
Infill/Wall overlap
- Outer wall
- Inner wall
- Sparse infill
Infill/Wall overlap
This makes the infill reach a little way into the inner wall, the innermost wall loop, so the two overlap and bond. It's a percentage of the line width. Leave it at the preset. If infill lines stop short of the walls, check the K-factor from Flow Dynamics Calibration first. That value keeps the plastic flow in step with the nozzle's moves. A common cause of lines that don't join up is a K-factor set far too high, for example 0.25 typed instead of 0.025.
In this preset: 15%. In our test the infill reached about 0.09 mm into the inner wall, and about 0.19 mm at 40%.
Infill direction


- Infill lines, one layer
- Walls
Infill direction
This sets the angle of the infill lines. It turns the solid layers too, including the top and bottom surfaces, so it also decides which way the lines run on a flat top or underside. At 45° they run diagonally across a box placed square on the plate. Set 0° to make them run parallel to its sides instead. Bridges over open air keep their own direction.
In this preset: 45°.
Bridge direction
- One line: a filled dot lands on a pillar, a hollow one ends over air
Bridge direction
A bridge is a layer printed across open air, from one supported area to another. This sets which way its lines run. Each line hangs between its two ends while it cools, so it sags least when both ends rest on something solid and the span is short. Leave it at 0 (automatic) unless a bridge comes out badly. Then pick an angle that runs the lines straight across the gap. For a gap too long to bridge cleanly, add support.
In this preset: 0, so Bambu Studio works out the direction itself. Any other angle overrides it. To force 0°, enter 180°, because 0 means automatic.
In our test bridge over a 30 mm gap, the automatic direction laid 31 mm lines that landed on the pillars at both ends. At 90°, most lines were only 18 mm long but had nothing under either end. All three angles took the same 13 minutes and 5 g.
Minimum sparse infill threshold


- Sparse infill
- Solid infill
Minimum sparse infill threshold
Any patch of sparse infill (the open pattern inside) smaller than this area, in mm², gets solid infill instead. Inside a thin post or pin, sparse infill would be only a few short lines that add little strength. Raise it when thin posts, pins or ribs need to be stiff, so more of them print solid.
In this preset: 15 mm².
In our test with posts 5, 8 and 14 mm across, 15 mm² turned the 5 mm post solid. At 60 mm² the 8 mm post turned solid too, for 18 seconds and 0.34 g more.
Infill combination
The infill inside a print is hidden, so it doesn't need fine layers. With this on, Bambu Studio prints the infill only on every second or third layer, as one taller line that fills the same height. The walls and the top and bottom surfaces still print on every layer, so the outside looks the same, and the nozzle makes fewer trips across the inside.
Turn it on when you print with thin layers for a smooth surface, 0.12 mm or less, on a part with a lot of infill. Thin layers make a print slow, and this keeps them only where you can see them. With 0.2 mm layers it saves little. The infill already prints about as fast as the hotend can melt plastic, so a taller line has to slow down to match.
In this preset: Off. Bambu Studio combines as many layers as fit within the nozzle's width, so with the 0.4 mm nozzle, 0.2 mm layers combine in pairs and 0.12 mm layers in threes. At 0.24 mm and thicker it does nothing, because two layers would already be taller than 0.4 mm.
In our test on a 50 x 50 x 25 mm block with 0.2 mm layers, it saved about a minute (27 minutes instead of 28) and 1.2 g.
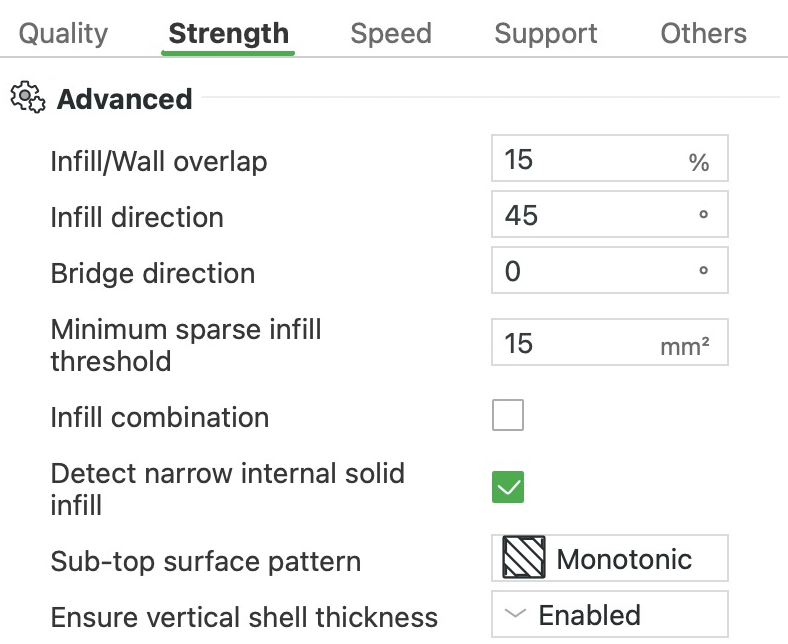
Detect narrow internal solid infill
This fills narrow solid areas inside a part with Concentric loops instead of back-and-forth lines. In a narrow strip, back-and-forth lines are short and full of turns, while loops run in long paths and print faster. An area counts as narrow when no spot in it is more than 3 mm from its edge, so it's under about 6 mm wide. Leave it on. Detect floating vertical shells, and Vertical shell speed on the Speed tab, only show while it's on.
In this preset: On.
In our test with posts filled solid, the 5 mm post's core printed in loops. The 8 mm post's core printed in straight lines.
Ensure vertical shell thickness


The whole roof, 50 mm long, cut in half
- Extra solid shell under the slope
Ensure vertical shell thickness
This adds solid infill under sloping surfaces. That keeps the shell (the solid outer layers) under a slope as thick, measured straight up and down, as the top and bottom shell settings ask for. Without it, the sparse infill (the open pattern inside) runs right up to the walls under a slope, so the shell there can come out thin. Keep Enabled. Partial adds less, and Alternate extra wall asks for Partial. Disabled saves a little plastic and time.
In this preset: Enabled.
In our test on a 30° roof 50 mm long, Enabled used 9.75 g, Partial 9.44 g and Disabled 8.61 g. Disabled also printed 43 seconds faster than Enabled.
Detect floating vertical shells
Narrow bands of solid infill inside a part can sit partly on sparse infill, the open pattern with air between its lines. Ensure vertical shell thickness adds bands like these under slopes. This setting finds the stretches that hang over that air and prints them at bridge speed. Going slowly there gives each line time to cool and firm up before it droops into the gap. Leave it on.
In this preset: On. Those stretches print at the bridge speed of 50 mm/s. The rest of the band prints at Vertical shell speed, 80% of the internal solid infill speed, which works out to 200 mm/s.
Sub-top surface pattern
The line pattern for the solid layer that holds up a top surface you can see. Its lines can print through and mark the top, so a monotonic pattern gives the smoothest result.
In this preset: Monotonic.
Walls filament
Picks which loaded filament prints the walls. On a one-nozzle printer like the A1, a different filament here adds a filament change and its purge to every layer.
In this preset: Default.
Sparse infill filament
Picks which loaded filament prints the sparse infill, the open pattern inside the part. Default keeps the part's own filament.
In this preset: Default.
Solid infill filament
Picks which loaded filament prints the solid infill, the fully filled layers inside the part.
In this preset: Default.
What do the Speed settings in Bambu Studio do?
The Speed tab decides how fast the nozzle moves for each kind of line it prints, and how quickly it speeds up and slows down. It also holds the slowdowns for overhangs and for the top part of tall prints. You'll only see this tab with the Advanced switch on. The "In this preset" values come from the A1's 0.20mm Standard preset with the 0.4 mm nozzle.
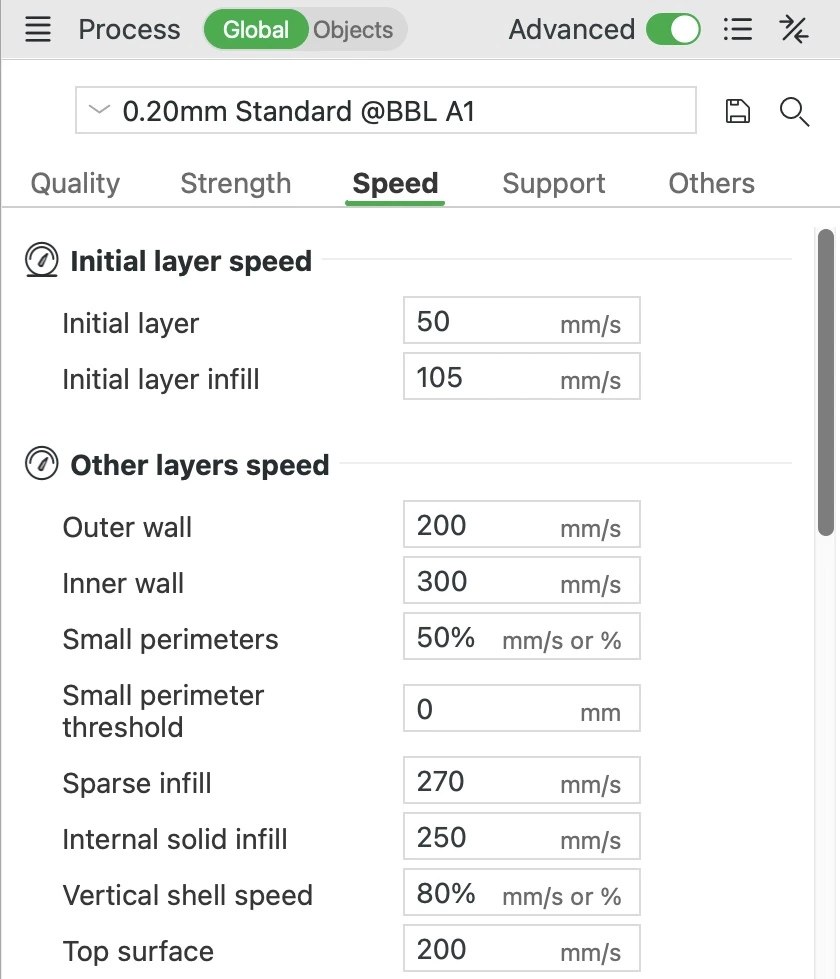
Initial layer
This is the speed of the first layer, apart from the solid infill between its walls, which has its own setting below. It covers the walls (the outlines of the part), a brim and the feet of any support. Going slowly gives the hot plastic time to press down and grip the plate. If your first layer won't stick, lower this to 30 mm/s and Initial layer infill to 60 mm/s.
In this preset: 50 mm/s, a quarter of the outer wall's 200 mm/s on the layers above.
Initial layer infill
This sets the speed of the first layer's solid infill, the lines between the walls that form the bottom face of the part. It runs slower than the solid infill higher up, so the lines have time to grip the plate. If the first layer won't stick, lower it to 60 mm/s. On a part with a big flat base this infill covers most of the first layer, so slowing it adds the most time.
In this preset: 105 mm/s.
Other layers speed
Other layers speed
These settings decide how fast each kind of line prints on every layer after the first. Faster saves time, but the plastic gets less time to melt in the nozzle and to cool once it's down. Poor cooling shows most on overhangs and bridges (lines over open air) and on small details. If you slow the whole print down a lot, also lower the nozzle temperature by 5 to 10 °C. Plastic that sits longer in the hot nozzle gets runnier and can string, ooze and build up on the nozzle.
The filament's Max volumetric speed also caps every line. It's the most plastic the nozzle may melt and push out each second, in mm³/s. Bambu Studio slows down any line that would need more. A line that asks for more than the nozzle can melt comes out with gaps and bonds weakly to the layer below. Thinner layers use less plastic per millimetre of line, so the same cap allows faster lines on them. That's why the A1's 0.08mm Extra Fine preset can set the sparse infill (the pattern inside the part) to 450 mm/s. If a print runs slower than you expect, check whether this cap is holding it back.
Small layers that print quickly get slowed down too. Each layer needs a moment to cool and firm up before the next one goes on top. The filament setting Slow printing down for better layer cooling handles this. It slows any layer that would take less than its Layer time, but not below its Min print speed. This matters most on small parts and thin tips. If they still come out soft or droopy, raise the Layer time by a few seconds.
To see the speeds your sliced print will use, set the preview's Color Scheme to Speed. The Flow scheme shows how much plastic each line needs per second, in mm³/s, which is what Max volumetric speed caps.
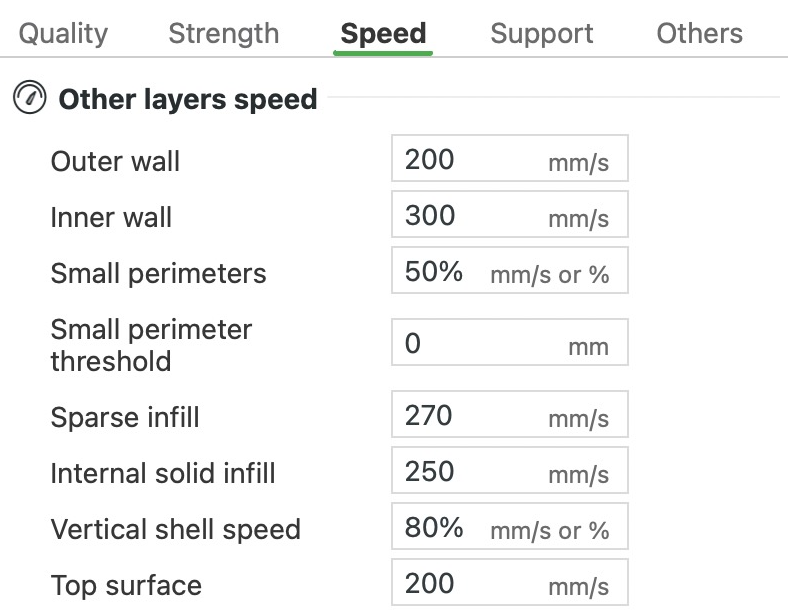
In this preset: the lines hidden inside the part are set fastest, because any roughness from the speed won't show. The inner walls (extra outlines inside the outer wall) are at 300 mm/s. The sparse infill (the open pattern inside) is at 270 and the internal solid infill (solid layers under the top) at 250. The outer wall and top surface, which you do see, are at 200 mm/s. Lines over open air are slowest, with bridges at 50 mm/s and overhangs down to 10 mm/s. Our filament, Bambu PLA Basic, has a Max volumetric speed of 21 mm³/s. That holds 0.45 mm lines on 0.2 mm layers to 258 mm/s, so the inner walls and sparse infill both print at 258. Its cooling slowdown is on, with a Layer time of 6 s and a Min print speed of 20 mm/s.
In our test, a 50 x 50 x 25 mm block printed its walls at 200 and 258 mm/s with 15% infill. With 0% infill, most layers would have finished in under 6 seconds, so the cooling slowdown dropped both walls to 97 mm/s.
Outer wall
The outer wall is the outline that forms the surface you see and touch, and this sets its speed. It usually runs slower than the inner walls, because fast moves shake the printer a little at corners and leave faint ripples. If the seam (the small mark where each layer's outline starts and ends) stands out, slowing this down can make it less visible.
Slower lines also come out glossier, because the plastic spends longer in the hot nozzle. So if Slow down for overhangs slows parts of a wall, you can get shiny and dull patches. Lowering this speed shrinks the difference, or you can turn Slow down for overhangs off. On small parts the layer-cooling slowdown can cause the same patches, and the filament option Don't slow down outer walls prevents that.
In this preset: 200 mm/s. The A1's 0.20mm Strength and 0.16mm High Quality presets use 60 mm/s.
Inner wall
Inner walls are the extra outlines inside the outer wall that make the sides thicker and stronger. Fast printing leaves faint ripples, but nobody sees the inner walls, so they can run faster than the outer wall to save time. On an overhang they hang out over the layer below too. For a part with big overhangs and no support, slowing both walls can reduce drooping.
In this preset: 300 mm/s, though Bambu PLA Basic's Max volumetric speed caps it at 258 mm/s on 0.2 mm layers.
Small perimeters
This sets a slower speed for small wall loops (the closed outlines of each layer), usually the ones around small holes. Small perimeter threshold decides which loops count as small. You can enter mm/s or a percentage of the Outer wall speed. Either way it applies to inner and outer wall loops. It can only slow a loop down, and at 0 small loops keep their normal speed.
In this preset: 50% of the outer wall speed, so 100 mm/s. But with the threshold at 0, no loop counts as small and nothing uses it.
Small perimeter threshold
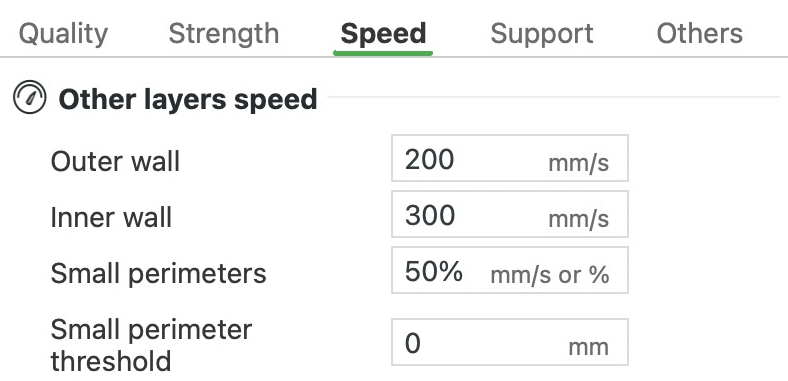


- Small perimeter speed, 100 mm/s
- Other speeds
Small perimeter threshold
This decides how small a wall loop (a closed outline) must be to print at the Small perimeters speed. You enter a radius. A loop counts as small if it's no longer than the distance round a circle of that radius. So a round loop slows down when its radius is at or below the threshold. Raise it if small holes or round details need a cleaner finish. Only those loops slow down, so it adds little time.
In this preset: 0, so no loop counts as small. All of Bambu Lab's own process presets leave it at 0.
In our test plate with holes, a 3 mm threshold slowed both loops around the 4 mm hole to 100 mm/s. Around the 5 mm hole, only the loop touching the hole slowed. The next loop out sits 3.1 mm from the centre, so it kept its speed. At 6.5 mm every hole slowed, apart from the second loop around the 12 mm hole, 6.6 mm from its centre. That added only about 10 seconds to the plate's 8-minute estimate.
Sparse infill
Sparse infill is the open pattern that fills the inside of the part. Fast lines come out a little rougher, but nobody sees the infill, so it can run fast to save time. Grid and Triangles cross their own lines within each layer. Plastic piles up a little at each crossing, and the nozzle can bump into it. Usually that does no harm. If it starts knocking the part loose, slow this down or pick a pattern whose lines don't cross, such as Gyroid.
In this preset: 270 mm/s, with the Grid pattern, though Bambu PLA Basic's Max volumetric speed caps it at 258 mm/s on 0.2 mm layers.
Slow down for overhangs
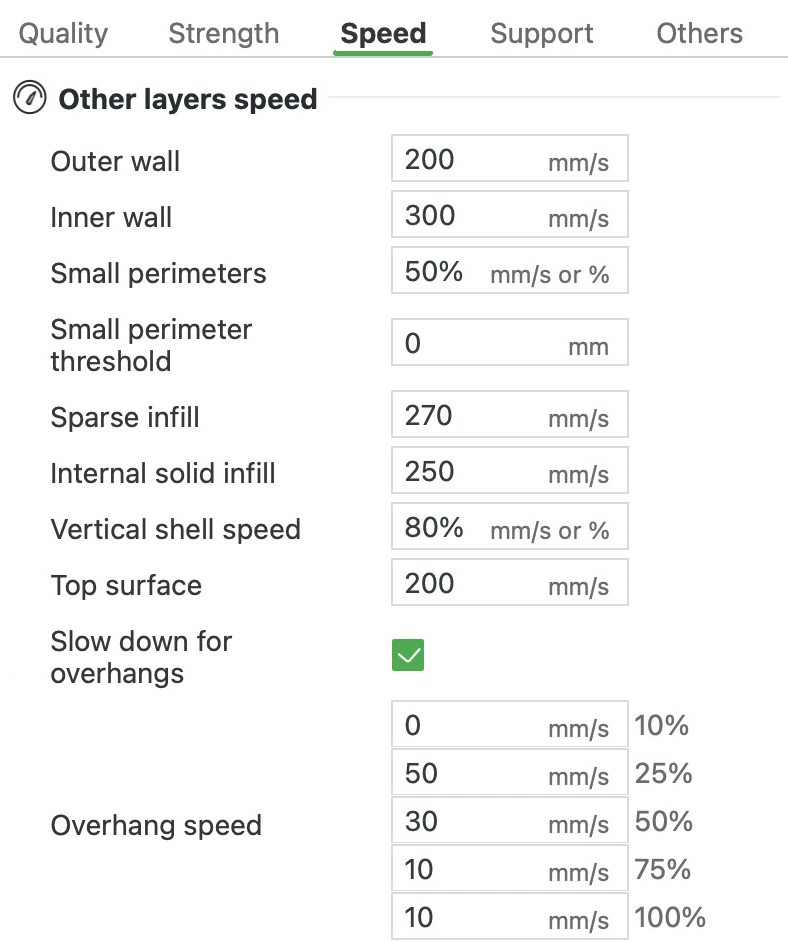
Slow down for overhangs
Overhangs are parts of a model that stick out past the layer below. This slows the walls (each layer's outlines) only where they hang out. A line with little under it needs time to cool and firm up before it droops. The rest of the print keeps its speed. If overhangs still droop, lower the Overhang speed fields. Bambu's A1 presets use 10 to 60 mm/s, slower the further a line hangs out. Nearly flat overhangs need support instead, and Threshold angle on the Support tab decides which ones get it.
The Overhang speed row has five fields, 10%, 25%, 50%, 75% and 100%. Each is how much of a line's width hangs past the layer below, and 100% means the line has nothing under it. With the Classic wall generator, which this preset uses, the speed blends between two fields. So with 50 mm/s at 25% and 30 mm/s at 50%, a line hanging out 40% prints at 38 mm/s. A field set to 0 means no slowdown at that level. Turn Slow down for overhangs off and the row disappears. Walls then keep their normal speed, except ones that hang out completely, which print at the Bridge speed.
In this preset: on, with 0 (no slowdown) at 10%, 50 mm/s at 25%, 30 mm/s at 50%, and 10 mm/s at 75% and 100%.
In our test slab, the wall slowed from 200 mm/s to 110 mm/s on a face leaning 30° from upright. At 45° it slowed to 36 mm/s, and at 60° to 10 mm/s. We turned off the filament's Slow printing down for better layer cooling for this test, so only this setting changed the speed. With the setting off, only the part of the wall with nothing under it slowed, to the 50 mm/s bridge speed. The slab then took about 11 minutes instead of almost 13.
In our test plate, the 5 mm hole starts on top of a wider 10 mm hole. Its first two wall loops have nothing below them, so they print at 10 mm/s.
Slow down by height
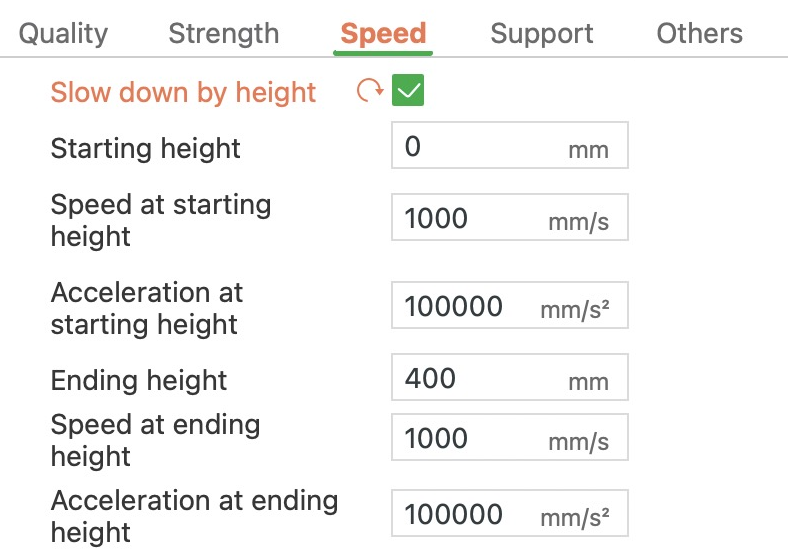
Slow down by height
This lowers the maximum speed and acceleration (how hard the nozzle speeds up) as the print gets taller. The A1 slides its bed back and forth, and that motion shakes a tall, thin part. It can come loose or fall over. Slower upper layers make that less likely, and only those layers take longer. If a tall, thin part falls over, turn this on and set lower limits for its upper part.
Turn on Slow down by height, then set Starting height, where the slowdown begins. Speed at starting height and Acceleration at starting height are the limits at that point. From there the limits change evenly up to the Ending height, where they reach Speed at ending height and Acceleration at ending height. Above that they stay the same. The Ending height must be higher than the Starting height, or nothing happens. A limit only slows lines that are set faster than it. It applies to the part's own lines and the jumps the nozzle makes to reach them, but not to support, a brim or a skirt. You can also set it on one part only, or on a modifier (a shape that changes settings for one region of a part).
In this preset: off. Turning it on without changing the limits does nothing, because the preset's limits of 1000 mm/s and 100000 mm/s² are far above anything it prints.
In our test we used a cylinder 30 mm across and 170 mm tall, with the filament's cooling slowdown off. Bambu Studio estimated it at about 1 hour 19 minutes. We set 200 mm/s at 120 mm and 60 mm/s at 162 mm, with acceleration held at 2000 mm/s² from 120 mm up. That raised the estimate to about 1 hour 38 minutes. The outer wall printed at 200 mm/s up to 120 mm, 130 mm/s at 141 mm and 60 mm/s from 162 mm to the top.
Bridge
A bridge is a line stretched across open air between two points that hold it up, such as the roof over a hole. This sets how fast bridges print. Bambu says bridges sag when they print too slowly with too much plastic. So if bridges sag, raise this speed a little, or lower Bridge flow (Bambu suggests 0.9). If the lines get pulled apart instead, the speed is too high for the flow, so slow down or turn on Thick bridges. Bridge flow and Thick bridges are on the Quality tab.
Walls that hang completely over air also print at this speed while Slow down for overhangs is off. Straight walls over air use it even when it's on. The underside of a part resting on support prints as a bridge too.
In this preset: 50 mm/s.
In our test plate, the lines across the top of the 10 mm hole, where the 5 mm hole starts, printed at 50 mm/s. So did the first solid layer laid over the infill inside the plate.
More Other layers speed settings
- Internal solid infill: The speed of the solid infill you don't see. That's the layers under the top surface and over the bottom one, plus areas too small for the open infill pattern. 250 mm/s in this preset.
- Vertical shell speed: The speed of narrow strips of solid infill that sit on the open infill below. The extra solid infill added near sloping surfaces is one example. As a percentage, it's taken from Internal solid infill. It only shows while Detect narrow internal solid infill (Strength tab) is on. 80% in this preset, which works out to 200 mm/s.
- Top surface: The speed of the solid skin you see on top of the part. It runs slower than the hidden solid infill under it (250 mm/s) because it's on show. 200 mm/s in this preset.
- Gap infill: The speed of the short lines that fill gaps too narrow for another wall loop. A gap changes width along its length, so Bambu Studio's own tip says to print these lines more slowly. 250 mm/s in this preset, as fast as the internal solid infill.
- Support: The speed of support, and of a skirt (a loop around the part) above the first layer. Lines the preview calls Support transition use the Bridge speed. It only appears once support, a raft or a skirt is on. 150 mm/s in this preset.
- Support interface: The speed of the support layers that touch the part. It only shows while support is on. 80 mm/s in this preset, about half the support speed.
Travel
Travel moves are the jumps the nozzle makes to the start of its next line without printing. Nothing comes out during a travel, so there's no line to spoil and it can go much faster than printing. To slow travel only on the upper layers of a tall part, use Slow down by height. Above its Starting height it also limits the travel moves to the lines it slows.
In this preset: 700 mm/s, the same in every A1 preset for the 0.4 mm nozzle. That's above the A1's rated top speed of 500 mm/s. Bambu Studio also writes a 500 mm/s limit for side-to-side and front-to-back moves into the G-code (the list of moves the printer follows).
Normal printing
Acceleration is how quickly the nozzle gets up to speed and slows down again. This sets it for every line after the first layer that has no value of its own below. Higher values save time on short lines and at corners. But every hard start and stop shakes the printer a little, which can leave faint ripples on the surface. On the A1, every front-to-back move slides the whole bed, with your part on it. The A1's Vibration Compensation calibration, in the printer's calibration menu, reduces these ripples. If a tall, thin part falls over, lower this, or use Slow down by height to lower it only on the upper layers.
In this preset: 6000 mm/s².
More Acceleration settings
- Travel: The acceleration of travel moves (jumps without printing) after the first layer. Short jumps onto the outer wall use a gentler 250 mm/s² instead, from a hidden setting that reduces fine ripples on the surface. 10000 mm/s² in this preset, the highest in this group.
- Initial layer travel: The acceleration of travel moves on the first layer. 6000 mm/s² in this preset.
- Initial layer: How hard the nozzle speeds up while printing the first layer. Gentler starts and stops can help the first lines stick to the plate. 500 mm/s² in this preset, the lowest printing value it uses.
- Outer wall: The acceleration of the outer wall and of walls that hang over air. A lower value can give a cleaner outside with fewer ripples. 5000 mm/s² in this preset; the 0.16mm High Quality preset uses 2000.
- Inner wall: The acceleration of the inner walls. At 0 they use Normal printing. 0 in this preset, so they get 6000 mm/s².
- Top surface: The acceleration of top surfaces. A lower value may give a smoother top. 2000 mm/s² in this preset.
- Sparse infill: The acceleration of the open infill inside the part, in mm/s² or as a percentage of Normal printing. 100% in this preset, so 6000 mm/s².
- Enable accel_to_decel: Only for printers running Klipper firmware, so it's hidden for the A1. It lets Bambu Studio set Klipper's max_accel_to_decel value for you. Off in this preset.
- accel_to_decel: The share of the acceleration that Klipper's max_accel_to_decel gets set to while Enable accel_to_decel is on. Hidden for the A1 too. 50% in this preset.
Jerk(XY)
Jerk is how big a sudden change in speed the printer allows without easing into it, for example at a corner. Bambu Studio hides these settings for Bambu Lab printers, the A1 included. It only writes them into the G-code (the list of moves the printer follows) for other printers, and only while Default is above 0.
Default applies to every move that has no value of its own. At 0, the other fields are greyed out. Outer wall, Inner wall, Infill, Top surface, First layer and Travel set it for those moves. All values are in mm/s.
In this preset: hidden, and not used on the A1.
What do the Support settings in Bambu Studio do?
Support is extra plastic printed under overhangs, the parts of a model that would otherwise hang in the air. You break it off after printing. This page decides whether your print gets support, which kind, and how it meets your part. Its settings sit in five groups: Support, Raft, Filament for Supports, Advanced and Tree Support. Most stay greyed out until you turn on Enable support or add a raft.
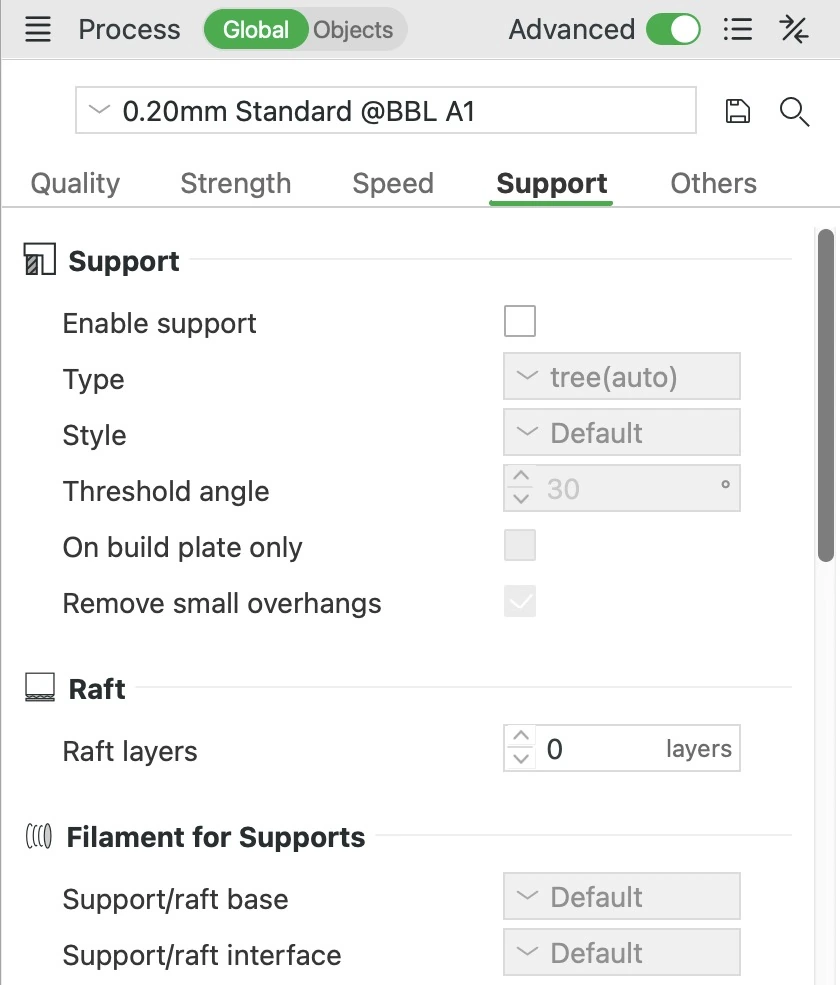
Enable support
This switches on support, the temporary structure printed under parts of your model that would otherwise hang in the air.
Plastic printed over air droops, because nothing holds it up while it cools. You need support for faces flatter than about 30° from level, parts that start in mid-air, and ledges held at one end only. Turning the model on the plate can often remove those overhangs, so you need no support and have nothing to clean off.
Remove support within about 2 hours of the print finishing. Some plastics soak up moisture from the air and go soft, which makes support harder to remove and can leave bits on the part. This matters most for nylon (PA) parts and for PVA or Support for PA/PET supports. If it's already soft, dry the print and let it cool first.
In this preset: Off. You can also turn it on for a single object, which then overrides this setting.
Type
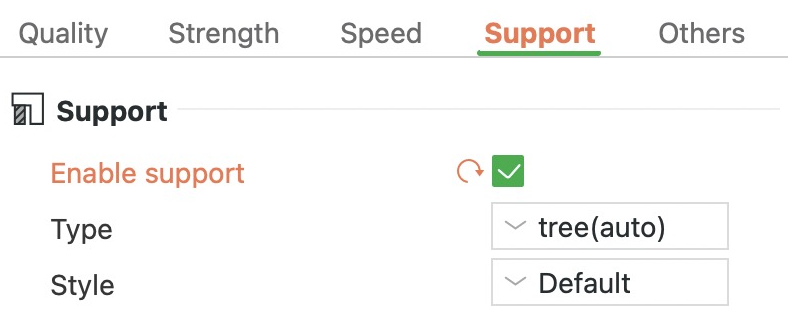


- Support
Type and Style, on our Coral lamp
This picks the kind of support. Normal support fills the space straight below each overhang. Tree support grows branches up to the overhang that join into trunks lower down.
Normal support usually leaves the better surface under a large flat overhang, such as a shelf, because it holds the whole area evenly. On complex models whose overhangs are mostly small and not flat, tree support is stronger and uses less plastic and time. The (auto) types find the overhangs for you, while the (manual) types only support areas you mark, for example with the support painting tool.
In our test, normal support under the wide cap of a 60 mm mushroom added about 19 to 24 minutes. The tree styles added about 40 to 45 minutes.
In this preset: tree(auto). It stays greyed out until you turn on Enable support or add a raft.
Style


- Support
Type and Style
Style sets the shape of the support. Normal and tree support each have their own styles.
For normal support, Grid lays the support out on a regular grid a little wider than the overhang, so it stands more steadily. Snug hugs the outline of the overhang, which uses less plastic and leaves fewer marks on the part.
For tree support, Tree Organic grows smooth, curving branches. It has fewer interface layers (the dense layers that touch your part), so it comes off more easily. Tree Slim merges branches sooner into a much smaller support and adds walls to keep it strong. Tree Strong builds bigger, stronger branches that use more plastic. Tree Hybrid puts normal support under large flat overhangs and tree support everywhere else, and Bambu's wiki calls it a safe choice in general.
In our test, a 60 mm mushroom weighed 16.4 g with no support. Grid added 14.4 g, Snug 12.4 g, Tree Organic 8.4 g, Tree Slim 11 g and Tree Strong 16.6 g.
In this preset: Default, which means Grid for normal support and Tree Organic for tree support. For tree support, Default switches to Tree Hybrid when Top Z distance is 0, as with a support material. It does the same when layer heights vary, as with adaptive layer height, because Tree Organic only prints on evenly spaced layers.
Threshold angle
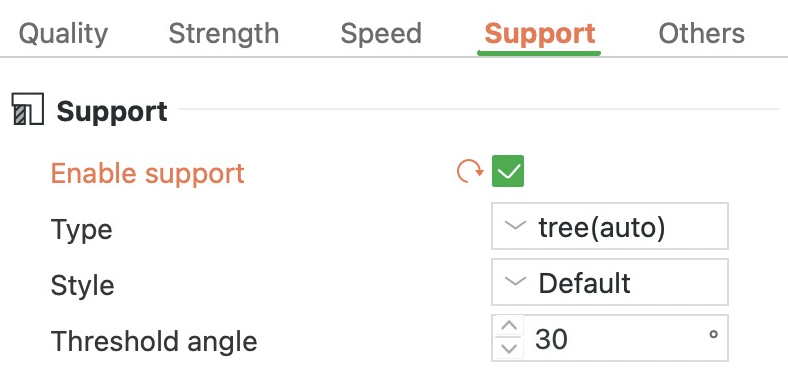


- Support
Threshold angle
Faces that slope flatter than this angle get support. The angle is measured from level, so 0° is a flat ceiling and 90° is a vertical wall.
On a slope, each layer sticks out a little past the one below, and the flatter the slope, the further it hangs over air. Faces steeper than 45° generally print fine without support. If faces between 30° and 45° come out droopy, raise the angle to 45°. A higher angle adds support under more of the model, which costs plastic and time.
In our test with brackets sloping at 15°, 30°, 45° and 60°, a face at exactly the set angle got support too. The brackets took about 29 minutes and 7.3 g at 15°, and 34 minutes and 10.4 g at 60°.
In this preset: 30°, which Bambu's wiki calls a safe angle for most materials to print without support. It only works with the (auto) types.
On build plate only
Turn this on to make support stand only on the build plate, never on your model's own surfaces.
Support standing on the model leaves marks where it touches, so turn this on to keep those surfaces clean. An overhang above another part of the model may then get no support, because support can't reach the plate from there. Check the sliced preview for anything left hanging over air.
In this preset: Off, so support can stand on the model.
Support critical regions only
With this on, only critical spots such as sharp tails and cantilevers get support.
A sharp tail is a small part that starts in mid-air, away from the rest of the model. A cantilever is a ledge held at one end only. Both need support even when small, because a sharp tail would start on thin air and a cantilever's free end droops. Turn this on when the model's other overhangs print well on their own, to save the plastic and cleanup.
In this preset: Off. You'll only see it after you turn support on with Type set to tree(auto).
Remove small overhangs
This leaves support out under overhangs so small that they probably print fine without it.
Each tiny support costs plastic and leaves a mark to clean up, so skipping them saves both. Sharp tails and cantilevers keep their support even when small. Turn it off only if a small detail you care about comes out drooping.
In this preset: On.
Raft layers


- Raft
Raft layers
This sets how many layers make up a raft, a thin platform printed on the plate first with your object built on top.
A raft is wider than your object, so it grips the plate over a larger area. That can reduce warping (corners curling up off the plate as the plastic cools and shrinks) with plastics such as ABS. It costs time and plastic and has to be broken off, so leave it at 0 unless warping is a problem.
Bambu's wiki doesn't recommend ABS, ASA, PC or nylon on open-frame printers like the A1. These plastics need warm air around them to keep from warping, and an open frame leaves them in room-temperature air. Large parts with dense infill (the pattern inside) warp the most.
In our test on a 50 mm ring, 2 raft layers added about 2 minutes and 0.8 g and lifted the ring 0.6 mm. 4 layers added about 3 minutes and 1.2 g and lifted it 1.2 mm. Both heights include the 0.1 mm gap above the raft.
In this preset: 0, so there's no raft.
Raft contact Z distance
This is the small gap between the top of the raft and the bottom of your object.
The gap stops your object from fusing to the raft, so you can break the raft off. Because of the gap, the first layer of the object is printed like a bridge (lines stretched across air), at the slower bridge speed. A bigger gap makes the raft easier to remove but leaves the underside of the object rougher.
In our test ring, those lines printed at 50 mm/s on the raft, compared with 105 mm/s straight on the plate.
In this preset: 0.1 mm. You'll only see it when Raft layers is above 0 and Top Z distance is above 0. With Top Z distance at 0, the usual setting with a support material, there's no gap and the object sits right on the raft.
Support/raft base
This picks the filament for the support base and any raft. The base is the bulk of the support, below the few dense layers that touch your part.
Default uses whichever filament is already printing on that layer. That keeps filament changes down, and each change takes time and flushes plastic out of the nozzle. Keep Default even with a support material for the interface. A whole support in support material costs more time and filament, and tall, thin support made entirely of it can bend or fall over. Bambu Studio warns you if you pick a non-dissolving support material here.
A soluble material such as PVA is the exception: use it for both base and interface, so the whole support dissolves in water. Bambu Studio suggests this when you choose PVA.
In this preset: Default.
Support/raft interface
This picks the filament for the interface, the dense layers of support that touch your part, and for the top of a raft.
Support in your part's own plastic needs a small gap or it fuses to the part, and the gap leaves the underside rougher. A support material doesn't bond firmly to your part's plastic. It can touch the part with no gap and still come away, leaving a smooth underside. Use it for the interface only, with the base in your part's plastic, to save time and filament.
Pick a support material made for your part's plastic, such as Support for PLA under PLA. Using it under a hotter plastic, such as Support for PLA under ABS, can clog the nozzle. On the A1, with a support material that doesn't dissolve, set Top Z distance and Top interface spacing to 0. Also set Interface pattern to Rectilinear Interlaced and turn off Independent support layer height. Bambu Studio offers to make these changes when you choose the material.
In this preset: Default, so the interface uses the filament already printing on that layer.
Avoid interface filament for base
When Support/raft base is left at Default, this keeps your interface filament out of the base wherever it can.
Without it, the base may print in your support material on layers where that filament is already loaded. That uses up support material where your part's plastic would do. Leave it on.
In this preset: On. You'll only see it after you pick a filament for Support/raft interface while Support/raft base stays at Default.
Top Z distance


The whole T, 60 mm wide, 40 mm tall, cut in half
- Support
- Your part
Top Z distance
Top Z distance is the small gap between the top of the support and the underside of the part it holds up.
The gap stops the support fusing to your part. A bigger gap makes support easier to remove, but the underside is printed over more air and comes out rougher. A smaller gap gives a better surface, but the support sticks harder. With support in your part's own plastic, keep about 0.2 mm, because at 0 it fuses and is hard to remove. Use 0 only with a support material, which comes away even with no gap.
The gap barely changes the cost. In our test on a 60 mm T with normal support, every gap from 0 to 0.3 mm gave about 15.6 g and 39 minutes.
In this preset: 0.2 mm.
Bottom Z distance
This is the gap under support that stands on your part instead of on the plate.
The gap stops that support fusing to the surface below, so leave it as it is when the support is in your part's own plastic. With PVA supporting a PLA part, set it to 0, since PVA dissolves in water. Note that 0 here means 'same as Top Z distance', so the gap only closes if Top Z distance is 0 too.
In this preset: 0.2 mm.
Base pattern


The whole T, 60 mm wide, 40 mm tall, the view is its lowest 6 mm
- Support
Base pattern
This is the pattern of lines that fills the body of the support.
Rectilinear lays straight lines that run the same way on every layer. Rectilinear grid turns them 90° from one layer to the next, so they cross. That makes a stiffer support, which can be harder to break away. Honeycomb builds six-sided cells. That makes a sturdy support, but in our test it took the longest. Lightning, for tree support only, fills the inside with a few thin branching lines, which saves plastic but is weaker. Hollow, also for tree support, leaves the inside empty, so each branch is only its wall.
In our test on a 60 mm T with normal support, Rectilinear grid added only 0.1 g and about 20 seconds over Default. Honeycomb added about 1.5 g and 9 minutes. With normal support, Lightning and Hollow printed the same as Rectilinear. With Tree Organic, the pattern made no difference. With Tree Slim, Lightning came to 9.7 g, compared with 10.2 g for Rectilinear.
In this preset: Default. That's Rectilinear for normal support and for Tree Hybrid, and Hollow for the other tree styles.
Base pattern spacing
This sets how far apart the lines in the body of the support are.
Wider spacing uses less plastic and time but makes the support weaker. Closer spacing makes it stiffer but costs more. With Honeycomb, the spacing sets how big the cells are. Hollow has no fill lines, so the value does nothing there.
In this preset: 2.5 mm.
Top interface layers
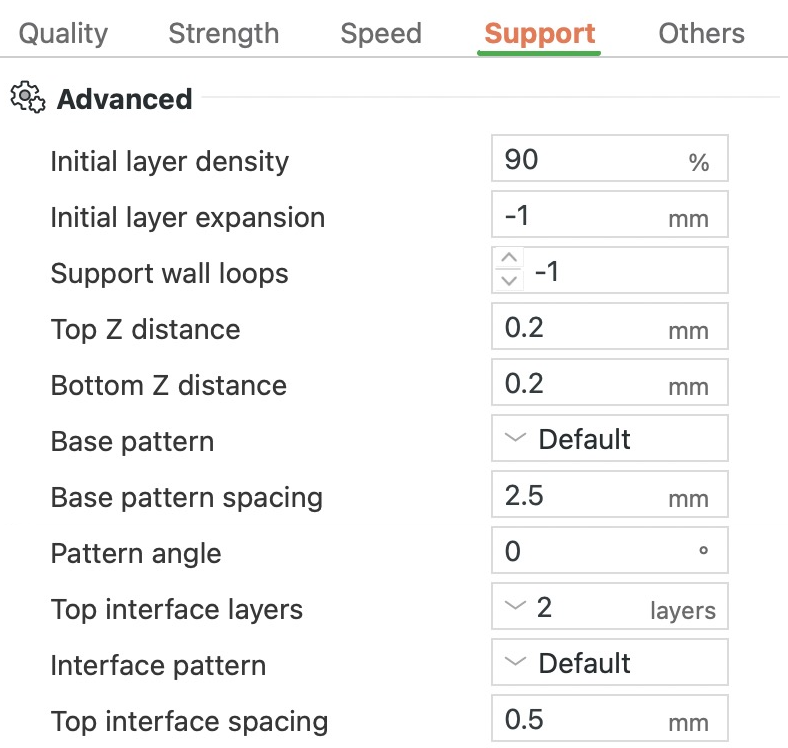
- Your part
- Support interface
- Support
Top interface layers, Interface pattern, Top interface spacing
This is how many dense layers top the support, making the flat surface your part's underside is printed on.
The support below is an open pattern with gaps between its lines, and the interface closes them. At 0, your part's underside is printed straight onto the open pattern and can sag into the gaps. More layers make a flatter surface for a little more plastic, and 3 gives the least sag. The underside is only free of sag when Top Z distance is also 0.
In our test on a 60 mm T, leaving out the top interface saved only 0.35 g and 55 seconds.
In this preset: 2 layers.
Bottom interface layers
When normal support stands on your part, this sets how many dense layers form its foot.
A dense foot gives the support more contact with the surface below, so it stands more steadily. At 0 it starts on your part with open lines that grip less, which makes everything above it less stable.
In this preset: 2 layers. Picking Same as top copies the Top interface layers value. It disappears while tree support is on, so with this preset it goes away once you turn support on.
Interface pattern
This picks the line pattern of the interface, the dense layers where the support meets your part.
Rectilinear lays straight lines that run the same way on every layer. Rectilinear Interlaced swings its lines 45° one way, then the other, on each new layer, so the layers cross. It's the pattern Bambu Studio sets for support materials. With normal support in the Grid style, Bambu Studio keeps the lines all one way instead. Concentric lays loops that follow the outline of the area. Grid crosses its lines within each layer, which makes a stiff interface that can be harder to pull off.
In our test on a 60 mm T, Concentric took 6 seconds longer than Default and weighed the same, about 15.6 g.
In this preset: Default, which Bambu Studio prints as Rectilinear Interlaced.
Top interface spacing
This is the gap between the lines of the top interface layers.
At 0 the lines touch and the interface is solid, so your part's underside rests on a closed surface. That's the value to use with a support material. With support in your part's own plastic, keep the gap, because a solid interface costs extra plastic and time.
In our test on a 60 mm T, a solid interface added about 0.6 g and 80 seconds.
In this preset: 0.5 mm.
Support/object xy distance
This is the sideways gap between your part's walls and the support next to them.
If the gap is too small, the support touches the walls and fuses to them, which makes it hard to remove. Raise it if support sticks to a wall next to an overhang. With a soluble support material such as PVA, set it to 0, since that support dissolves in water.
In this preset: 0.35 mm.
Don't support bridges
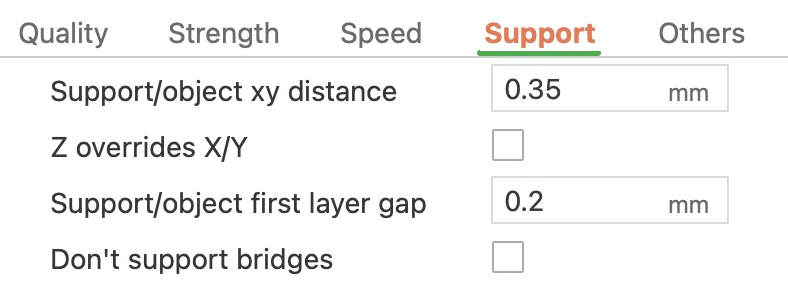

- Support
Don't support bridges
A bridge is a flat span printed across open air, held up at both ends. Turn this on to leave normal support out from under bridges.
Turn it on when your bridges are short. Each line of a bridge is held at both ends, so a short span prints well enough on its own. You also save the support and its cleanup. Leave it off for long spans, because the middle sags without support. How long a span prints cleanly depends on the plastic.
In our test, leaving a 30 mm span unsupported saved about 2 g and 4 minutes. The underside printed with the same bridge lines either way. They rested on the support when it was there and crossed open air when it wasn't.
In this preset: Off, so bridges get support. It disappears while tree support is on, which uses Max bridge length instead, so with this preset it goes away once you turn support on.
Max bridge length
Tree support leaves bridges (flat spans across open air, held at both ends) up to this length without support.
Longer bridges are supported along their whole length like any other overhang. At 0 every bridge gets support, and a value well above your biggest bridge leaves them all unsupported. Raise it only as far as your plastic bridges cleanly. In Tree Slim, Tree Strong and Tree Hybrid, values over twice the Branch distance also spread the branch tips wider inside large overhangs.
In this preset: 0 mm, so every bridge gets support. You'll only see it while tree support is on.
Independent support layer height
Turn this on to let the support print in layers of its own height instead of copying your part's layers.
The support can then use thicker layers, up to 0.28 mm with the A1's 0.4 mm nozzle, so large supports print faster. With it off, Top Z distance and Bottom Z distance round to whole layers: with 0.2 mm layers, a 0.1 mm gap becomes 0.2 mm.
Bambu Studio switches this off whenever there's a prime tower, the small tower printed beside your model to clean the nozzle after each filament change. In this preset, a print with more than one filament normally gets one, so adding a support material turns this off. A Smooth timelapse adds a prime tower too.
In this preset: On. Tree Organic, which Default picks for tree support, always prints on your part's layers, so with Tree Organic it changes nothing.
More Advanced settings
- Initial layer density: How densely the first layer of a raft or of support is filled. A fuller first layer touches the plate over more area, so raise it if support or a raft comes loose. 90% in this preset.
- Initial layer expansion: Widens the first layer of a raft or of support so it grips the plate over a bigger area. Widen it if tall support or tree trunks come loose from the plate. -1 (Bambu Studio chooses) in this preset.
- Support wall loops: How many walls (outlines) go around the support, from -1 to 2. 0 lets thick parts print with no wall. 2 gives every tree branch a double wall, which is sturdier but uses more plastic. -1 (Bambu Studio chooses) in this preset.
- Pattern angle: Turns the support's line pattern as seen from above. It only changes which way the lines run. 0° in this preset.
- Normal Support expansion: Makes normal support wider than the overhang with a positive value, or narrower with a negative one. Wider support stands more steadily and narrower support uses less plastic, the same trade-off as between the Grid and Snug styles. 0 mm in this preset.
- Z overrides X/Y: When on, Bambu Studio puts getting support under overhangs first. The sideways gap to the part can then shrink from Support/object xy distance to the Top Z distance, but not below 0.2 mm. Bambu Studio recommends it only with Tree Hybrid. Off in this preset.
- Support/object first layer gap: The sideways gap between your part and its support on the first layer only. If it's too small, the support touches the part and is hard to remove. 0.2 mm in this preset.
Branch distance
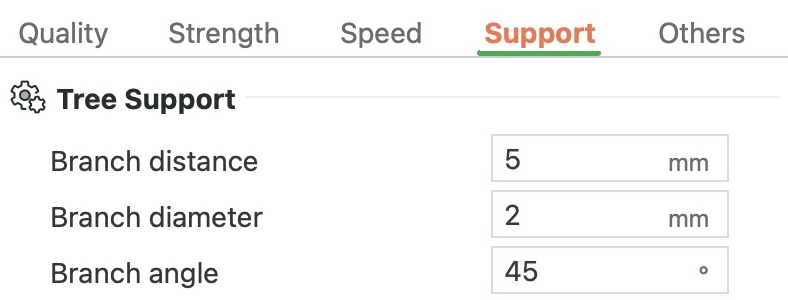


- Support, Tree Slim
Branch diameter, Branch angle, Branch distance
This sets how far apart the branch tips sit where they touch the underside of your part.
Closer tips hold the surface at more points, so it sags less between them and looks better, but the support is harder to remove. Wider spacing uses less support. Like the other settings in the Tree Support group, it only shows while tree support is on.
In our test on a 60 mm T with Tree Slim, 10 mm took about 34 minutes and 9.2 g. At 5 mm it took 36 minutes and 9.7 g. With Tree Organic, the change made no difference.
In this preset: 5 mm.
Branch diameter
This is how thick each tree branch is once it has grown out of its tip. The tip, where it touches your part, has its own setting, Tip diameter (0.8 mm in this preset).
Thicker branches are stronger but use more plastic and are harder to remove. Raise it if thin branches bend or snap and can't hold the part steady.
In our test with Tree Slim, 5 mm branches weighed 11.1 g, compared with 9.7 g at 2 mm. Both took about 36 minutes.
In this preset: 2 mm.
Tip diameter
How thick each tree branch is where it touches your part. A thicker tip holds the part more firmly, but it leaves bigger marks and is harder to remove.
In this preset: 0.8 mm.
Branch angle
This limits how far from upright a tree branch can lean.
A larger angle lets branches lean further, so they can reach around the model and gather into fewer trunks. A smaller angle keeps them nearly upright, so more trunks rise from the plate and the support gets bigger. You can set anything from 0° to 60°.
In our test with Tree Slim, 15° took about 50 minutes and 15 g, compared with 36 minutes and 9.7 g at 45°.
In this preset: 45°.
Branch diameter angle
This sets how quickly tree branches thicken towards the plate.
At 0 they keep one thickness all the way down. A small angle widens their feet, which can make the tree more stable. The range is 0° to 15°.
In this preset: 5°.
What do the Others settings in Bambu Studio do?
The Others tab covers the skirt and brim around your print, and the prime tower and purge options for multi-colour prints. It also holds special modes such as Spiral vase and Fuzzy Skin. From top to bottom, its groups are Bed adhesion, Prime tower, Purge options, Special mode, Advanced, G-code output, Post-processing scripts and Notes. Every "In this preset" value comes from the A1's 0.20mm Standard preset with the 0.4 mm nozzle.
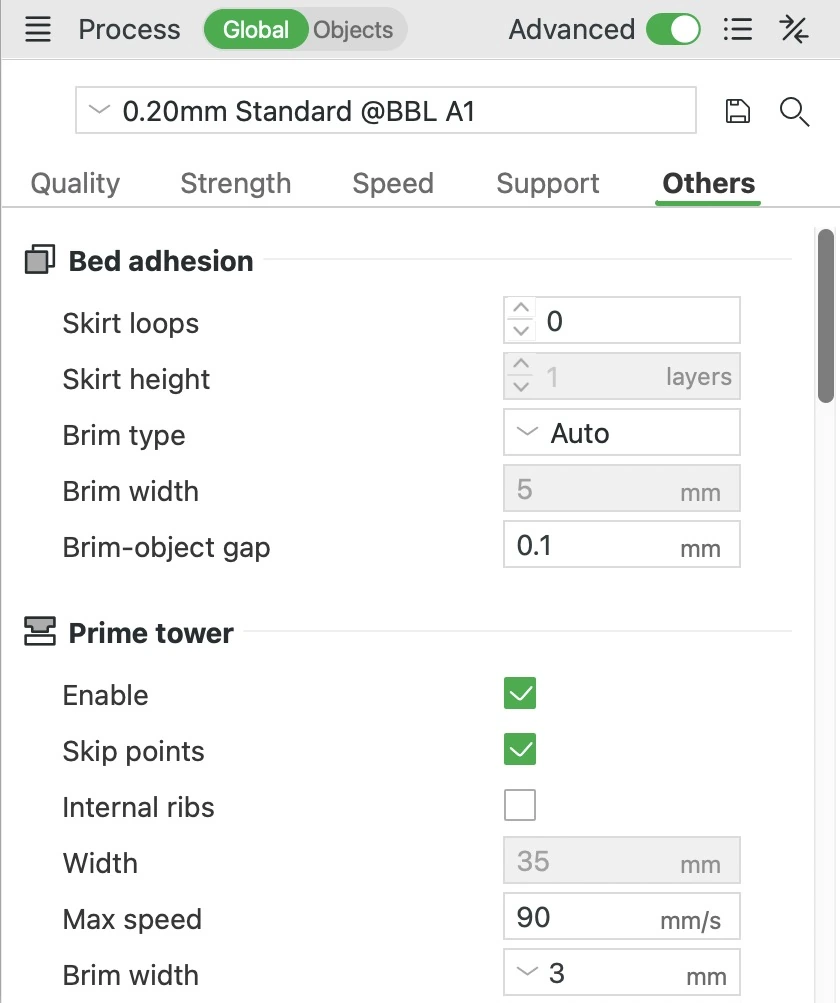
Skirt loops
- Skirt or brim
- The ring
Skirt loops
A skirt is a thin outline drawn on the plate around your parts before they start printing. This setting is how many times it goes around. It gets plastic flowing through the nozzle and shows you whether the first layer sticks. It stays clear of your parts, so it doesn't hold them down. The A1 already pushes out fresh plastic and draws a short test line at the start of every print. That does the same job, so you don't need a skirt for it. Add a loop if you want to check the first layer before your part starts.
In this preset: 0 loops, so there's no skirt. A skirt you add sits 2 mm from your parts or their brim. In our test on a ring 50 mm across, one loop added 4 seconds and three loops added 11.
Skirt height
This is how many layers tall the skirt is, and one is normal. It's greyed out while Skirt loops is 0. With Print sequence on By object (one object at a time), a taller skirt resets to one layer. Otherwise the print head could hit it between objects.
In this preset: 1 layer.
Brim type


- Brim
Brim type
A brim is a flat ring of plastic, one layer thick, joined to the bottom edge of your part and peeled off after printing. It gives the part more grip on the plate, which helps tall, thin parts stay put. Plastics that shrink as they cool, such as ABS, tend to pull their corners up. A wide enough brim helps hold them down. This setting decides whether each part gets a brim, and where.
Auto works out a brim for each part from its shape, its plastic and the print speed. A tall part on a small footprint usually gets a wider brim. A low, wide part often gets none, because Auto skips any brim narrower than 5 mm. Leave it on Auto unless a part needs something else. Outer brim only, Inner brim only and Outer and inner brim use the width set in Brim width. They put the brim around the outside, inside the holes, or both. An inner brim needs a hole that reaches the plate. Painted makes brim ears instead, small round pads you place with the Brim Ears tool. Put them on sharp corners that tend to lift. They're easier to remove than a full brim. No-brim turns the brim off. You can give each object on the plate its own brim settings.
In this preset: Auto. In our test, it gave a ring 50 mm across and 8 mm tall no brim. A post 10 mm across and 60 mm tall got a brim 20 lines wide, reaching 9.3 mm out.
Brim width
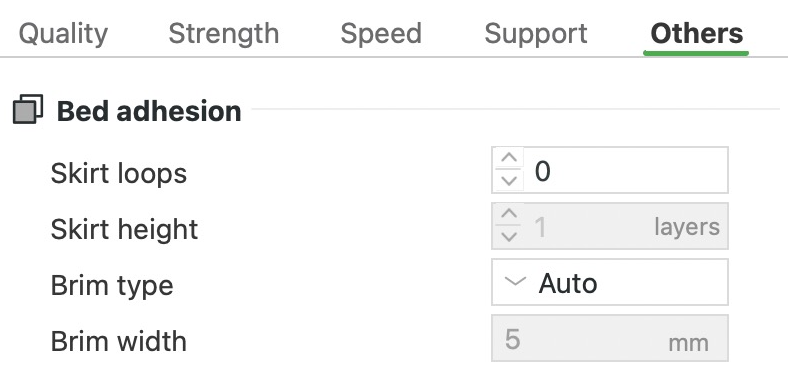


- Outer brim
Brim width
Brim width sets how far the brim reaches out from your part. A wider brim grips the plate over a bigger area, so it holds the part down better. It also takes longer to print and more work to peel off. If a PLA part's corners still lift, try 8 to 10 mm. The box is greyed out for Auto, Painted and No-brim. To use it, set Brim type to Outer brim only, Inner brim only or Outer and inner brim.
In this preset: 5 mm. In our test on a ring 50 mm across, the 5 mm brim added about 35 seconds and 0.2 g. A 10 mm brim added about 45 seconds and 0.2 g more than that.
Brim-object gap
This is the small gap between your part and the brim. It applies with Auto too, and only greys out with No-brim. A smaller gap joins the brim to the part more firmly. A bigger gap makes the brim easier to snap off. Even at 0, the preview can show a gap. That's because Elephant foot compensation, on the Quality tab, pulls the first layer's outline in slightly to stop the bottom of the part bulging out. In the real print, the squashed first layer usually fills that gap. To make the preview show the brim touching the part, set Elephant foot compensation to 0 as well.
In this preset: 0.1 mm, a hairline gap that helps the brim come away cleanly. Elephant foot compensation is 0.075 mm.
Prime tower
Enable, at the top of the Prime tower group, turns on the prime tower. That's a small block printed next to your parts when a print switches filament. After each switch, the nozzle prints a little on the tower first. That clears leftover plastic off the nozzle and evens out the pressure inside it. The messy first bit after a change lands on the tower instead of your part.
Leave it on. The tower is only built when the plate prints in more than one filament, or when Timelapse is set to Smooth. So one-colour prints don't pay for it. Without it, the Purge options stop working, and the first lines after each change land on your part. Leftover colour and uneven flow can then show up as mixed colours, strings or thin spots. The tower only rises to the last colour change, and a plate of several objects printed By object gets none. On the A1, leave it in its default back-left corner. That's close to the purge wiper, where the nozzle clears out the old colour, so the trips stay short.
In this preset: On (Enable is ticked).
Rib wall
Rib wall keeps the tower close to square and adds four ribs at its corners to make it steadier. Bambu Studio sizes a ribbed tower from how much plastic it has to take at each filament change, so Width is greyed out. Taller towers also get a bigger minimum footprint. If the plastic alone wouldn't fill that, or Extra rib length is above 0, the ribs stick out past the corners at the bottom. They shrink back to the corners at the top, so the tower stands on a wider foot. Leave it on. Turn it off only to set Width yourself, for example when the tower is short and space on the plate is tight.
In this preset: On, with Extra rib length at 0 mm, Rib width at 8 mm and Fillet wall on.
More prime tower settings
- Skip points: Leaves a short gap in the tower's outer wall where the nozzle starts printing on it after each filament change. On in this preset.
- Internal ribs: Adds ribs inside the tower to make it sturdier. Turn it on if tall towers wobble or fall over. Off in this preset.
- Width: How wide the tower is. You can only change it with Rib wall off. 35 mm in this preset.
- Max speed: The top speed for printing the tower. It doesn't cover ramming, a step that only printers with more than one nozzle use when they switch nozzles. 90 mm/s in this preset.
- Brim width: A brim around the foot of the tower that helps it stay stuck to the plate. Auto, or any negative number, sizes it from the tower's height, up to 8 mm for a tower 100 mm or taller. 3 mm in this preset.
- Infill gap: The spacing of the lines inside the tower, as a percentage of the line width. At 150%, half a line width of space is left between lines. At 100%, the lines touch. 150% in this preset.
- Extra rib length: A positive value makes the ribs longer, which takes more room on the plate. A negative value shortens them, though never below the size the tower needs to clean the nozzle. 0 mm in this preset.
- Rib width: How thick the ribs are. Bambu Studio keeps them under half the tower's side length, so they stay joined to the inside of the tower. 8 mm in this preset.
- Fillet wall: Rounds off the corners of the tower's outer wall. On in this preset.
- Flat ironing: Flattens the spot where the nozzle starts on the tower by running over it in a small square, without pushing out plastic. It needs Line ironing and Skip points on. Off in this preset.
- Line ironing: After a filament change, the nozzle runs back over the first few millimetres it printed on the tower, without pushing out plastic, to flatten them. It needs Skip points on. On in this preset.
- Ironing speed: How fast the nozzle moves during Flat ironing. 10 mm/s in this preset.
- Side scrape after tool change: After each filament change (Bambu Studio calls it a tool change), the nozzle scrapes diagonally up the side of the tower without printing. That wipes the oozed blob onto the side instead of the top. Off in this preset.
- Side scrape walls: Which pair of opposite tower walls the scrape uses, Left and right or Front and back. Side scrape also keeps the tower full size on every layer so the nozzle can dip beside it. Front and back in this preset.
- Side scrape length: How far in from the side wall the nozzle travels during the scrape. 2 mm in this preset.
- Side scrape lift height: How far below the top of the tower the nozzle dips before scraping. It never dips into the tower's brim or the plate, so low layers without room get no scrape. 1.5 mm in this preset.
- Side scrape speed: How fast the nozzle moves during the scrape. 1400 mm/s in this preset.
- Side scrape wall gap: How far outside the tower's wall the scrape runs. A positive value keeps the nozzle clear of the wall, so it never cuts into the tower. 0.2 mm in this preset.
- Side scrape point spacing: How far apart the scrape spots are along each side wall. Spreading them out stops the scraped-off blobs from piling up in one place. 1 mm in this preset.
- Side scrape along-wall length: The longest distance the nozzle slides along the wall after the scrape, to smear the blob further. On a ribbed tower the straight part of the wall is short, so the slide can be much shorter. 2 mm in this preset.
Purge into objects' infill
After each filament change, the nozzle pushes out plastic until the new colour comes through clean. On the A1 this purge normally happens beside the bed, at the purge wiper, and goes to waste. This setting prints part of it as infill instead, the hidden pattern inside your parts. You waste less plastic and the print can finish sooner. The walls hide the mixed colour. Turn it on for multi-colour prints with opaque walls, and leave it off for see-through or thin-walled parts, where the mix can show through. It only works with the prime tower on.
In this preset: Off.
Purge into this object
This makes the object soak up the plastic pushed out after each filament change, so its colours come out mixed. Use it on an object whose colour doesn't matter, to save filament and time. It only appears in an object's own settings and needs the prime tower.
In this preset: Off.
Purge into objects' support
This uses the support to soak up some of the plastic pushed out after each filament change. Support is the scaffolding printed under overhangs and snapped off afterwards. You throw it away, so mixed colours there don't matter, and it saves filament and time. Leave it on. It only works when the print has support and the prime tower is on.
In this preset: On.
Slicing Mode


- What prints
- The two rings as modelled
Slicing Mode
A 3D model is built from closed surfaces called shells. This setting decides what counts as solid where shells overlap or surround holes. Regular merges overlapping shells into one solid piece. Even-odd leaves empty any area inside an even number of shells, such as the spot where two shells overlap. Close holes fills every hole in the model. Keep Regular for normal models. Use Even-odd for 3DLabPrint airplane models, and Close holes only when you want every hole filled.
In this preset: Regular.
Print sequence
With several objects on the plate, this decides whether they print together or one after another. By layer prints the first layer of every object, then the second layer of each, and so on. By object finishes one object completely before starting the next.
By object suits a plate of short, separate parts. If the print fails late, the parts already finished are safe. The nozzle also crosses between parts once each instead of on every layer, so there are fewer non-printing moves to leave strings. The print head has to pass the finished parts, so Bambu Studio warns you when one is too tall or too close to the others. It offers Auto Arrange to space them out. With several objects, By object also rules out the prime tower, and on the A1 it rules out a timelapse.
In this preset: By layer.
Spiral vase


- Everything inside the outer wall
Spiral vase
Spiral vase prints your model as a single wall on top of a few solid bottom layers. The nozzle climbs in one long spiral and never stops between layers. So there's no seam, the line of marks that normally shows where each layer starts. It also skips the infill and the top.
Use it for simple, open-topped shapes such as vases and lamp shades, where a smooth, unbroken wall matters more than strength. The wall is only one line of plastic thick, so it's fragile. A complex model can't be printed as one continuous line, and parts of it end up hanging in mid-air. Spiral vase doesn't work on an object with more than one filament. Several objects on one plate must print By object, and on the A1 you get no timelapse. When you turn it on, Bambu Studio offers to change the settings it needs. These include Wall loops at 1, Top shell layers at 0, Sparse infill density at 0%, support off and the Instant timelapse. If you say no, Spiral vase stays off.
In this preset: Off. In our test, turning it on took a vase 60 mm tall from about 28 g and 44 minutes to 4.5 g and 31 minutes. Above the three solid bottom layers, the nozzle rose steadily in one unbroken path and finished the rim with one last flat turn.
Smooth Spiral
Smooth Spiral smooths out a small sideways step that plain Spiral vase leaves on sloping walls. On a wall that leans in or out, plain Spiral vase shifts the line sideways a little where each turn starts. In our test on a vase 60 mm tall, that shift was up to 0.07 mm, which can leave a faint seam. Turn it on for vases with sloping sides. Upright walls don't need it. It only shows once Spiral vase is on.
In this preset: Off.
Max XY Smoothing
Max XY Smoothing limits how far Smooth Spiral may shift the line sideways to smooth the spiral. You can set it in mm or as a percentage of the nozzle size. A bigger value can smooth walls whose shape changes more between turns, but lets the wall stray further from your model. It only shows once Smooth Spiral is on.
In this preset: 200%, which is 0.8 mm on a 0.4 mm nozzle.
Timelapse
A timelapse is a video made from one photo per layer. This setting picks how the photos are taken. Instant moves the print head and bed to a fixed spot for each photo, then carries on. Smooth sends the head to the purge area beside the bed. Plastic oozes out while it waits there, so it then wipes the nozzle on the prime tower.
Instant doesn't add a prime tower, so ooze can leave small marks. Bambu Studio hides them by taking each photo right before it prints the infill, the hidden pattern inside. Where a layer has no infill, it warns you and suggests Smooth, which adds a prime tower all the way up. To record, tick Timelapse in the window you send the print from. It starts unticked on the A1, and the printer needs a memory card.
In this preset: Instant.
Fuzzy Skin
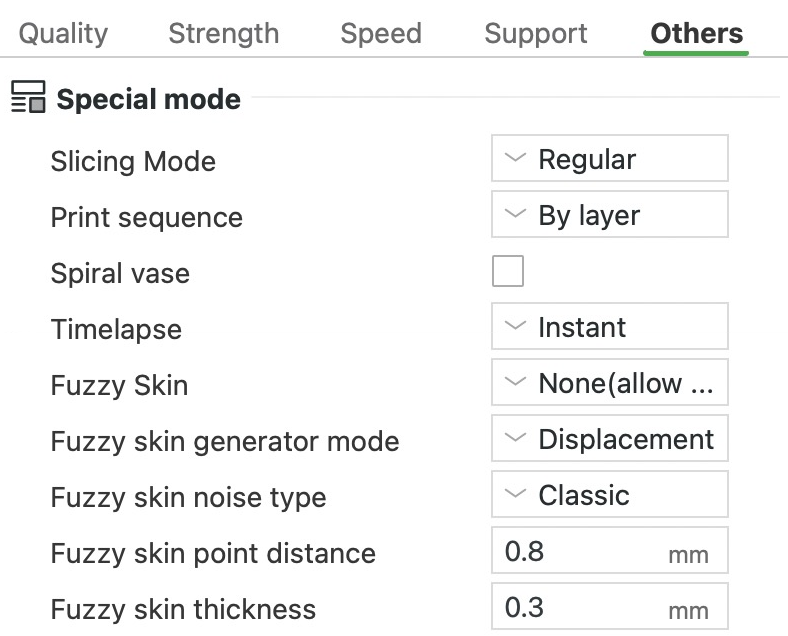


Fuzzy Skin
Fuzzy Skin makes the nozzle wobble randomly in and out as it prints the walls (the outlines of each layer). That gives the sides a rough, grainy texture, which looks good on decorative parts, adds grip and hides layer lines. This setting picks which walls get it. None(allow paint) only roughens areas you paint with the Fuzzy skin Painting tool. Contour does the outside walls, Contour and hole adds the walls of holes, and All walls does every wall. Disabled turns it off, painted areas too, and hides its settings.
Keep it off holes and faces that must fit other parts, because the wobble moves the wall off its true line. In our test on a 50 mm tube, Contour and hole pushed the 24 mm hole's wall up to 0.3 mm inwards. It also adds time. The tube took about 29 minutes plain, 34 with Contour and 37 with Contour and hole.
In this preset: None(allow paint), so nothing gets roughened until you paint it.
Fuzzy skin generator mode
This picks how the texture is made. Displacement pushes the nozzle sideways off its path for a strong 3D texture, but it can leave small gaps in the wall. Extrusion keeps the path straight and varies how much plastic comes out. Combined does both, so it looks like Displacement but fills those gaps. Extrusion and Combined need the Arachne wall generator (Quality tab) and a Fuzzy skin thickness no bigger than the line width. With the Classic generator, Bambu Studio offers to switch to Arachne or go back to Displacement.
In this preset: Displacement.
Fuzzy skin noise type
This picks the pattern of the texture. Classic is plain random grain. Perlin is smoother and more even, and Billow is like Perlin but clumpier. Ridged Multifractal makes sharp, jagged ridges a bit like marble. Voronoi splits the surface into cells and moves each one in or out by a random amount, for a patchwork look.
Voronoi moves the wall much further than Classic. In our test on the 50 mm tube at the preset thickness, it reached about 0.9 mm out instead of 0.3 mm. That leaves stretches of wall hanging past the layer below, which Bambu Studio prints slowly as overhangs. The print went from about 34 to 49 minutes.
In this preset: Classic.
Fuzzy skin point distance
The wobble comes from random points added along the wall, each nudged in or out. This is the average distance between those points. A smaller distance gives a finer grain, but the printer has many more tiny moves to make, so the print takes longer. In our test, 0.3 mm gave the tube's outer wall about 2.6 times as many moves. The print went from about 34 to 42 minutes.
In this preset: 0.8 mm.
Fuzzy skin thickness
The thickness is how far the wobble can push the wall, so it sets how deep the texture is. With Classic noise, the wall moves up to this distance either side of its normal line. Keep it below the outer wall's line width. Beyond that, parts of the wall stick out past the layer below with nothing under them, so they have to print slowly. In our test, 0.6 mm took the tube from about 34 to 39 minutes.
In this preset: 0.3 mm, with an outer wall line width of 0.42 mm.
Apply fuzzy skin to first layer
This decides whether the first layer, the one touching the plate, gets the texture too. Left off, the bottom edge keeps a smooth outline, as on our test tube. Turn it on only if you want the texture to reach the plate and the part sticks well.
In this preset: Off.
More fuzzy skin settings
- Fuzzy skin feature size: How big the bumps or cells in the pattern are. It shows for every noise type except Classic. 1 mm in this preset.
- Fuzzy skin noise octaves: How many levels of detail the pattern has. More add finer detail but make slicing slower. It shows for Perlin, Billow and Ridged Multifractal. 4 in this preset.
- Fuzzy skin noise persistence: How strongly the finer levels of detail show. Lower values make the texture smoother. It shows for Perlin and Billow. 0.5 in this preset.
Use beam interlocking
Where two filaments touch inside an object, this builds small interlocking beams across the join so the two sides bond better. It helps most when they're different materials. Beams only go between two parts that both have this setting on. While it's on, the beam settings appear and Interlocking depth of a segmented region is hidden.
In this preset: Off.
More Advanced settings
In Bambu Studio 2.9.1, the three filament settings that used to close this group moved to the Strength tab, under Advanced. They let a part's walls print in a different filament from its infill. On a one-nozzle printer like the A1, that adds a filament change and its purge to every layer that has both.
- Enable clumping detection by probing: Checks for a clump of plastic stuck around the nozzle and pauses the print if it finds one. It needs a prime tower, so even one-colour prints get one about 20 layers tall. It only shows on the H2 series and the P2S. Off in this preset.
- Interlocking depth of a segmented region: This is for areas painted with the Color Painting tool. On every other layer the painted colour only goes this deep, so the two colours interlock. It's hidden while Use beam interlocking is on. 0 (off) in this preset.
- Interlocking beam width: How wide each beam is. 0.8 mm in this preset.
- Interlocking direction: The angle the beams run at. 22.5° in this preset.
- Interlocking beam layers: How many layers tall each beam is. Fewer layers give a stronger bond but print with flaws more easily. 2 in this preset.
- Interlocking depth: How far the beams reach from the line where the two filaments meet, counted in cells (the repeating blocks of the beam pattern). Too few cells give a weak bond. 2 in this preset.
- Interlocking boundary avoidance: How far in from the model's outside surface the beams stop, counted in cells. 2 in this preset.
- Sparse infill filament: Moved to Strength, Advanced. Picks the filament for the sparse infill, the open pattern inside the part. Default (the object's own filament) in this preset.
- Solid infill filament: Moved to Strength, Advanced. Picks the filament for the solid infill, the fully filled layers inside the part. Default in this preset.
- Walls filament: Moved to Strength, Advanced. Picks the filament for the walls. Default in this preset.
Reduce infill retraction
When the nozzle moves without printing, it normally pulls the filament back a little first, so it doesn't ooze and leave strings. That's called retraction. This setting lets the printer skip it for moves inside the infill, the hidden pattern inside your part. Strings there stay out of sight, so skipping saves time. Auto skips it for plastics that don't stick much to the nozzle's metal, such as PLA. It keeps retracting for stickier ones like PETG, which would leave ooze marks. Enabled always skips it and Disabled always retracts. Leave it on Auto.
In this preset: Auto.
Exclude objects
This adds EXCLUDE OBJECT commands to the G-code (the list of moves the printer follows), which Klipper printers use to cancel one object mid-print. It only shows for Klipper printers.
In this preset: Hidden, as the A1 doesn't run Klipper.
Post-processing scripts
This passes the G-code file (the list of moves the printer follows) through your own scripts, which can edit it. List each script's full path, separated by semicolons. Each one gets the G-code file's path as its first argument and can read the setting values. Only use scripts you trust, since they change what your printer receives.
In this preset: Empty.
Notes
Your own notes about this preset go here. Write down why you changed a setting, so you remember next time.
In this preset: Empty.
How do you check a print before you send it?
Slicing turns your model and settings into the printer's moves, so you can check them on screen before any plastic is used.
Slice plate

The Slice plate button works out the path the nozzle will follow and opens the preview. It shows how much filament the plate needs and how long it will take. The slider on the right steps through the layers, and the one along the bottom follows the nozzle through a layer. Use them to check the walls, the supports and the flat roofs over holes before you print.

In the preview's legend, set Color Scheme to Line Type. It then lists each kind of line, such as the outer wall or the infill, with the time it takes. The longest times show where a faster speed would save the most.
In this preset: our 50 x 50 x 25 mm test block uses 20.63 g of filament, with a Total time of about 34 minutes. Model printing time, spent on the block itself, is 28 minutes. The other 6 minutes or so are Prepare time, the printer's start-up routine.
Which Bambu Studio settings matter most?
Settings by goal
- The surface: Start with Layer height, then Seam position and Top surface pattern. Slopes and curves are built from flat layers, so they show small steps as tall as each layer. Thinner layers make the steps smaller and the surface smoother, but the print takes longer. Each outline starts and ends at one spot, which leaves a small mark called the seam, and Seam position decides where those marks go. Top surface pattern decides how the lines on a flat top are laid out.
- Strength: Wall loops, Sparse infill density and the top and bottom shells. Walls are the outlines printed round the edge of each layer, and Wall loops sets how many there are. Sparse infill is the open pattern inside, and its density is how much of the inside it fills. The shells are the solid layers that close the top and bottom. For a part that has to take weight or force, Bambu Lab suggests five walls and about 25% infill. For most other parts, the A1 preset's two walls and 15% are enough.
- Overhangs: Enable support, which is off in the A1 preset, then Type, Style and Threshold angle. An overhang is any part of the model that sticks out past the layer below, with nothing underneath. Each layer can only reach a little way out over thin air. An overhang that sticks out too far can sag or lose its shape unless support holds it up. Threshold angle decides how flat an overhang has to be before it gets support. Type and Style decide what kind of support you get. Normal support fills the space under the overhang, and tree support holds it up on branches.
- Time: Ironing Type, Sparse infill density and Layer height. Of the settings we compared, these three changed the print time the most. In our tests, their slowest values made a part take 2.5 to 4.5 times as long as their fastest.
- Material: Sparse infill density, the supports, Sparse infill pattern and Wall loops. Infill and walls stay in the finished part, while support is plastic you print only to throw away. The pattern changes how much plastic goes in, even at the same density. Honeycomb lays about 25% more infill than Grid, and Lightning, which only holds up the top surface, lays far less.
What costs the most time
Ironing runs the hot nozzle back over each flat top with only a trickle of plastic, to smooth it. That second pass is slow, 30 mm/s in the preset with passes 0.15 mm apart, while the top itself prints at 200 mm/s. In Ironing Type, Top surfaces irons the tops. All solid layer also irons the bottom and the solid layers inside the part.
In our test, a 60 x 50 x 15 mm stepped block took about 21 minutes without ironing. Top surfaces raised that to about 31 minutes, and All solid layer to about 1 hour 34 minutes. Turn ironing on only when a flat top has to look smooth. Bambu Lab says All solid layer is rarely used because it doesn't always give a good finish, and it costs the most time.
Sparse infill density is how much of the inside of the part gets filled. More infill means more lines to print, so time and plastic go up together. In our test, a 50 x 50 x 25 mm block took 21 minutes and 9.71 g at 0%. At the preset's 15% it took 28 minutes and 20.63 g, and at 80% about 1 hour 9 minutes and 64.29 g. On a large part, stay under 50%. Plastic shrinks as it cools, and denser infill shrinks more, which can pull the corners up off the plate.
Layer height decides how many layers the part is sliced into. Each layer is another full round of walls and infill, so thinner layers mean more rounds and a longer print. In our test, a 50 mm dome took 323 layers and about 45 minutes at 0.08 mm. At the preset's 0.20 mm it took 130 layers and 20 minutes, and at 0.28 mm 93 layers and about 18 minutes. Thin layers are worth it on gentle slopes and curves that people will see. Bambu Studio's Variable layer height tool can use thin layers only where the model needs them.
Why a small part saves less time
Each layer needs a few seconds to cool and firm up before the next one goes on top, or it can sag and lose its shape. So every filament preset sets a minimum time per layer, called Layer time, in the Max fan speed threshold row of its Cooling tab. Bambu Studio slows down any layer that would print faster than that. On Bambu PLA Basic for the A1, Layer time is 6 s, and the slowdown never goes below 20 mm/s, its Min print speed.
A small part's layers can finish in under 6 seconds, so Bambu Studio slows them down. A change that should save time can then save less than you'd expect. In our test, Lightning infill cut a 50 x 50 x 25 mm block from 20.63 g to 11.83 g but saved only about 4 minutes. With so little infill, 109 of its 125 layers were slowed, and the outer wall dropped from its set 200 mm/s to about 103 mm/s. With the preset's Grid infill, no layer above the first was slowed. On a bigger part, each layer takes longer than 6 seconds anyway, so more of the saving shows in the print time.
How do you fix common print problems in Bambu Studio?
Find the problem below that looks like your print and work through its fixes from the top. The first fixes are usually checks on the printer, such as the plate, the filament or the nozzle. Process settings come after those. Change one thing between test prints, so you can tell which change helped.
The first layer will not stick
Watch the first layer while it prints. Everything else is built on it, so if it fails, the rest of the print is likely to fail too. Round, thin lines with gaps between them mean the nozzle is too high. Lines squashed into ridges or waves, with the nozzle dragging through them, mean it's too low. A good first layer is smooth and even, its lines slightly flattened and overlapping a little, with no gaps or ridges.
- Wash the plate with warm water and plain dish soap, without added oils or moisturisers. Scrub with a sponge or a plastic brush, rinse, dry it with a paper towel, and from then on hold it by its edges. Oil from your fingers is a common cause of poor adhesion, because plastic won't grip it. Bambu says washing, plus the right plate and settings, solves most adhesion problems. Skip alcohol, which can spread the oil around a textured plate, and acetone, which can damage textured PEI.
- Choose the plate in Bambu Studio that's on the printer, because the bed temperature depends on it. With PLA Basic, the A1 heats the Textured PEI Plate to 65 °C but the Cool Plate to only 35 °C. PLA needs 55 to 65 °C on textured PEI. The A1 also lowers the nozzle 0.02 mm for the Textured PEI Plate. When it measures that plate, the nozzle rests on the tops of the texture. With another plate chosen, the first layer prints 0.02 mm too high.
- Keep Auto Bed Leveling on when you send a print, especially after changing or replacing the plate, since old levelling data may not match it. If the first layer is uneven, clean the nozzle tip and run Auto Bed Leveling from the Calibration menu on the printer's screen. The A1 levels by touching the plate with the nozzle, so plastic on the tip throws the measurement off.
- If the first layer still peels, bulges or comes out wavy after levelling, the heater assembly in the hotend may have worked loose. The nozzle then no longer sits where the printer measured it, so the first layer prints too low. Let the hotend cool below 50 °C and turn the printer off. Then take out the heater assembly and retighten the four small screws on its back with an H1.5 hex key, following Bambu's A1 guide. Refit the nozzle so its buckle locks, and level again.
- Slow the first layer with Initial layer and Initial layer infill, in Speed (speed slider). The A1 preset uses 50 and 105 mm/s; try 30 and 60 mm/s. Slower lines have more time to press into the plate and grip it.
- In the filament's Cooling settings, set Initial layer fan to the first 3 layers at 0% fan speed. The A1 preset turns the fan off for the first layer only. Without the fan, the bottom layers cool and shrink more slowly while they grip the plate.
Corners lift and the print warps
The corners or edges curl up off the plate, often partway through the print. Where the nozzle hits a lifted edge, a horizontal ripple can appear on the side. A slight warp is easy to miss, but it still marks the sides and the top, so it's easily mistaken for a flow problem.
Plastic shrinks as it cools. The edges cool faster than the centre, so they shrink first, and the pull lifts them. Large parts, dense infill and hotter materials such as PETG, ABS, ASA, PC and nylon (PA) warp more. PLA warps less than any of these. The A1 has no enclosure, so a room below 20 °C or a draught makes warping worse.
- Start with the plate. Wash it, run a fresh Auto Bed Leveling and check that the nozzle sits flat with its buckle locked. A part that grips the plate well resists the pull of the shrinking plastic, so do this before you change any setting.
- Keep draughts away. Air from an open window, an air-conditioning vent or a fan cools one side of the print faster, and that side shrinks and lifts first.
- If the material allows, raise the bed temperature in the filament settings, on the line for your plate. A warmer bed holds the part better and slows the cooling of its lower layers. Add 5 to 10 °C, and the full 10 °C in a room below 20 °C, as Bambu suggests. PLA on the Textured PEI Plate has no room left. Bambu's range for it is 55 to 65 °C, and PLA Basic already uses 65 °C, so add a brim instead. Too hot a bed can cause clogs and elephant foot with PLA and PETG. The heat softens the filament in the extruder and keeps the bottom layers soft.
- Add a brim, a flat ring one layer thick around the base. It gives the part more grip on the plate and holds its edges down. The preset's Auto brim decides for each part and can leave it out, as it did on our test ring 50 mm across. Brim width is greyed out while Brim type is Auto. Set Brim type, in Others, Bed adhesion, to Outer brim only (brim type slider). Then set Brim width to 8 to 10 mm instead of the preset's 5 mm (brim width slider). If only sharp corners lift, choose Painted and add brim ears there with the Brim Ears tool, which leaves less brim to clean off.
- Keep the part cooling fan off for the first 3 layers. In the filament's Cooling settings, set Initial layer fan to 3 layers at 0% fan speed. Bambu recommends this for warping, because the bottom layers then cool and shrink more slowly.
- On a large part, switch to Gyroid infill and keep the density low. Straight-line patterns such as Grid, the preset's choice, and Triangles shrink along their lines and pull on the part. Bambu recommends Gyroid to reduce that shrinkage (infill pattern slider). In our test, a 50 x 50 x 25 mm block took about 38 minutes with Gyroid and 28 with Grid. For most parts, Bambu suggests the preset's two walls and 15%. For a strong part, it suggests five wall loops and about 25%. On a large part, keep the infill under 50%, because denser infill shrinks more.
The bottom flares out (elephant foot)
The first layer, and sometimes the next few, comes out wider than the layers above and forms a lip around the base. It's squashed onto the plate and kept soft by the bed's heat while the layers above press down, so it spreads outwards. Larger parts with wider bases show it more. On a display piece a slight lip doesn't matter. On parts that must fit, such as snap fits, rails and shaft holes, it spoils the fit.
- Elephant foot compensation, in Quality, Precision, pulls each edge of the first layer in by the value you set (elephant foot slider). Once the layer spreads, it lines up with the layers above. The A1 preset's 0.075 mm is fine for parts that don't need to be accurate. Above 1 mm, Bambu Studio resets it to 0 and asks you to check other causes, such as a bed that's too hot.
- For parts that must fit, measure your own value. Wash the plate and run Auto Bed Leveling and Flow Dynamics Calibration. Then print a 25 x 25 x 10 mm cube with the compensation at 0 and Brim type set to No-brim. Take it off only once the bed is at room temperature. With calipers that read to 0.01 mm, measure X and Y across the middle of each side, near the top and at the first layer. Touch the lip lightly. The lip sticks out on both sides, so enter half the difference, averaged over X and Y. Measure again on a different type of plate, since each one uses its own bed temperature.
Stringing and oozing
Stringing is fine, cobweb-like hair across the print or between its parts. Oozing is plastic that leaks from the nozzle when it isn't printing, leaving blobs on the model or a build-up on the nozzle. The melted plastic in the hot nozzle is under pressure, so some seeps out whenever the nozzle travels without printing. The usual causes are damp filament, too much plastic or heat at the nozzle, and the retraction settings.
- Dry the filament first. Damp filament pops or crackles as it prints and leaves rough, bubbly or stringy surfaces. The water turns to steam in the hot nozzle and pushes the plastic out in bursts, and retraction settings usually can't stop that. The A1 can't dry filament, so use a filament dryer and keep the spool sealed with desiccant (drying packs). At about 55% room humidity, freshly dried filament can absorb enough water to hurt the print within 2 to 12 hours, depending on the material.
- Cut down travel moves, the moves without printing, because the longer the nozzle travels, the longer it can leak. Place models close together, and turn on Avoid crossing wall, in Quality, Advanced (avoid crossing wall slider). The nozzle then goes round the walls instead of across them, so it doesn't drag strings over the outside. It's off in the A1 preset, and in our test on a ring 50 mm across, the detours added 4 seconds.
- Raise the retraction Length or Retraction Speed a little. Retraction pulls the filament back before a travel move, which relieves the pressure in the nozzle, so less leaks out. It's a printer setting, on the Extruder page, and each filament can override it on its Setting Overrides page. The A1 uses 0.8 mm at 30 mm/s. Keep the length at 2 mm or less. Bambu warns that longer retractions can cause clogs, and pulling back too far can leave gaps where printing restarts.
- If strings remain, lower the nozzle temperature a few degrees at a time, in the filament settings. Cooler plastic is thicker, so less of it drips out.
- Last, check the nozzle. A worn nozzle has a wider opening and lets more plastic out, and so does one bigger than the nozzle chosen in Bambu Studio. Replace a worn nozzle, and choose the printer preset for the nozzle fitted.
A seam line runs up the side
Each wall, an outline of the layer, is printed as a loop, and every loop starts and ends somewhere. Those joins stack up layer after layer into a line up the side, called the seam. A corner hides it well, but a round surface such as a cylinder has nowhere to hide it.
- Choose where the seam goes with Seam position, in Quality, Seam (seam position slider). Aligned, the A1 preset's choice, tucks it into a corner where it can and keeps it in one line up the part. Back puts it at the back, for a clean front. Random starts each layer somewhere new, which breaks up the line but leaves small zits all over. To pick the spot yourself, use the seam painting tool.
- On a round part, a scarf seam usually makes the seam less visible. Each loop starts thin and ramps up to full height over 10 mm, and its end fades out on top of that ramp. The two ends overlap in a slope instead of meeting at a step. Turn on Override filament scarf seam setting, in Quality, Seam, to show Scarf seam type. Choose Contour, or Contour and hole to include holes (scarf seam slider). With Smart scarf seam application on, as in the preset, a loop with a sharp corner keeps a plain seam there, since the corner hides it.
- If the seam still shows, slow the Outer wall speed, in Speed. The nozzle stops and restarts the flow at the seam, and a slower nozzle leaves a smaller mark. Bambu's High Quality A1 presets print it at 60 mm/s, and this preset at 200 mm/s. Keep Order of walls, in Quality, Advanced, at inner/outer, since Bambu notes that outer/inner can make seams more obvious.
- If you switched the Wall generator to Arachne, try Classic. Classic prints each wall as one closed loop with one seam a layer. Arachne can split a wall into separate pieces, each with its own start and end, and Bambu notes that seams are sometimes better with Classic.
- A simple hollow model can print in Spiral vase, in Others, Special mode (spiral vase slider). It prints the model as a single wall. The nozzle climbs in one long spiral and never stops between layers, so only the solid bottom layers have a seam. It also leaves out the infill and the top.
Dots or blobs on the walls
You see small dots, often called zits, scattered over the walls, or a few bigger blobs in places.
- Check Seam position, in Quality, Seam. Random starts each layer's outer loop somewhere new, and each start leaves a small bump. Bambu names it as the most common cause of dots all over the walls. Switch to Aligned or Back.
- Dry the filament, even from a new spool. Water in it boils off as it leaves the nozzle, leaving small gaps and flaws in the lines that look much the same.
- Blobs elsewhere can be plastic that leaked during travel. Place models closer together, and turn on Avoid crossing wall, in Quality, Advanced, so the nozzle goes round the walls instead of across them.
- Bulging corners can mean the pressure advance value is off. This value controls how much the printer eases off the filament as the nozzle slows into a corner. If it's too low, plastic piles up there. Run Flow Dynamics Calibration from Bambu Studio's Calibration tab.
- Blobs and zits all over, with layers that look too thick, point to too much flow, the amount of plastic pushed out. Clean the nozzle and the extruder, then run Flow Rate Calibration from the Calibration tab. Bambu's own filaments come tuned, so this mostly applies to other brands.
Gaps between lines (under-extrusion)
Lines come out thin, with gaps between them, across the whole print or in one area. The printer is laying down less plastic than the slice asks for. Something is holding the filament back, the nozzle can't melt it fast enough, or the flow is set too low.
- Clear the path from the spool to the nozzle. The spool should turn freely without tangles, and the PTFE tube that guides the filament should have no kinks, wear or debris. The extruder gears that grip the filament mustn't be jammed. A few cold pulls usually clear a partial clog. You pull the filament out of a half-cooled nozzle, and the dirt comes out with it. Fibre-filled filaments such as PAHT-CF leave particles that build up in the nozzle. A nozzle that stays blocked needs replacing.
- If the path is clear, the nozzle may not melt plastic as fast as the print needs. Raise the nozzle temperature a little, since hotter plastic melts faster, or slow the print. For a third-party filament, Bambu suggests the Generic profile and a lower print speed. Max volumetric speed, in the filament settings, caps how much plastic the nozzle melts each second, 21 mm³/s for PLA Basic. Bambu Studio slows any line that would need more, so raising it lets the printer try to push out more than it can melt.
- If the path is clean and the whole surface is short of plastic, the Flow ratio, in the filament settings, may be too low. It scales the plastic in every line. Bambu tunes it for its own filaments, 0.98 for PLA Basic, so leave that alone rather than guessing. For other filaments, set it with Flow Rate Calibration.
- Gaps only at corners usually mean the pressure advance value is off. This value tells the printer how much to push or ease off as the nozzle speeds up and slows down, keeping the flow even. Flow Dynamics Calibration measures it. Run it from the Calibration tab, or turn it on when you send a print. Run it again after changing filament brand or type, the nozzle, or the filament's Max volumetric speed or temperature, and when the filament is damp. If you type in a K value (the pressure advance number) by hand, check the decimal point. Most filaments need 0.02 to 0.04, and Bambu calls typing 0.25 instead of 0.025 a common mistake. It leaves lines that don't touch.
Gaps or ridges on the top surface
Even gaps between the top lines usually mean slightly too little flow, the amount of plastic pushed out. Uneven gaps can mean the file was sliced for the wrong nozzle, such as 0.6 mm when the printer has 0.4 mm. Lines piled into ridges, with the nozzle grinding over them, usually mean too much flow, or again the wrong nozzle.
- Check that the nozzle chosen in Bambu Studio is the one on the printer. Bambu Studio plans every line's width and plastic for that nozzle.
- Clean the nozzle and the extruder before you calibrate, because a partial clog gives a wrong value. Then run Flow Rate Calibration from the Calibration tab. The printer prints small blocks at different flow ratios, and you pick the one with the smoothest top. Bambu's own filaments usually don't need this. Bambu recommends flow ratios of 0.95 to 1.05. A result above that may mean a partial clog, so clean the extruder and the hotend and calibrate again.
- Top shell layers and Top shell thickness, in Strength, Top/bottom shells, set how many solid layers close the top (top shells slider). The A1 preset uses 5 layers and at least 1 mm. The first of these bridges the gaps in the infill, and each layer above gets a flatter base. If gaps remain, add a layer or two, especially over sparse infill with big open cells.
- For a smoother flat top, set Ironing Type, in Quality, Ironing (ironing slider). After the top is printed, the nozzle passes over it again at the same height with a trickle of plastic. This smooths the top lines and fills the gaps between them. It works only on flat tops and costs time. In our test on a stepped block, Top surfaces added about 11 minutes, and Topmost surface, which irons only the highest top, about 5. The slow, low-flow pass can clog the hotend with PLA, PETG and TPU. The filament moves so slowly that heat creeps up and softens it before it reaches the nozzle. The rubbing nozzle can also knock a poorly stuck part off the plate.
Overhangs droop or curl
The underside of a slope or a ledge comes out rough, its lines sag or curl, and at worst the plastic drops. Each layer of an overhang sticks out past the one below, so part of every line has nothing under it. If the plastic doesn't cool in time to hold its place, it droops.
- Supports are off in the A1 preset, so turn on Enable support, in Support. Threshold angle, 30° by default, decides which surfaces get support. Undersides that slope less than 30° from the plate get it, and steeper ones usually print fine without. If faces between 30° and 45° sag, raise it to 45° (threshold angle slider). Support costs plastic and time, and you have to remove it afterwards.
- Keep Order of walls at inner/outer, the default (wall order slider). The inner wall then prints first, and the outer wall leans on it instead of hanging in the air.
- Without support, Slow down for overhangs, in Speed, slows walls down the further they hang out, so each line has time to cool (overhang walls slider). It's on in the A1 preset. Its Overhang speed boxes run from 50 mm/s, for a wall with a quarter of its line over air, down to 10 mm/s at three quarters. If overhangs still droop, lower those speeds. Bambu's finer A1 presets, 0.16 mm and below, use 30 mm/s where this one uses 50, and 10 where it uses 30.
- If overhangs stay poor, set the part cooling fan to 100% in Bambu Studio's Device tab during a print and check that it spins. Overhangs rely on it to set the fresh plastic.
- Once overhangs print slowly, a lower nozzle temperature helps too, because cooler plastic sets sooner. For PLA Basic, try about 205 °C instead of the A1 preset's 220 °C. The whole print runs at that temperature, so slow the rest down to match, or the nozzle may not melt enough plastic.
- A lower layer height also helps, because a thinner layer sticks out less past the one below. It makes the print take longer.
Bridges sag
A bridge is a line printed across open air between two supported points. When it fails, the underside looks rough, neighbouring lines don't touch, and the span hangs down. Nothing presses a bridge line flat, so it stays round, no thicker than the nozzle, and it can end up narrower than the spacing between lines. Gravity then pulls it down. Past a certain length a bridge sags whatever you set and needs support.
- First shorten the span. Bridge direction, in Strength, Advanced, sets which way the bridge lines run, and at the preset's 0 Bambu Studio picks it (bridge direction slider). Lines that cross a gap the short way have less distance to hang, so a direction that shortens the span can help. A gap too long for any direction needs support.
- Then test Bridge flow, in Quality, Advanced, which scales the plastic in each bridge line, 1 in the A1 preset (bridge flow slider). If the bridge sags, try a little less, such as 0.9, so each line is lighter. If neighbouring lines don't touch, raise it in small steps until each line swells enough to meet the next. Print a small test with your material and settings, and keep the value with the smoothest underside.
- Then tune the Bridge speed, in Speed, 50 mm/s in the A1 preset. Bambu says a bridge sags when it prints too slowly with too much flow. Raise the speed a little, since a faster nozzle pulls each line tighter across the gap, or lower the flow. If the lines break or pull apart, the speed is too high for the flow, so slow the bridge down or turn on Thick bridges.
- Thick bridges, in Quality, Advanced, prints each bridge line as a full round strand as wide as the nozzle. Bridges get stronger and can span further, but they may look worse underneath. It's off in the A1 preset and only affects bridges seen from below, since Bambu Studio always prints the hidden ones inside a part thick.
Supports are hard to remove
The support won't come away cleanly, breaks off in pieces or leaves bits stuck to the part. Support stops a small gap short of the part, so the two can separate. When the model and the support use the same filament, that gap is a trade-off between easy removal and a clean surface where the support touched.
- Top Z distance, in Support, Advanced, is that gap (support distance slider, at 0, 0.1, 0.2 and 0.3 mm). A larger gap comes away more easily but leaves a rougher underside, and a smaller one does the reverse. With the model's own filament, use about 0.2 mm, the A1 preset's value. At 0 the support bonds to the part like a normal layer, and Bambu warns it will be hard to remove.
- A support filament, such as Bambu Support for PLA under a PLA part, removes the trade-off, because it doesn't bond firmly to the model. Top Z distance can then go to 0. This needs an AMS connected, because the printer has to switch between two filaments. Choose it as the Support/raft interface filament, in Support, Filament for Supports. It then prints only the layers that touch the part, which saves filament changes and time. Match it to the model's material, because a mismatch such as Support for PLA under ABS can clog the extruder or the nozzle.
- The support Style matters too (support style, Coral supports and tree branch sliders). Tree Organic, which the preset's Default style usually gives you, has fewer interface layers (the dense layers touching the part), so it comes off more easily. For normal support, Snug scars the part less. Tree Strong builds bigger, stronger branches, and thicker branches and tips are harder to break off.
- Remove supports soon after the print finishes, ideally within 2 hours, before they soak up moisture from the air and go soft. This matters most with nylon (PA) filaments, which absorb water fast. If they sat too long, dry the whole print, let it cool completely, then take them off.
Thin walls are missing from the slice
In the Preview, a thin wall, a fin or small text is missing, and the print comes out without it. The Wall generator, in Quality, decides how a wall is filled with lines. Classic, the A1 preset's choice, prints every wall line at one width as a closed loop. A part too thin to hold such a loop is left out. In our test on a comb of walls 0.3 to 2 mm thick, Classic left out the 0.3 and 0.4 mm walls on every layer.
- Switch the Wall generator to Arachne (wall generator slider). It makes each line wider or narrower to fit the shape, so thin details still get a line. It can split a wall into separate pieces, though, so go back to Classic if the seam or the surface gets worse.
- If you stay with Classic, turn on Detect thin wall, in Strength, Walls (thin wall slider). Walls too thin for two lines then print as one line, so details such as small text slice. In our test it brought back the 0.3 and 0.4 mm walls. A single line has loose ends instead of forming a closed loop, so it may not print as well. The option is greyed out while Arachne is on.
- A smaller nozzle, such as the A1's 0.2 mm, lays thinner lines, so fine details are more likely to slice.
Holes are too small, or parts do not fit
Screws won't go into printed holes, or pins and shafts are too tight. Before you compensate, rule out the other causes. Plastic shrinks as it cools, and elephant foot narrows the bottom of a hole. Damp filament, a wrong flow dynamics value or the seam can leave bumps inside it. Holes under 1 mm are hard to tune.
- Start with clean, lubricated axes and correctly tensioned belts, because printed sizes depend partly on how accurately the printer moves.
- Then correct for shrinkage with Shrinkage, in the filament settings under Basic information. It scales the part in X and Y to make up for the plastic shrinking as it cools, and its default, 100%, changes nothing. Print a cube, measure it once it has cooled, and enter the measured size divided by the designed size. For example, enter 94% if 100 mm comes out as 94 mm.
- Use X-Y hole compensation and X-Y contour compensation, in Quality, Precision, for the last small corrections (hole compensation slider). Hole compensation moves only the walls of holes. A positive value makes them bigger, and because both sides move, a hole's diameter grows by twice the value. A hole 0.5 mm too small needs 0.25 mm. Contour compensation moves only the outer edges. Calibrate each one for each filament with test holes and parts of known size. Bambu Studio resets any value beyond 2 mm to 0 and points you to scaling instead. Hole compensation works only on holes closed all round; a hole open to the side counts as part of the outer edge.
- Auto circle contour-hole compensation does this automatically for round holes and outer edges up to 50 mm across, as long as they're full circles lying flat. It works only with some Bambu filaments, such as PLA Basic and PETG HF, and turning it on sets both X-Y compensations to 0. Damp filament weakens its effect, so dry the filament first.
Tall prints shake or fall over
A tall, thin part wobbles as it grows, its top turns into a tangle or shifts sideways, or it falls over. Its weight sits high above a small footprint, so a knock from the nozzle during fast moves can tip it. On the A1 the plate moves back and forth for the Y axis, and that can shake a tall part.
- Slow down by height, in Speed, caps the speed and acceleration from the Starting height up (slow down by height slider, on a 170 mm cylinder). It eases them down to your values at the Ending height, and gentler moves shake the part less. Ticking the box alone changes nothing, because the A1 preset's limits, 1000 mm/s and 100000 mm/s², are above anything it prints at. Type in your own values. The slower top makes the print longer.
- Or lower the speeds and accelerations for the whole print on the Speed page. That slows every layer, not only the top.
- A brim helps a tall, thin part stay on the plate by widening its footprint. The preset's Auto brim already gives a taller part on a smaller footprint a wider brim.
- Add supports to steady the model, as Bambu recommends for thin, tall prints, or lay it down or cut it into shorter pieces.
- To slow only the upper part of one model, add a Height range Modifier for that height and lower the speeds there.
The nozzle hits the print
You hear the nozzle knock or scrape as it passes, or you see scratches on the print.
- A warped corner or a curling edge sticks up into the nozzle's path, so fix the warping first.
- Clean off any plastic built up on the nozzle, since a blob there drags across the print, and reprint a little cooler and slower. PETG builds up most, because it sticks to metal more than PLA does, and damp PETG oozes more, so dry it.
- Grid, the A1 preset's infill, and Triangles lay lines that cross within the same layer (infill pattern slider). At each crossing, the second line rides over the first and leaves a bump the nozzle can clip. This usually does little harm. When it does, slow the Sparse infill speed, in Speed. Or switch the Sparse infill pattern, in Strength, to one without crossings, such as Line, Rectilinear, Gyroid or Concentric.
- If the nozzle scrapes the top while it travels, raise Z hop when retract, in the printer settings on the Extruder page. It lifts the nozzle each time it retracts, so it clears the print. The A1 uses 0.4 mm.
Layers shift sideways
The side of the print has a step, and every layer above it is offset. The printer lost track of its position partway through a layer and carried on from the wrong spot.
- On the A1, check that the filament tube and the cables can't catch, and that the toolhead and the plate move freely without catching or grinding. A blocked move makes a motor skip steps, and the printer loses its place.
- The nozzle may be catching on a warped corner, a curled-up edge or plastic stuck to the nozzle. Fix warping first, and use Bambu's stock filament profiles, since custom settings can change the cooling and let edges curl. PETG sticks to the nozzle more than PLA, so dry it to reduce oozing.
- A loose belt can slip and shift a layer, and irregular clicking from the X or Y axis can be a sign of it. The A1 checks its belts with a frequency scan during calibration and shows a message when one needs re-tensioning. Re-tension it as the message says, then run Vibration Compensation from the Calibration menu.
- Moving too fast is another cause, for example switching to Ludicrous on the printer's screen partway through a print. Turn on Auto-recover from step loss, in Bambu Studio's Device tab under Print Options, or on the printer's screen under Setting. When a motor loses steps, the printer moves back to its known start position to find its place, then carries on from where it was.
Prints take too long
Print time depends on how many layers the part has, how much line each layer holds, and how fast each line can go in practice.
- Use the thickest layers the part can take. Fewer layers print faster but leave bigger steps on slopes. In our test, a 50 mm dome took about 45 minutes and 323 layers at 0.08 mm (layer height slider). At the preset's 0.2 mm it took 20 minutes, and at 0.28 mm, about 18 minutes and 93 layers. Keep the layer height between 20% and 70% of the nozzle diameter, 0.08 to 0.28 mm on a 0.4 mm nozzle. If only part of a model needs fine layers, such as a gently sloping top, Bambu Studio's Variable layer height can put them only there.
- Use only the infill and walls the part needs. In our test, a 50 x 50 x 25 mm block took about 28 minutes at the preset's 15% Grid. At 80% it took about 1 hour 9 minutes. Honeycomb at 15% took about 50 minutes, because its zigzags keep changing direction and the printer slows for each turn. Going from two wall loops to five added about 4 minutes (infill density, infill pattern and wall loops sliders). The preset's two walls and 15% suit most parts that need little strength.
- Ironing every top surface adds a slow extra pass, about 11 minutes on our stepped block. Smoothing wall speed along Z(experimental), in Quality, Advanced, also adds time. It evens out the outer wall's speed between layers, and Bambu Studio warns that it lengthens the print.
- On a small part, or one with little infill, the minimum Layer time sets a floor. It's on the Max fan speed threshold line in the filament's Cooling settings, 6 s for PLA Basic on the A1. Bambu Studio slows any layer that would finish sooner, so it can cool before the next one lands on it. In our test at 15% Grid, no layer of the 50 x 50 x 25 mm block was slowed. With Lightning infill, 109 of its 125 layers were. Lightning cut the block from about 20.6 g to 11.8 g, but the time only from about 28 to 24 minutes.
- To print faster, raise the speeds on the Speed page, with the Advanced switch on, rather than using the printer's speed modes. Bambu Studio compares each line with the filament's Max volumetric speed and slows any that would need more plastic per second. The printer's Sport and Ludicrous modes speed everything up after slicing, past that limit. Bambu warns that Ludicrous can cause partial clogs and suggests about 10 °C more nozzle temperature for it. With PLA Basic's 21 mm³/s, the preset's 300 mm/s inner walls and 270 mm/s sparse infill already print at 258 mm/s on 0.2 mm layers. To see the speeds you'll get, slice and set the Preview's Color Scheme to Speed.
How do you print a lamp with these settings?
Opening a lamp's project

Every lamp in our Studio downloads as a Bambu Studio project, ready to print. The project holds the lamp, its plates and its settings. Those settings are Bambu Lab's presets with the lamp's own values set on top. A Gravity, Dune, Coral or Growth project has the lamp on Plate 1 and its LED housing on Plate 2. A Bloom project starts with its shell and LED housing, followed by plates of its blooms. Each download can also include STL files for other slicers. An STL holds only the shape, so you set all the settings yourself.
Before you print, check that the printer, plate type, nozzle and filaments in Bambu Studio match yours. The plate type matters because the filament preset sets its own bed temperature for each type of plate. The wrong temperature can stop the print sticking. Our Studio lists some printers together, such as the P1S and X1, or the H2D, H2S and H2C. So if the project opens set up for a printer other than yours, choose yours first. Then slice the plate and check the estimate and the preview. On an A1 with a 0.4 mm nozzle, a Dune lamp as downloaded takes about 22 hours, plus about an hour for its LED housing.
What the project changes
A switch beside the Process title flips between Global and Objects. Global holds the settings for every object in the project, and Objects holds the values one object sets for itself. In Global, each setting the project changes from the preset has an orange name and an orange arrow beside it. In Objects, only what the lamp carries on its own is orange, with an orange open padlock beside it. Leave these values as they are, because they're the values the lamp prints with. Clicking the arrow or the padlock resets the setting.
Plans and lamp guides
Designing a lamp is free, and so is downloading the Starter lamp. The other lamps download with our plans. Our guides to the Gravity, Dune, Coral, Growth and Bloom lamps show how each one is made.
Frequently asked questions about Bambu Studio settings
What are the best Bambu Studio settings?
Start with Bambu Studio's presets, the ready-made settings for your printer, nozzle and filament. For most prints they're all you need. On an A1 with a 0.4 mm nozzle, the default process preset is 0.20mm Standard. For a filament from another brand, choose the matching Generic preset. It prints more slowly because it's tuned to suit a wide range of filaments. Change a setting only when the part needs it, because most changes trade one thing for another, such as a smoother surface for a longer print. For a part that has to carry weight or take force, Bambu Lab suggests five walls and about 25% infill. In our test, five walls instead of two added 5.2 g and about 4 minutes to a 50 x 50 x 25 mm block. The A1's 0.20mm Strength preset goes further, with six walls and 25% infill.
Which Bambu Studio settings make a print faster?
Thicker layers, less infill and leaving ironing off make the biggest difference. Thicker layers mean fewer layers to print, but each one leaves a bigger step on slopes and curves. In our test, a 50 mm dome took about 18 minutes at 0.28 mm and about 45 minutes at 0.08 mm. Less infill means fewer lines inside the part, but the part is weaker. A 50 x 50 x 25 mm block took 28 minutes at 15% infill and about 1 hour 9 minutes at 80%. Ironing is a slow extra pass that smooths flat tops. With All solid layer, it took a 60 x 50 x 15 mm stepped block from about 21 minutes to about 1 hour 34 minutes. Raising the speeds on the Speed tab only helps up to a point. Each filament preset has a Max volumetric speed, the most plastic the nozzle can melt and push out each second. Bambu Studio slows down any line that would need more. With Bambu PLA Basic's 21 mm³/s, the A1 preset's inner walls are set to 300 mm/s but print at 258 mm/s on 0.2 mm layers.
What layer height should I use with a 0.4 mm nozzle?
Use 0.20 mm for most prints, and stay between 0.08 and 0.28 mm, which is 20% to 70% of the nozzle's width. Bambu Studio warns you if you go outside that range, the A1's limit for a 0.4 mm nozzle, because it may hurt print quality. Slopes and curves are built from flat layers, so they show a small step at every layer, as tall as the layer. Thinner layers make smaller steps and a smoother surface, but the print takes longer. Go thinner for gentle slopes and curved tops that people will see. If only part of the model needs thin layers, use Variable layer height. In our test, a 50 mm dome took about 45 minutes at 0.08 mm, 20 minutes at 0.20 mm and about 18 minutes at 0.28 mm. Thick layers need more plastic each second, and the nozzle needs time to melt it. That's why the A1's 0.28mm Extra Draft preset slows the inner walls and sparse infill to 200 mm/s, where 0.20mm Standard uses 300 and 270 mm/s.
How many walls should a print have?
Walls are the outlines printed round the edge of every layer, and Wall loops sets how many there are. The outer one is the surface you see. Each loop inside it makes the sides thicker and the part stronger, and adds plastic and time. Use two for most parts that don't carry weight or take force, as the A1's 0.20mm Standard preset does. For a part that must carry load, Bambu Lab suggests five, with about 25% infill. In our test, a 50 x 50 x 25 mm block took 28 minutes and 20.63 g with two loops. With five, it took 32 minutes and 25.83 g. Three loops can also make the seam, the small mark where each loop starts and ends, look better.
How much infill does a print need?
Sparse infill is the open pattern that fills the inside of a part, between the walls and the solid top and bottom layers. Its density is how much of that space it fills, from hollow at 0% to solid at 100%. More infill makes a part stronger, but heavier and slower to print. Use 15% for most parts that carry no load, and about 25%, with five walls, for parts that do. On a large part, stay under 50%, because denser infill shrinks more as it cools and can pull the edges up off the plate. If a large part warps, lower the density and switch to Gyroid, which shrinks less than patterns with more straight lines. In our test, a 50 x 50 x 25 mm block took 28 minutes and 20.63 g at 15%. At 80% it took about 1 hour 9 minutes and 64.29 g.
What is the best infill pattern in Bambu Studio?
No pattern is best for every part. Grid, the 0.20mm Standard preset's pattern, is one of the simplest and fastest. Where its lines cross within a layer, they build up small bumps that the nozzle can catch on. If that happens, slow the infill down or switch to a pattern without crossings, such as Gyroid. Gyroid supports the part in every direction, and it shrinks less than patterns with more straight lines. Cubic spreads its strength fairly evenly in all directions, up and down included. Honeycomb adds stiffness and impact resistance, but uses about 25% more plastic than Grid at the same density. Lightning only holds up the top surface, so it suits parts that carry no load. In our test at 15%, a 50 x 50 x 25 mm block weighed 11.83 g with Lightning and 20.63 g with Grid. Ten of the 19 other patterns we tried finished within a minute of Grid's 28 minutes. Gyroid took 38 minutes, and Honeycomb, the slowest, 50 minutes.
What is the difference between Classic and Arachne in Bambu Studio?
Classic and Arachne are the two choices for Wall generator, the setting that decides how the lines of a wall fill its thickness. Classic, the A1 preset's choice, prints every wall line at the same width and fills leftover thin spaces with gap fill. Arachne makes each line wider or narrower to fit the space, so it can print details too thin for Classic, such as small text. Switch to Arachne when thin walls or fine details are missing in the preview. Arachne has downsides too. It can put the seam in a worse spot, leave small pieces of wall hanging in the air, or make the surface uneven. Bambu Lab suggests going back to Classic when that happens. In our test, we printed a 50 mm wall that tapers to a 0.3 mm tip. On every layer except the first, Classic's outer wall stopped 1.2 mm short of the tip, and Arachne's single line 0.16 mm short.
How do I hide the seam in Bambu Studio?
Each wall loop, one outline of a layer, starts and ends at one spot, and that joint leaves a small mark. Layer after layer, the marks line up into a visible seam. Seam position, in the Quality tab, decides where it goes. Aligned, the A1 preset's choice, hides the seam in a corner where the part has one and keeps it mostly in one line. Back puts it on the side of the part that faces the back of the plate. A round part has no corner, so Aligned leaves a line of marks you can see. There, a scarf seam turns the joint into a long, sloped overlap, which in most cases shows less. To use one, turn on Override filament scarf seam setting, also in Quality, and choose a Scarf seam type. Random scatters the seam over the surface, but leaves small bumps all over it.
What is a scarf seam in Bambu Studio?
A scarf seam stretches the joint where a wall loop starts and ends into a long, gentle slope. The two ends overlap gradually instead of meeting at one spot, so in most cases the seam shows less. The loop starts low, 10% of the layer height above the layer below in the preset. It climbs to full height over the scarf length while the flow of plastic builds up. The end of the loop then runs back over that slope while its flow fades out. Use it on round parts and other loops with no corner to hide a seam in. By default, Smart scarf seam application limits the scarf to loops like these. Scarf seams are normally set in each filament's settings, and the A1's Bambu PLA Basic preset leaves them off. To use one anyway, turn on Override filament scarf seam setting in the Process settings and choose a Scarf seam type. In our test on an 80 mm bar, a 10 mm scarf added only 4 seconds to the print.
What does ironing do in Bambu Studio?
Ironing sends the hot nozzle back over a flat top at the same height. It lays only a trickle of plastic, 10% of the normal flow in the preset. The heat softens the top lines and the extra plastic fills the gaps between them, so the top comes out smoother. It only works on flat tops. It can't iron the sides of a part, and on a curved top it can't smooth the steps between layers. Use it where a flat top has to look smooth. It costs time, because the nozzle slowly covers the surface again, at 30 mm/s with passes 0.15 mm apart in the preset. PLA, PETG and TPU soften at low temperatures, so with them the slow pass can let heat creep up the hot end and clog it. In Ironing Type, Top surfaces irons every top, and Topmost surface only the highest one. All solid layer also irons the bottom and the solid layers inside the part. Bambu Lab says it's rarely used because it doesn't always print well, and it adds a lot of time. In our test, a 60 x 50 x 15 mm stepped block took about 21 minutes without ironing. Top surfaces made it about 31 minutes, and All solid layer about 1 hour 34 minutes.
Should I use tree or normal supports in Bambu Studio?
Normal support fills the space straight under an overhang, the part of a model that sticks out with nothing beneath it. Tree support holds the overhang up on branches. Bambu Lab says normal support usually leaves a better surface under a large, flat overhang. On a complex model whose overhangs are small and not flat, tree support is stronger and needs less plastic and time for a similar surface. If you're unsure, choose tree(auto) with Style set to Tree Hybrid. It puts normal support under large flat overhangs and tree branches everywhere else, which makes it a safe choice in general. Among the tree styles, Tree Organic has fewer interface layers, the dense layers that touch the part, so it comes away more easily. Tree Strong builds bigger, stronger branches that use more plastic. In our test, we supported the wide cap of a 60 mm mushroom, a large overhang only 18° from flat. Normal support added 14.41 g and about 24 minutes. Tree Organic added less plastic, 8.43 g, but took longer, about 40 minutes.
What is the difference between a brim and a skirt?
A brim is a flat ring of plastic, one layer thick, printed around the base of a part and joined to it. It gives the part more grip on the plate and holds its edges down, and you remove it after printing. A skirt is a separate loop around the part, 2 mm away from the part or its brim in the A1 preset. The nozzle prints it first, which gets the plastic flowing before the part starts. It doesn't touch the part, so it doesn't help the part stick. When the corners of a PLA part lift, set Brim type to Outer brim only and Brim width to 8 to 10 mm. Brim width is greyed out while Brim type is Auto. A tall, thin part also stays put better with a brim. The A1 preset prints no skirt and sets Brim type to Auto. Auto works out a brim for each part from its shape, its material and the print speed. In our test, Auto gave no brim to a ring 50 mm across and 8 mm tall. A post 10 mm across and 60 mm tall got 20 brim loops reaching 9.3 mm. On that ring, a 5 mm outer brim added 34 seconds and 0.19 g, and one skirt loop added 4 seconds.
What does orange text mean in Bambu Studio?
In the Global settings, a setting's name turns orange when its value differs from the saved preset. That can be a change a downloaded project makes or one you made yourself. A project that sets Wall loops to 3, for example, shows Wall loops in orange, and the Strength tab's name turns orange too. The orange arrow beside a changed setting puts the preset's value back if you click it. In the Objects view, an orange open padlock marks a setting that one object or part sets for itself. That value overrides Global for that object only, and clicking the padlock removes it. Before you print a downloaded project, read the orange names to see what it changes.
Why can't I find a setting in Bambu Studio?
Turn on the Advanced switch at the top right of the Process settings. Many settings only show in Advanced mode, including the whole Speed tab, the line widths, ironing and the wall generator. Some appear only once another setting is on. Smooth Spiral appears after you turn on Spiral vase, and the other ironing settings after you choose an Ironing Type. A few belong to a single object and only show in that object's own settings, in the Objects view. Purge into this object is one of them. Bambu Studio 2.9.1 also moved the filament choices for walls, sparse infill and solid infill to the Advanced group of the Strength tab. Some settings stay hidden on Bambu Lab printers, such as the jerk settings, which Bambu Studio only shows for other printers.
What does On build plate only mean in Bambu Studio?
On build plate only makes support, the temporary structure printed under overhangs, grow only from the build plate. It never starts on the model's own surfaces. Turn it on when support standing on the model would leave marks on a surface that has to look clean. An overhang whose support would have to start on the model then gets none. Check the preview for parts left hanging in the air before you print. The A1 preset leaves it off.
What is Bambu Studio?
Bambu Studio is Bambu Lab's slicer, the program that turns a 3D model into instructions for the printer. It cuts the model into thin layers and works out every move the nozzle makes. It writes those moves as G-code, the list of commands the printer follows. Its settings come in three kinds of preset, for the printer, the filament and the process. The process settings decide how the part itself prints, and they sit on the Quality, Strength, Speed, Support and Others tabs. Before you print, it shows the estimated time and filament, and a preview of every layer and every move.
Is Bambu Studio free?
Yes. Bambu Studio is free and open source, under the GNU Affero General Public License, version 3. Free installers for Windows, macOS and Linux are on its GitHub releases page.
Is Bambu Studio based on PrusaSlicer?
Yes. Bambu Studio is based on PrusaSlicer by Prusa Research, which in turn comes from Slic3r by Alessandro Ranellucci and the RepRap community.
Was this guide helpful?